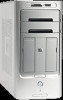
HP Media Center m7200 HP Media Center PC Getting Started Guide
HP Media Center m7200 - Desktop PC Manual
 |
View all HP Media Center m7200 manuals
Add to My Manuals
Save this manual to your list of manuals |
HP Media Center m7200 manual content summary:
- HP Media Center m7200 | HP Media Center PC Getting Started Guide - Page 1
HP Media Center PC Getting Started Guide - HP Media Center m7200 | HP Media Center PC Getting Started Guide - Page 2
applicable to the sale of this product or service to you. HP assumes no responsibility for the use or reliability of its software on equipment 216, 4,819,098, and 4,907,093 licensed for limited viewing uses only. HP supports lawful use of technology and does not endorse or encourage the use of its - HP Media Center m7200 | HP Media Center PC Getting Started Guide - Page 3
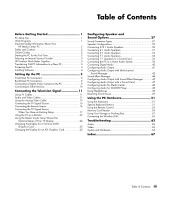
Information About Your HP Media Center PC 2 Safety and Comfort 2 Online Guides 2 Starting the PC for the First Time 2 Selecting an Internet Service Provider 3 HP Products Work Better Together 3 Transferring Old PC Information to a New PC 3 Protecting the PC 4 Installing Software 4 Setting - HP Media Center m7200 | HP Media Center PC Getting Started Guide - Page 4
iv HP Media Center PC User's Guide - HP Media Center m7200 | HP Media Center PC Getting Started Guide - Page 5
PC. 2 Identify the items included with your HP Media Center PC. 3 Follow the setup information that came with your PC to connect your PC. 4 Read this guide for information about using your HP Media Center PC. PC HP provides special utility programs in the PC Help & Tools folder that display support - HP Media Center m7200 | HP Media Center PC Getting Started Guide - Page 6
product name and number. Online manuals are associated with specific PC model numbers. Some models do not have online manuals. Starting the PC for the First Time Read the safety information included with your HP Media Center PC before you turn on the PC. 2 HP Media Center PC Getting Started Guide - HP Media Center m7200 | HP Media Center PC Getting Started Guide - Page 7
-up icon on the desktop. Or ■ Click Start on the taskbar, choose All Programs, choose Online Services, if available, and then click Easy Internet Sign-up. The Easy Internet Sign-up screen appears. Follow the onscreen instructions. HP Products Work Better Together HP computers include preloaded - HP Media Center m7200 | HP Media Center PC Getting Started Guide - Page 8
listed for the new software for compatibility with your PC. Install the new software according to the directions provided by the software manufacturer. Check the manufacturer's documentation or customer service information for help if you need it. 4 HP Media Center PC Getting Started Guide - HP Media Center m7200 | HP Media Center PC Getting Started Guide - Page 9
peripheral devices, such as a digital video camera, can be plugged into the connectors on the back or the front of the PC. Front-Panel PC Connectors Connector Icon/label S-video 2 Composite video 2 L audio 2 Description and function S-video connector to connect your VCR, video camera, or other - HP Media Center m7200 | HP Media Center PC Getting Started Guide - Page 10
Back-Panel PC Connectors n Location, availability, and number of connectors may vary. Connector Icon/label Description and function Power connector Mouse Keyboard SERIAL Serial port 1394) connector for video cameras and other high-speed devices 1394 6 HP Media Center PC Getting Started Guide - HP Media Center m7200 | HP Media Center PC Getting Started Guide - Page 11
or Fast Ethernet (100BaseT) network hub. Connect this adapter in your PC to your local area network (LAN) hub or any broadband connection. Plug connector) OUT IN Center Rear Side S-Video Audio Line Out (powered speakers, green connector) Audio Line In (blue connector) Center/Subwoofer audio (gold - HP Media Center m7200 | HP Media Center PC Getting Started Guide - Page 12
video, or component video (select models only) VGA display output in Digital audio In and Out Digital audio input Digital audio output digital audio out 8 HP Media Center PC Getting Started Guide - HP Media Center m7200 | HP Media Center PC Getting Started Guide - Page 13
use the Video and Audio In connectors on the front of the PC. The following instructions only apply to digital cameras. See the documentation that came with your digital video camera. 1 Turn on the PC, and wait for Windows XP . to start. 2 Connect the video camera transfer cable into the camera - HP Media Center m7200 | HP Media Center PC Getting Started Guide - Page 14
peripheral devices can be connected to the front or back of your HP Media Center PC by using USB or FireWire ports. You can connect peripheral devices such digital assistant) or handheld computer to the PC. See the documentation that came with your device. 10 HP Media Center PC Getting Started Guide - HP Media Center m7200 | HP Media Center PC Getting Started Guide - Page 15
video and audio cables to connect: ■ Video out from the HP Media Center PC to the TV ■ TV signal source video in to the HP Media Center PC ■ Audio out from the HP Media Center PC to the TV ■ TV signal source audio in to the HP Media Center PC n Location and number of connectors may vary by model - HP Media Center m7200 | HP Media Center PC Getting Started Guide - Page 16
. Your HP Media Center PC box may not include all the cables you need for your PC setup, and may vary by model. For example, you may want to use an S-video cable to connect the TV out on the PC to your TV, if your TV has an S-video input connector. 12 HP Media Center PC Getting Started Guide - HP Media Center m7200 | HP Media Center PC Getting Started Guide - Page 17
the analog video cable: 1 Make sure the PC power is disconnected. 2 Connect the analog video cable to the Analog Video Output connector on See (E) above. Go to step 5. B n Refer to the Start Here guide for more information about the various display connection options. A 5 Check the documentation for - HP Media Center m7200 | HP Media Center PC Getting Started Guide - Page 18
the power and turn on the PC. 9 If the resolution is not correct, turn off the PC and disconnect the power. 10 Move the correct switch to the On position on the analog video cable to match the new resolution. 11 Connect the power, and then turn on the PC. 14 HP Media Center PC Getting Started Guide - HP Media Center m7200 | HP Media Center PC Getting Started Guide - Page 19
is provided through the Television Program Guide in Media Center, so both TV sources must have identical Television Program Guides. The HP Media Center PC records television and allows you to control the television channels. The HP Media Center PC has two tuner configurations available: Single - HP Media Center m7200 | HP Media Center PC Getting Started Guide - Page 20
box (C). 3 Plug the remote control sensor cable into a USB connector (D) on the back of the PC. 4 Place the remote sensor so that you can easily point at it with the remote control. (An ideal spot would be on top of the monitor or desk.) P C 21 A B D 16 HP Media Center PC Getting Started Guide - HP Media Center m7200 | HP Media Center PC Getting Started Guide - Page 21
Existing Setup This section describes how to connect the PC to an existing setup for your TV signal source cables to the input of the VCR and the other one to the TV connector on the back of the PC. Existing setup A B C D Add the PC with a splitter A B C G H C C J D E E A Wall C C B Cable - HP Media Center m7200 | HP Media Center PC Getting Started Guide - Page 22
the TV connector on the back of the PC. Be sure to connect the remote control sensor cable (emitter) and position it on your set-top box or satellite box. This allows the PC to change the channel on the box. See "Connecting the Remote Sensor" on page 16. 18 HP Media Center PC Getting Started Guide - HP Media Center m7200 | HP Media Center PC Getting Started Guide - Page 23
D Set-top box/Satellite In E Set-top box/Satellite Out F VCR In G VCR Out H TV In J Splitter In K Splitter Out L TV In on back of PC M Remote control sensor cable N Remote control sensor Connecting the Television Signal 19 - HP Media Center m7200 | HP Media Center PC Getting Started Guide - Page 24
satellite box. Plug the other end of the cable into the S-video In connector on the back of the PC. 3 When using a composite video or S-video cable, you must also plug audio cables (not provided) adapter to the S-video In connector on the back of the PC. 20 HP Media Center PC Getting Started Guide - HP Media Center m7200 | HP Media Center PC Getting Started Guide - Page 25
/Satellite Out E S-video or composite cable F VCR In G VCR Out H TV In J Add an S-video or composite cable with adapter K S-video In on back of PC L Remote control sensor cable M Remote control sensor Connecting the Television Signal 21 - HP Media Center m7200 | HP Media Center PC Getting Started Guide - Page 26
jack, connect an S-video cable (A) (not provided) from the S-video In jack on the TV to the S-video Out jack (B) on the back of the PC (select models only). A B 22 HP Media Center PC Getting Started Guide - HP Media Center m7200 | HP Media Center PC Getting Started Guide - Page 27
jack, connect a composite video cable (A) to the Video In jack on the TV and to the composite video out jack (C) on the back of the PC (select models only). A 5 Turn on the TV and select the TV In video source; refer to the documentation for your TV set. 6 Enable the image - HP Media Center m7200 | HP Media Center PC Getting Started Guide - Page 28
or the ATI Displays tab, depending on your PC model. If you have a GeForce 6600 tab, see "Changing the Display for a GeForce 6600 Graphics Card" on page 25. If you have an ATI Displays tab, see "Changing the Display for an ATI Graphics Card" on page 25. 24 HP Media Center PC Getting Started Guide - HP Media Center m7200 | HP Media Center PC Getting Started Guide - Page 29
. 5 Click Apply, and then click OK. 6 Click OK again to close the window. Changing the Display for an ATI Graphics Card 1 Follow the "Using the Media Center Setup Wizard for Optional Setup of Your TV Display" on page 24. 2 Click the ATI Displays tab. 3 Click the TV button (the small bar above - HP Media Center m7200 | HP Media Center PC Getting Started Guide - Page 30
only for display, and then follow the onscreen instructions. Disconnecting the TV 1 Disable the TV option. See the previous procedure, "Disabling the TV option" on page 26. 2 Turn off the TV and the PC. 3 Remove the video cable from the TV and the PC. 26 HP Media Center PC Getting Started Guide - HP Media Center m7200 | HP Media Center PC Getting Started Guide - Page 31
Configuring Speaker and Sound Options HP Media Center PCs support many different audio options, sound connections, and speaker configurations. You may set up your PC for two stereo speakers or for multichannel audio speaker systems. Connect your speaker system to the PC, and then configure the - HP Media Center m7200 | HP Media Center PC Getting Started Guide - Page 32
) for rear speakers in a multichannel audio configuration. C Line Out (lime-green) for front speakers. OUT D 28 HP Media Center PC Getting Started Guide Mic (pink) connects to microphone. (3: Also functions as center/subwoofer Line Out when a multichannel audio configuration is activated.) - HP Media Center m7200 | HP Media Center PC Getting Started Guide - Page 33
connects to an analog audio device such as a CD player for input into PC. (3: Also functions as rear Line Out when a multichannel audio configuration is ). Speaker Configurations You may set up your HP Media Center PC for the following supported configurations: Name Headphones 2 (stereo) 2.1 - HP Media Center m7200 | HP Media Center PC Getting Started Guide - Page 34
PC (select models only), connect the Audio Line Out connector to the subwoofer. 4 Connect the left and right speakers to the subwoofer. Refer to the speaker documentation. 5 Turn on the PC. 6 Plug in the speaker system power. 7 Turn on the speaker system. 30 HP Media Center PC Getting Started Guide - HP Media Center m7200 | HP Media Center PC Getting Started Guide - Page 35
installation: OUT IN OUT Connecting 4.1 Audio Speakers To connect two front speakers, two rear speakers, and a subwoofer for four-channel (4.1 speaker) output: 1 Turn off the PC. 2 . Connect the front speaker cable to the limegreen Audio Line Out connector that matches the back of your - HP Media Center m7200 | HP Media Center PC Getting Started Guide - Page 36
the rear speaker cable to the black connector that matches the back of your PC. IN 3 6 S OUT 3 6 S ■ For 3-connector systems, the blue audio line in connector functions as a rear line out when a multichannel audio configuration is activated. 32 HP Media Center PC Getting Started Guide - HP Media Center m7200 | HP Media Center PC Getting Started Guide - Page 37
. 8 Plug in the speaker system power. 9 Turn on the speaker system. 10 After the speakers are connected to the PC, configure the audio software for sound output for your PC model: ■ For 3-connector systems, the pink Mic connector functions as a center/subwoofer speaker Line Out when a multichannel - HP Media Center m7200 | HP Media Center PC Getting Started Guide - Page 38
the speaker system power. 10 Turn on the speaker system. 11 After the speakers are connected to the PC, configure the audio software for sound output for your PC model: ■ 6 connectors: See "Configuring Audio Output with Sound Effect Manager" on page 45. 34 HP Media Center PC Getting Started Guide - HP Media Center m7200 | HP Media Center PC Getting Started Guide - Page 39
The following diagram shows a typical 7.1 audio installation: Connecting 7.1 Speakers to a Sound Card If you have a sound card and you want to connect 7.1 speakers, you must purchase Creative Inspire T7700 speakers. Configuring Speaker and Sound Options 35 - HP Media Center m7200 | HP Media Center PC Getting Started Guide - Page 40
system: 3 Y adapter cables ■ 8/7.1 speaker system: 4 Y adapter cables Connecting a home stereo to a PC typically requires audio cables that are long enough to connect from the PC to the stereo. You may also need to purchase RCA or mini-extension cables. 36 HP Media Center PC Getting Started Guide - HP Media Center m7200 | HP Media Center PC Getting Started Guide - Page 41
speakers and plugs into a home stereo standard left and right input. This is only a suggested configuration. Your system may be different. IN OUT A A: PC back-panel connectors (3, 6, or sound card) B B: Y adapter cables C: Receiver/amplifier D: Subwoofer C E: Front speakers (left and right - HP Media Center m7200 | HP Media Center PC Getting Started Guide - Page 42
-panel connectors (3, 6, or sound card) B B: Y adapter cables C: Receiver/amplifier C D: Subwoofer E: Center speaker F: Front speakers (left and right) G: Rear speakers (left and right) D E F G PC to 5.1 multichannel audio system connection 38 HP Media Center PC Getting Started Guide - HP Media Center m7200 | HP Media Center PC Getting Started Guide - Page 43
cable into the lime-green Audio Line Out connector that matches the back of your PC. connector or the center speaker/subwoofer (gold) connector that matches the back of your PC. 3 6 S n Receiver/amplifier input connectors may be labeled Surround, 5.1, or 6 Channel inputs, CD, DVD, or DVD - HP Media Center m7200 | HP Media Center PC Getting Started Guide - Page 44
the PC. 4 Plug in the speaker system power. 5 Turn on the speaker system. 6 After the speakers are connected to the PC, configure the audio software for sound output for your PC model " on page 47. Follow the instructions to enable digital audio output. 40 HP Media Center PC Getting Started Guide - HP Media Center m7200 | HP Media Center PC Getting Started Guide - Page 45
with the following software. Use the software that applies to your PC model: ■ Multi-channel Sound Manager (3 connectors) ■ Sound Effect Manager (6 connectors) ■ Creative Speaker Settings (Sound card) ■ Media Center (all systems) ■ WinDVD Player (all systems) Configuring Speaker and Sound Options - HP Media Center m7200 | HP Media Center PC Getting Started Guide - Page 46
Configuration - Select the number of speakers. An Audio Connector Switch indicates the speaker configuration. ■ Speaker Test - Test all connected speakers for correct configuration. ■ General - View driver and audio information. 42 HP Media Center PC Getting Started Guide - HP Media Center m7200 | HP Media Center PC Getting Started Guide - Page 47
the Speaker Test tab. Follow the instructions. 9 Configure audio output for the Media Center. See "Configuring Audio for Media Center" on page 48. 10 Configure . 3 Connect the digital audio output connector on the back of your PC to your home audio system's digital audio input. 4 Select your stereo - HP Media Center m7200 | HP Media Center PC Getting Started Guide - Page 48
an environment, such as Under Water or Auditorium. To use the equalizer, click the Power button in the center of the circular equalizer control to turn on the equalizer. You can click a preset button "The Sound Effect Manager control screens" on page 45. 44 HP Media Center PC Getting Started Guide - HP Media Center m7200 | HP Media Center PC Getting Started Guide - Page 49
in the center of the circular equalizer control to turn on the Equalizer. You can click a preset button, such as Pop or Live, or manually adjust the settings and then save them for easy selection later. ■ Speaker Configuration - selects the number of speakers, shows the Connection Guide, and had - HP Media Center m7200 | HP Media Center PC Getting Started Guide - Page 50
wizard. 8 Connect the speaker system audio cable plugs into the connectors on the front of your PC. The panel display highlights a cable that is properly inserted in a connector. 9 Close the window microphone too close to the speakers, feedback can occur. 46 HP Media Center PC Getting Started Guide - HP Media Center m7200 | HP Media Center PC Getting Started Guide - Page 51
the speakers. 7 Adjust the speaker volume settings on the PC. Click the Calibrate button. The wizard starts. Follow the wizard basic instructions. 8 Close the window. 9 Configure audio output for the Media Center. See "Configuring Audio for Media Center" on page 48. 10 Configure audio output for the - HP Media Center m7200 | HP Media Center PC Getting Started Guide - Page 52
change the audio properties for WinDVD to match your speaker configuration (if your InterVideo WinDVD program supports more than two channels). If you want to play a stereo DVD, you may change the able to hear the speakers. Click Stop, and then click OK. 48 HP Media Center PC Getting Started Guide - HP Media Center m7200 | HP Media Center PC Getting Started Guide - Page 53
to the Line Out connector (lime-green) on the back of your PC. Using a 2.1 speaker system For select models with the 2.1 speaker system headphones connector is located on the right side of the control tower. If the control tower displays HP (for headphones), the headphones are enabled; the sound to - HP Media Center m7200 | HP Media Center PC Getting Started Guide - Page 54
Use active, powered speakers, or speakers with an amplifier. ■ Some programs may result in low volume, even when the Volume knob is turned to the maximum position. If this is the case, double-click the Volume icon on the taskbar, and increase the volume. 50 HP Media Center PC Getting Started Guide - HP Media Center m7200 | HP Media Center PC Getting Started Guide - Page 55
Internet Description or function Puts PC into or out of power-saving mode. May take 10-30 seconds before screen reappears. Opens the Help and Support Center. Opens your Internet browser. Can open any Web site or software program. hp Club HP Club Links to an HP Web site. Using the PC Hardware 51 - HP Media Center m7200 | HP Media Center PC Getting Started Guide - Page 56
lower optical drive trays. Starts recording to selected media. Stops media. Plays or pauses media. Rewinds media. Fast-forwards media. Volume knob controls speaker volume. Volume buttons Turns through 6 for other buttons. 8 Click OK when you are finished. 52 HP Media Center PC Getting Started Guide - HP Media Center m7200 | HP Media Center PC Getting Started Guide - Page 57
22.5 degrees (45 degrees total) from the center of the remote sensor. Troubleshooting the remote control If your remote doesn't work: problem is probably in the Media Center software. Close Media Center, restart the PC, and then open Media Center again. ■ If the remote control works in Media Center - HP Media Center m7200 | HP Media Center PC Getting Started Guide - Page 58
such as CF Ultra/III, are not compatible with the memory card reader that came with your HP Media Center PC. D A SmartMedia/xD B In-use light (indicates data is being read or written) C slot) Facing up Facing up A (Upper-left slot) A (Upper-left slot) 54 HP Media Center PC Getting Started Guide - HP Media Center m7200 | HP Media Center PC Getting Started Guide - Page 59
the instructions that came with your digital camera. HP recommends formatting your memory card in your digital camera. Or 1 Insert the media into then remove the media. A steady light indicates that the PC is not reading or writing the media. w Do not try to remove media when the inuse light - HP Media Center m7200 | HP Media Center PC Getting Started Guide - Page 60
this media into the slot. Troubleshooting the memory card reader If you are having problems reading PC serviced if a pin is bent to the point of touching another pin. Straighten slightly bent pins with the PC PC for it to recognize the memory card reader. 56 HP Media Center PC Getting Started Guide - HP Media Center m7200 | HP Media Center PC Getting Started Guide - Page 61
allows you to place a device and thread a FireWire (IEEE 1394) data cable and the power cord underneath the rear top cover to the connectors on the back of the PC. Installing an HP Camera Docking Station HP Media Center PCs come with a camera docking bay and two camera docking bay lids. This bay is - HP Media Center m7200 | HP Media Center PC Getting Started Guide - Page 62
shown) into a TV if you want to view the camera images on a TV (optional). ■ Plug the power cord into a power outlet. SERIAL Refer to the instructions that came with the HP camera docking station. IN OUT ETHERNET TV-OUT VID IN LCD R S-VID IN L TV 58 HP Media Center PC Getting Started Guide - HP Media Center m7200 | HP Media Center PC Getting Started Guide - Page 63
6 Place the correct camera docking station lid (D) on top of the PC. Gently guide the edge of the lid into the top of the PC. 7 Place the HP digital camera (E) into the camera docking station. 8 Follow the instructions that came with your camera docking station. Installing an iPod Dock To install - HP Media Center m7200 | HP Media Center PC Getting Started Guide - Page 64
the PC. Pull cable to the center and connect them to the back of the iPod Dock (K). K 4 Connect the USB cable into the back of the PC. Refer to the instructions that came with the iPod. IN OUT SERIAL ETHERNET TV-OUT VID IN LCD R S-VID IN L TV 60 HP Media Center PC Getting Started Guide - HP Media Center m7200 | HP Media Center PC Getting Started Guide - Page 65
5 Place the iPod Dock lid (L) on top of the PC. Gently guide the edge of the lid into the top of the PC. 6 When you want to use it, place the iPod (M) into the docking station. 7 Follow the instructions that came with your iPod. SmartMedia xD / CompaI/cItIFlash / MMC / SD Memory Stick / M L - HP Media Center m7200 | HP Media Center PC Getting Started Guide - Page 66
the fan or in one of the I/O slots on the back of the PC. Connecting the Wireless LAN (Select models only) You can connect the HP Media Center PC to an 802.11b/g wireless network. An external antenna is supplied with your system. You must connect this antenna to connect to the wireless network - HP Media Center m7200 | HP Media Center PC Getting Started Guide - Page 67
drivers by using Application Recovery. See "Application Recovery" in the other documentation that came with your PC. ■ Reconfigure the software for surround sound. n If you need more information about using or troubleshooting Media Center, refer to the Media Center online Help or Help and Support - HP Media Center m7200 | HP Media Center PC Getting Started Guide - Page 68
in this search, and then click the Browse button. i Click the plus sign (+) in order, next to each of the following directories: ■ My Computer ■ C:/ ■ Drivers j Click OK, Next, and then click Finish after the drivers are updated. k Restart the PC. 64 HP Media Center PC Getting Started Guide - HP Media Center m7200 | HP Media Center PC Getting Started Guide - Page 69
't work. See "Troubleshooting the remote control" on Unplug the end of the USB cable on the remote sensor from the PC and plug it into the same USB port. Device Manager. 3 Click a voltage select switch for use in a 115 or 230 power system. The voltage select switch has been preset to the correct - HP Media Center m7200 | HP Media Center PC Getting Started Guide - Page 70
. ■ Make sure the memory card is one of the supported types: CompactFlash (1, 2, and Microdrive), Memory Stick, Memory pins are bent, replace the memory card reader, or have the PC serviced if a pin is touching another pin. To straighten slightly bent pins HP Media Center PC Getting Started Guide - HP Media Center m7200 | HP Media Center PC Getting Started Guide - Page 71
remote control 53 buttons media control or playback 52 On 2 C cables connecting PC to TV 22 included video camera connecting to PC 9, 36 recording videos 9, 36 troubleshooting 9 documentation online guides 2 drives memory card connecting to the PC 36 home videos 9, 36 HP updates from 2 Index 67 - HP Media Center m7200 | HP Media Center PC Getting Started Guide - Page 72
service provider 3 K keyboard connector 6 keys 51 using 51 keyboard buttons access 51 configuring 52 media playback 52 not working 63 special 51 L LAN antenna 62 M Media Center opening with remote control 53 memory card reader in-use light 55 troubleshooting HP Media Center PC Getting Started Guide - HP Media Center m7200 | HP Media Center PC Getting Started Guide - Page 73
issues 50 setting up digital speaker output 47 standby mode button 51 stereo connecting to the PC 36 S-video In connector 7 T transfer wizard 3 transferring old PC information to a new PC 3 troubleshooting keyboard buttons not working 63 memory card reader 66 remote control 65 remote sensor 65 sound - HP Media Center m7200 | HP Media Center PC Getting Started Guide - Page 74
Part Number: 5991-2603 70 HP Media Center PC Getting Started Guide
-
 1
1 -
 2
2 -
 3
3 -
 4
4 -
 5
5 -
 6
6 -
 7
7 -
8
-
9
-
10
-
11
-
12
-
13
-
14
-
15
-
16
-
17
-
18
-
19
-
20
-
21
-
22
-
23
-
24
-
25
-
26
-
27
-
28
-
29
-
30
-
31
-
32
-
33
-
34
-
35
-
36
-
37
-
38
-
39
-
40
-
41
-
42
-
43
-
44
-
45
-
46
-
47
-
48
-
49
-
50
-
51
-
52
-
53
-
54
-
55
-
56
-
57
-
58
-
59
-
60
-
61
-
62
-
63
-
64
-
65
-
66
-
67
-
68
-
69
-
70
-
71
-
72
-
73
-
74
 |
 |

HP Media Center PC
Getting Started Guide