Konica Minolta bizhub C550 bizhub C451/C550/C650 Fax Driver Operations User Ma - Page 17
occurs, select Specify the Printer/MFP Except for the Above. IP Address, Host Name, and then - copier
 |
View all Konica Minolta bizhub C550 manuals
Add to My Manuals
Save this manual to your list of manuals |
Page 17 highlights
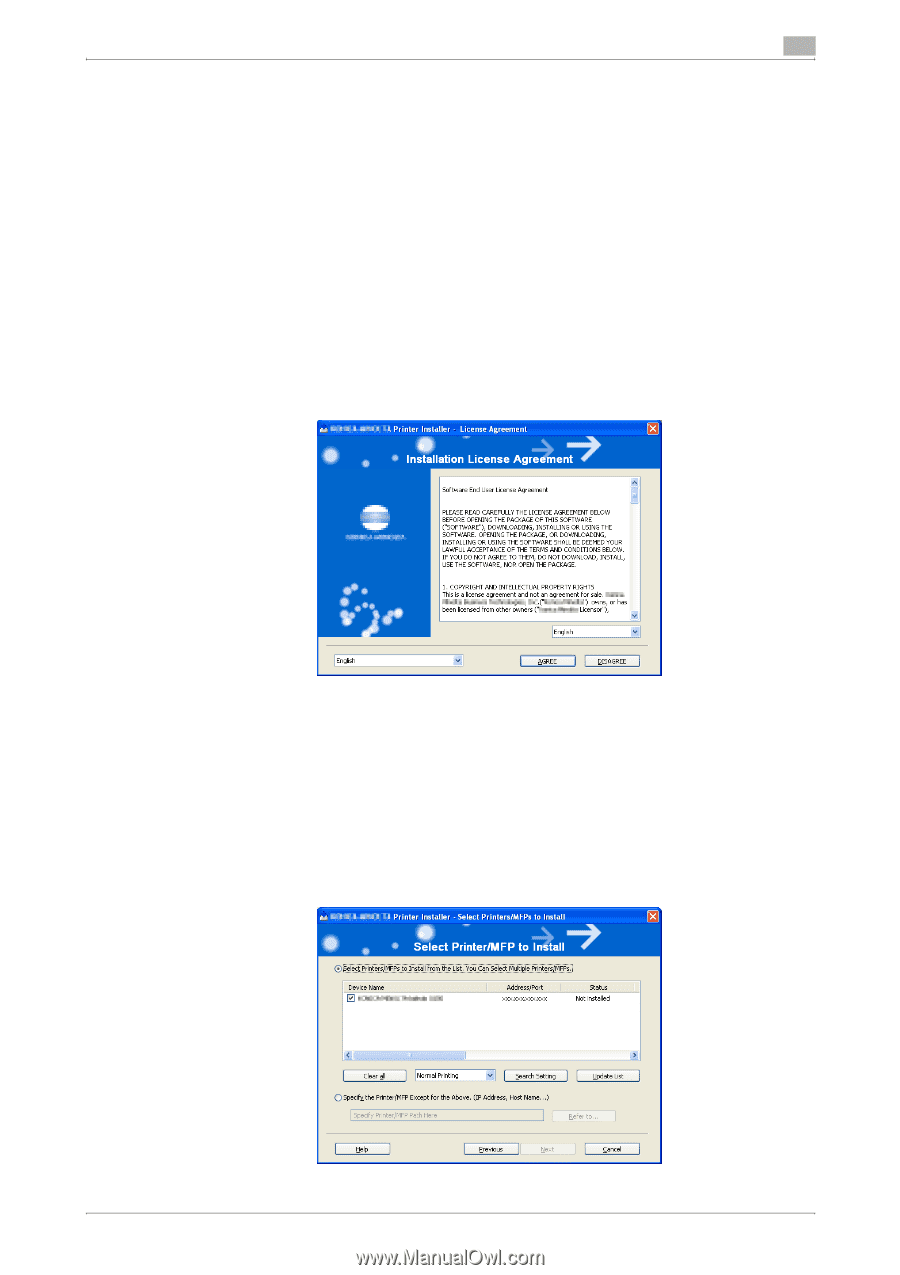
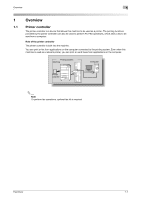
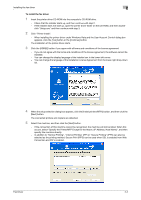
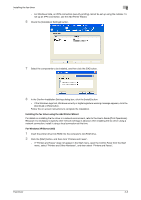
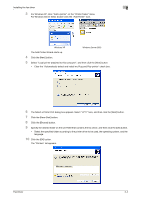
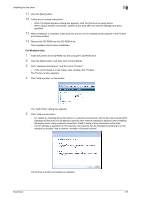
Installing the fax driver 2 To install the fax driver 1 Insert the printer driver CD-ROM into the computer's CD-ROM drive. - Check that the installer starts up, and then continue with step 2. - If the installer does not start up, open the printer driver folder on the CD-ROM, and then double- click "Setup.exe" and then continue with step 3. 2 Click "Printer Install". - When installing the printer driver under Windows Vista and the User Account Control dialog box appears, click the [Yes] button or the [Continue] button. The installation of the printer driver starts. 3 Click the [AGREE] button if you agree with all terms and conditions of the license agreement. - If you do not agree with the terms and conditions of the license agreement, the software cannot be installed. - You can change the display language of the installer box in the lower-left corner. - You can change the language of the Installation License Agreement from the lower-right drop-down list. 4 When the setup selection dialog box appears, click the [Install printers/MFPs] button, and then click the [Next] button. The connected printers and copiers are detected. 5 Select this machine, and then click the [Next] button. - If the connection of this machine cannot be recognized, the machine will not be listed. When this occurs, select "Specify the Printer/MFP Except for the Above. (IP Address, Host Name)", and then specify this machine directly. - In addition to "Normal Printing", "Internet Printing" (IPP) or "Secure Printing" (IPPS) can also be selected as the printing method. Secure Print (IPPS) can be used when SSL is enabled from Web Connection and IPP is enabled. Fax Driver 2-2
-
 1
1 -
2
-
3
-
4
-
5
-
6
-
7
-
8
-
9
-
10
-
11
-
 12
12 -
 13
13 -
 14
14 -
 15
15 -
 16
16 -
 17
17 -
 18
18 -
 19
19 -
 20
20 -
 21
21 -
 22
22 -
23
-
24
-
25
-
26
-
27
-
28
-
29
-
30
-
31
-
32
-
33
-
34
-
35
-
36
-
37
-
38
-
39
-
40
-
41
-
42
-
43
-
44
-
45
-
46
-
47
-
48
-
49
-
50
-
51
-
52
-
53
-
54
-
55
-
56
-
57
-
58
-
59
 |
 |