Konica Minolta bizhub C550 bizhub C451/C550/C650 Fax Driver Operations User Ma - Page 23
Installing the fax driver using Plug and Play, For Windows 2000, For Windows XP/Server 2003 - xp driver
 |
View all Konica Minolta bizhub C550 manuals
Add to My Manuals
Save this manual to your list of manuals |
Page 23 highlights
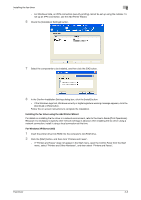
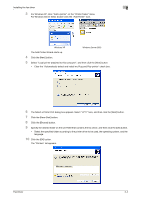
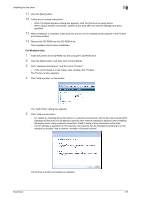
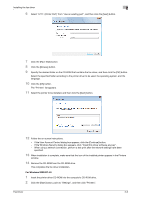
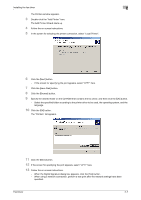
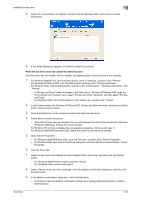
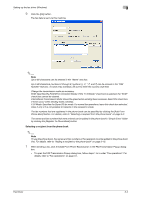
Installing the fax driver 2 14 When installation is complete, make sure that the icon of the installed printer appears in the Printers window. 15 Remove the CD-ROM from the CD-ROM drive. This completes the fax driver installation. Installing the fax driver using Plug and Play For Windows 2000 1 After using a USB cable to connect this machine to a computer, turn on the computer. - Do not disconnect or connect the cable while the computer is starting up. 2 Insert the printer driver CD-ROM into the computer's CD-ROM drive. 3 Turn the main power of this machine on. The Found New Hardware Wizard starts up. 4 Select "Search for a suitable driver for my device (recommended)", and then click the [Next] button. 5 Select "Specify location", and then click the [Next] button. 6 Specify the desired folder on the CD-ROM that contains the fax driver, and then click the [OK] button. - Select the specified folder according to the printer driver to be used, the operating system, and the language. 7 Click the [OK] button, and then follow the on-screen instructions. 8 Click the [Finish] button. 9 When installation is complete, make sure that the icon of the installed printer appears in the Printers window. 10 Remove the CD-ROM from the CD-ROM drive. This completes the fax driver installation. For Windows XP/Server 2003 1 After using a USB cable to connect this machine to a computer, turn the computer on. - Do not disconnect or connect the cable while the computer is starting up. 2 Insert the printer driver CD-ROM into the computer's CD-ROM drive. 3 Turn the main power of this machine on. - If the Add New Hardware Wizard does not start up, turn the main power off, then on again. - When turning the power off, then on again, wait at least 10 seconds before turning the power on again; otherwise, this machine may not function properly. The Found New Hardware Wizard dialog box appears. 4 Select "Install from a list or specific location (Advanced)", and then click the [Next] button. - If the Windows connect to Windows Update dialog box appears, select "NO". 5 From "Search for the best driver in these locations", select "Include this location in the search", and then click the [Browse] button. 6 Specify the desired folder on the CD-ROM that contains the fax driver, and then click the [OK] button. - Select the specified folder according to the printer driver to be used, the operating system, and the language. 7 Click the [Next] button, and then follow the on-screen instructions. - When the Digital Signature dialog box appears, click the [Continue] button. Fax Driver 2-8
-
 1
1 -
2
-
3
-
4
-
5
-
6
-
7
-
8
-
9
-
10
-
11
-
12
-
13
-
14
-
15
-
16
-
17
-
 18
18 -
 19
19 -
 20
20 -
 21
21 -
 22
22 -
 23
23 -
 24
24 -
 25
25 -
 26
26 -
 27
27 -
 28
28 -
29
-
30
-
31
-
32
-
33
-
34
-
35
-
36
-
37
-
38
-
39
-
40
-
41
-
42
-
43
-
44
-
45
-
46
-
47
-
48
-
49
-
50
-
51
-
52
-
53
-
54
-
55
-
56
-
57
-
58
-
59
 |
 |