Konica Minolta bizhub C550 bizhub C451/C550/C650 Fax Driver Operations User Ma - Page 38
Click the [Authentication/Account Track] button.
 |
View all Konica Minolta bizhub C550 manuals
Add to My Manuals
Save this manual to your list of manuals |
Page 38 highlights
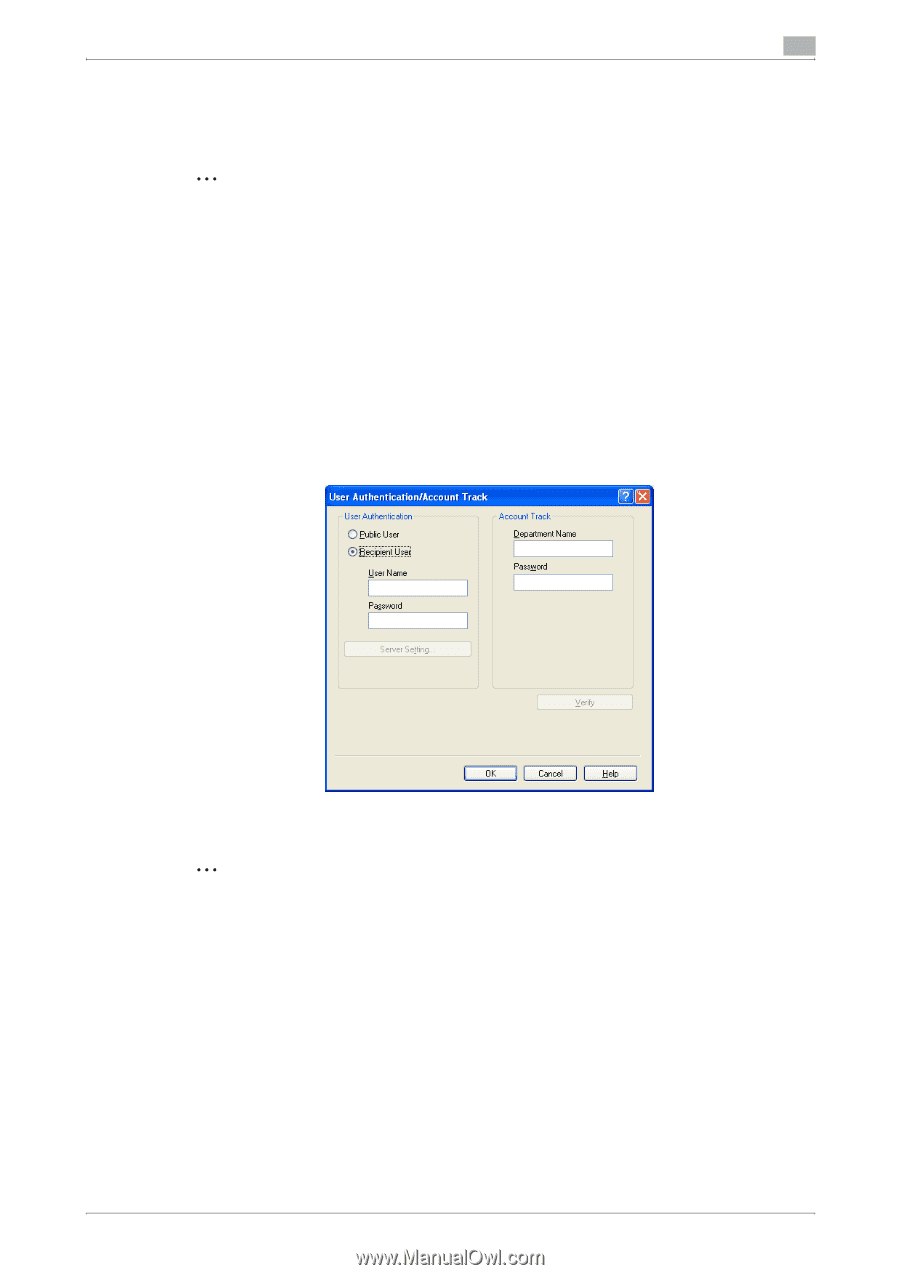
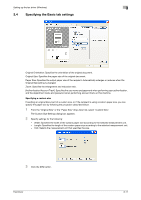
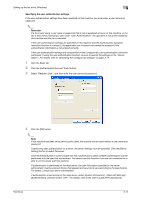
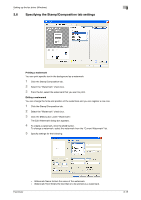
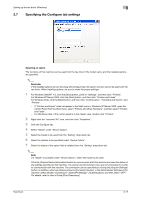
Setting up the fax driver (Windows) 3 Specifying the user authentication settings If the user authentication settings have been specified on this machine, you must enter a user name and password. 2 Reminder If a fax is sent using a user name or password that is not a registered account on this machine, or if a fax is sent without selecting a user under "User Authentication", the operation is not authenticated by this machine and the job is canceled. If the user authentication settings are specified on this machine and the authentication operation restriction function is in mode 2, the applicable user is locked and cannot be accessed if the authentication information is not entered correctly. If the user authentication settings are not specified on the Configure tab, user authentication cannot be performed. If using the user authentication function, be sure to specify the settings on the "Device Option". For details, refer to "Specifying the Configure tab settings" on page 3-17. 1 Click the Basic tab. 2 Click the [Authentication/Account Track] button. 3 Select "Recipient User", and then enter the user name and password. 4 Click the [OK] button. 2 Note If this machine has been set to permit public users, the machine can be used without a user name and password. If performing user authentication on a server, the server settings must be specified. Click the [Server Setting] button to select the server. Click the [Verify] button to communicate with this machine and to check whether authentication can be performed with the user that was entered. You cannot use this function if you are not connected to or able to communicate with this machine. If authentication is performed on the relay server, the user information specified by the server administrator must be entered. Screen that appears and input items vary according to the specification. For details, consult your server administrator. If authentication is performed on the relay server, select [System Connection] - [Open API Settings] [Authentication], and then select "OFF". For details, refer to the User's Guide [Print Operations]. Fax Driver 3-12
-
 1
1 -
2
-
3
-
4
-
5
-
6
-
7
-
8
-
9
-
10
-
11
-
12
-
13
-
14
-
15
-
16
-
17
-
18
-
19
-
20
-
21
-
22
-
23
-
24
-
25
-
26
-
27
-
28
-
29
-
30
-
31
-
32
-
 33
33 -
 34
34 -
 35
35 -
 36
36 -
 37
37 -
 38
38 -
 39
39 -
 40
40 -
 41
41 -
 42
42 -
 43
43 -
44
-
45
-
46
-
47
-
48
-
49
-
50
-
51
-
52
-
53
-
54
-
55
-
56
-
57
-
58
-
59
 |
 |