LG 42CQ610H Setup Guide - Page 12
Express Script Installer Menu Wizard Cont.
 |
View all LG 42CQ610H manuals
Add to My Manuals
Save this manual to your list of manuals |
Page 12 highlights
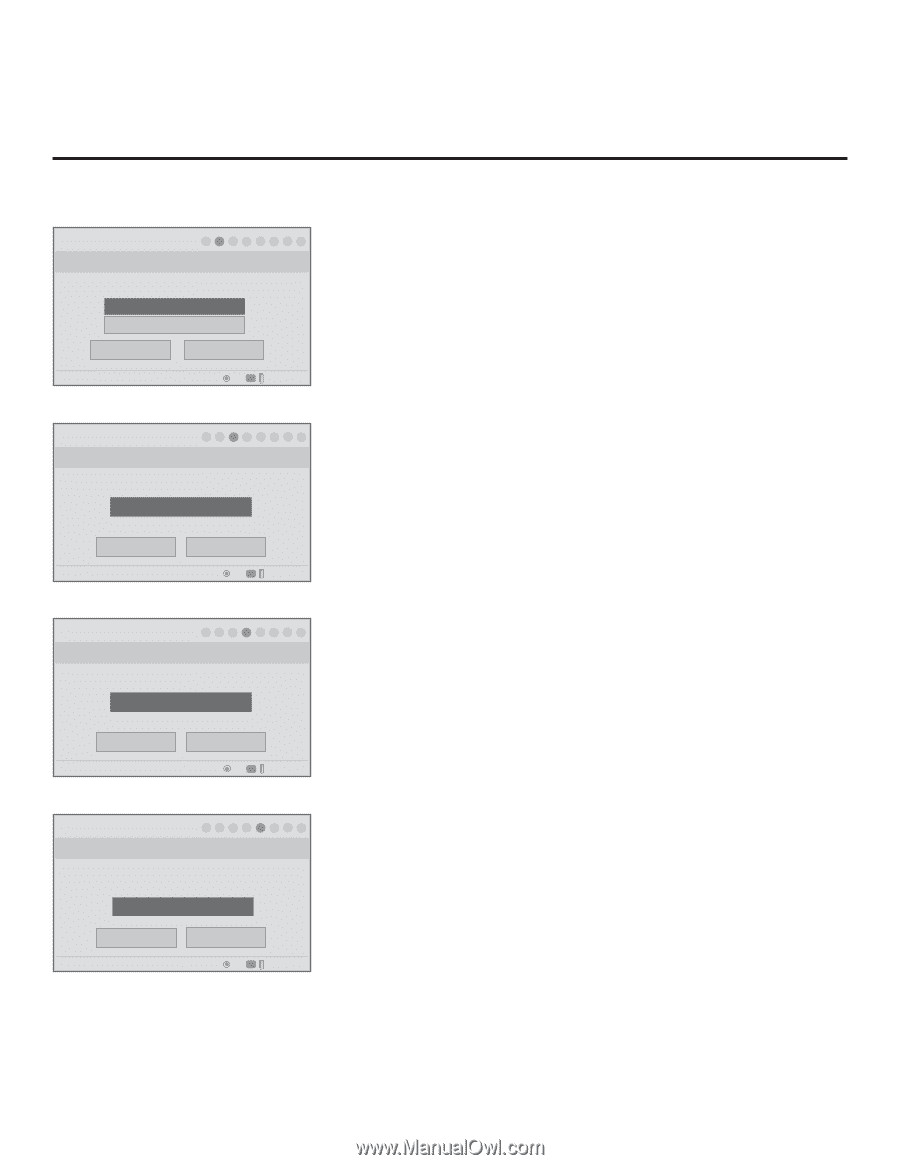
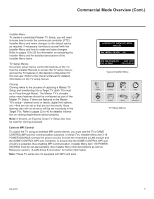
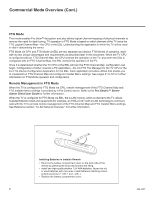
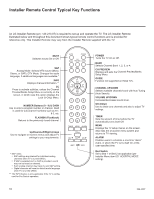
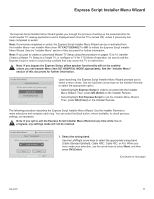
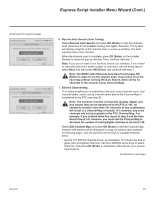
Express Script Installer Menu Wizard (Cont.) (Continued from previous page) Installer Menu Wizard 1 ► 2 ► 3 ► 4 ► 5 ► 6 ► 7 ► 8 Step 2. Aux Input Which inputs will you be using? Customize Inputs. Use default values. Back Next PTC: V1.00.013 CPU: V03.07.00.01 ASIC: D279 OK CC Exit Express Script Installer Menu Wizard 1 ► 2 ► 3 ► 4 ► 5 ► 6 ► 7 ► 8 Step 3. Speaker Selection UWph/iDchospweanke/rLcoenffitg/uRraitgiohn wt oaulrdryoowu likkeetoyusse? F Exit ScPriilplotw OnlyG ► Back PTC: V1.00.013 CPU: V03.07.00.01 ASIC: D279 Next OK CC Exit Express Script 2. Select the Aux inputs. Use the Up/Down arrow keys to select the desired Aux input option(s). (Note: If you simply select Next and press OK (Enter) in this step, default values will be used.) • To customize settings, select Customize Inputs and press OK (Enter). Aux input options are displayed in a pop-up window. Use the arrow keys to select the input(s) to enable or disable. When you are finished, press MENU to close the pop-up window. Then, continue with step 3. • To use default values, select Use default values and press OK (Enter). Then, continue with step 3. 3. Select the speaker configuration. Use the Left/Right arrow keys to select the appropriate speaker (Pillow Only [default], TV Only, or Pillow & TV). When you have made your selection, use the arrow keys to select Next, and then press OK (Enter). ► ► ► Installer Menu Wizard 1 ► 2 ► 3 ► 4 ► 5 ► 6 ► 7 ► 8 Step 4. Pillow Speaker UWph/icDh obrwannd p/Lilloewfts/pReaikgerhcotdae rwrilol ywou bkeeuysisng? F Exit SZcreinpitth codeG ► Back PTC: V1.00.013 CPU: V03.07.00.01 ASIC: D279 Next OK CC Exit Express Script Installer Menu Wizard 1 ► 2 ► 3 ► 4 ► 5 ► 6 ► 7 ► 8 Step 5. Channel Access Do you want to allow direct access to channels not in the channel list? Yes ► Back PTC: V1.00.013 CPU: V03.07.00.01 ASIC: D279 Next OK CC Exit Express Script 4. Select the pillow speaker code. If using the Zenith pillow speaker code (default), you can simply select Next and press OK (Enter). Otherwise, select the pillow speaker code field, and use the Left/Right arrow keys to select the appropriate option. When you have made your selection, use the arrow keys to select Next, and then press OK (Enter). 5. Choose whether to allow access to channels outside the channel lineup. To allow direct access to channels outside the channel lineup (default: Yes), you can simply select Next and press OK (Enter). To limit access to only the channel lineup (after the Express Script is complete) and restrict access to the TV setup menus, select the channel access field, and use the Left/Right arrow keys to select "No." When you have made your selection, use the arrow keys to select Next, and then press OK (Enter). Note: It is recommended that you select "No" to limit access to the channel lineup and prevent end users from accessing channel settings; i.e., the Channel Menu will be inaccessible/grayed out. (Continued on next page) 12 206-4207
-
 1
1 -
2
-
3
-
4
-
5
-
6
-
 7
7 -
 8
8 -
 9
9 -
 10
10 -
 11
11 -
 12
12 -
 13
13 -
 14
14 -
 15
15 -
 16
16 -
 17
17 -
18
-
19
-
20
-
21
-
22
-
23
-
24
-
25
-
26
-
27
-
28
-
29
-
30
-
31
-
32
-
33
-
34
-
35
-
36
-
37
-
38
-
39
-
40
-
41
-
42
-
43
-
44
-
45
-
46
-
47
-
48
-
49
-
50
-
51
-
52
-
53
-
54
-
55
-
56
-
57
-
58
-
59
-
60
-
61
-
62
-
63
-
64
-
65
-
66
-
67
-
68
-
69
-
70
-
71
-
72
-
73
-
74
-
75
 |
 |