LG 42CQ610H Setup Guide - Page 29
Channel Banks Setup Cont.
 |
View all LG 42CQ610H manuals
Add to My Manuals
Save this manual to your list of manuals |
Page 29 highlights
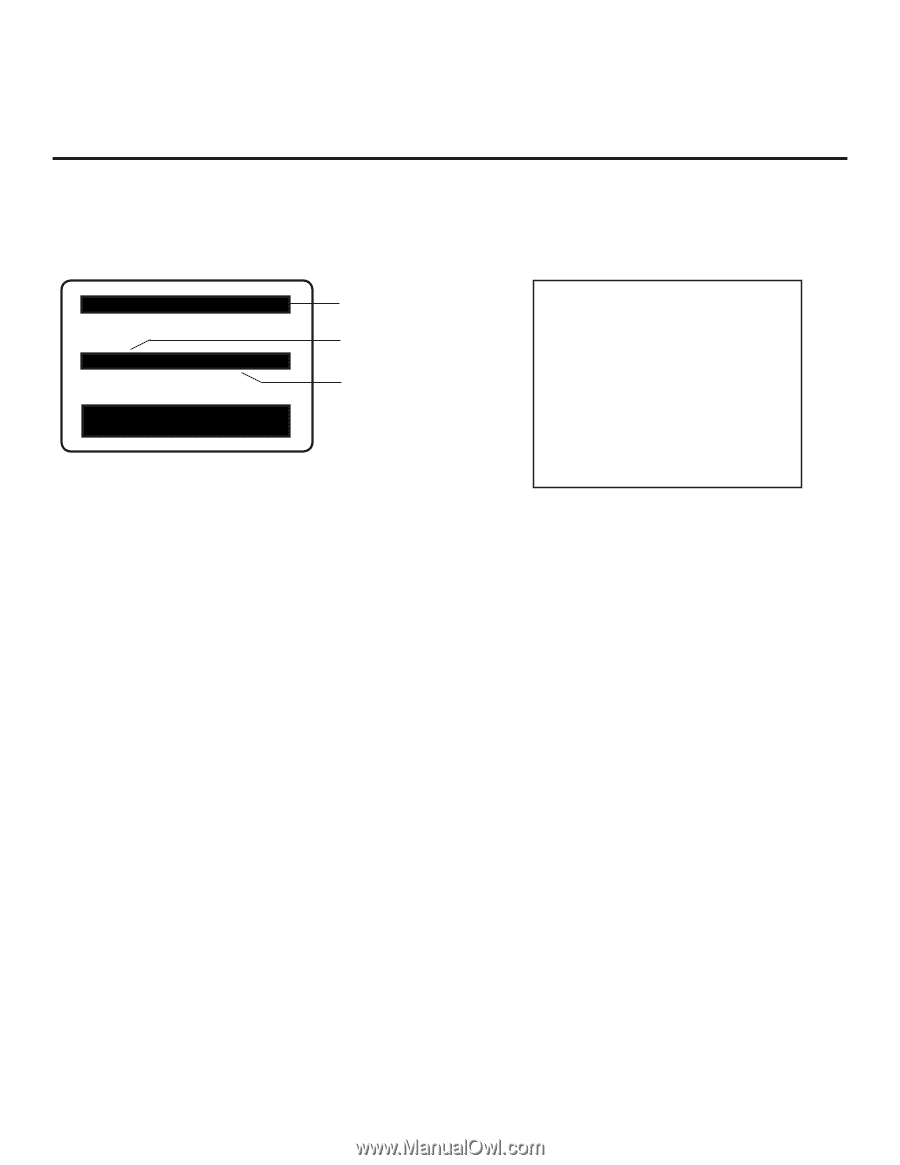
Channel Banks Setup (Cont.) Channel Status Options for Channel Banks In the Channel Preview/Banks Setup Menu, use the Channel Up/Down arrows on the Installer Remote to navigate to a channel and the Left/Right arrows to select the channel status. CHANNEL PREVIEW - BANK 1 CH 011-001 NORMAL-ADDED Enter -> Change CC -> VCHIP Menu, Ch. Preview -> Exit IDs currently selected channel bank. IDs currently selected channel. IDs channel status in selected bank. Typical Channel Preview/Banks Setup Menu Channel Status Options • NORMAL-ADDED: Channel will appear in channel lineup. • NORMAL-DELETED: Channel will not appear in channel lineup. • BLANK-ADDED: Channel will appear in all channel banks; however, video will be black, no picture. • BLANK-DELETED: Channel will be blanked in all channel banks. Adding / Deleting / Blanking Channels It is best to complete ADD / DELETE customization before assigning BLANK status. All channels found during Auto Tuning are automatically assigned NORMAL-ADDED status in Channel Banks 1, 2, 3, and 4. NORMAL-ADDED and NORMAL-DELETED status can be assigned independently for Channel Banks 1, 2, 3, and 4. However, a channel blanked, is blanked in all channel banks. Note: Auto Tuning removes any channels previously customized with ADD / DELETE / BLANK. Note: On individual TVs, if a channel was not found during Auto Tuning (and was not added during Express Script/Custom Master TV Setup procedures), it can be added using the Manual Tuning option in the Channel Menu. Selecting Deleted Channels To tune to a NORMAL-DELETED channel: 1. Select a channel bank where the channel's status is NORMAL-ADDED. 2. Navigate to or direct enter the channel number. 3. Select the channel bank where the channel's status is "NORMAL-DELETED," and reconfigure the channel status in the Channel Preview/Banks Setup Menu. Inactive TV Setup There are two options for creating an inactive TV display on Channel Bank 4. Either: • Select NORMAL-DELETED for each channel in Channel Bank 4, or • Press BANK on the Installer Remote until Channel Bank 4 is selected, and then press CH PREVIEW to display the Channel Preview/Banks Setup Menu. Then, press the SAP key on the Installer Remote to automatically delete all channels in Channel Bank 4. When the TV is turned ON by the patient, an "Inactive TV Call Attendant" message will appear on the screen, and after a few moments the TV will turn itself OFF. This will prompt the patient to arrange for an available programming package on Channel Bank 1, 2, or 3. Using the Installer Remote, the administrator can select Channel Bank 1, 2, or 3 depending on the entertainment programming tier selected by the patient. When the patient leaves the hospital, the administrator can then select Channel Bank 4 to reinstate the "Inactive TV" message. 206-4207 29
-
 1
1 -
2
-
3
-
4
-
5
-
6
-
7
-
8
-
9
-
10
-
11
-
12
-
13
-
14
-
15
-
16
-
17
-
18
-
19
-
20
-
21
-
22
-
23
-
 24
24 -
 25
25 -
 26
26 -
 27
27 -
 28
28 -
 29
29 -
 30
30 -
 31
31 -
 32
32 -
 33
33 -
 34
34 -
35
-
36
-
37
-
38
-
39
-
40
-
41
-
42
-
43
-
44
-
45
-
46
-
47
-
48
-
49
-
50
-
51
-
52
-
53
-
54
-
55
-
56
-
57
-
58
-
59
-
60
-
61
-
62
-
63
-
64
-
65
-
66
-
67
-
68
-
69
-
70
-
71
-
72
-
73
-
74
-
75
 |
 |