Lenovo ThinkCentre M50 Hardware Maintenance Manual (HMM) - Page 53
Installing, drive
 |
View all Lenovo ThinkCentre M50 manuals
Add to My Manuals
Save this manual to your list of manuals |
Page 53 highlights
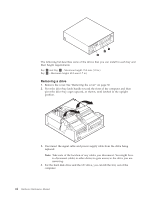
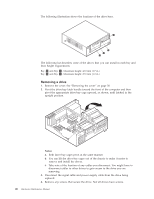
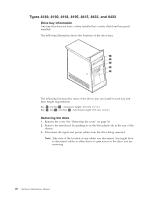
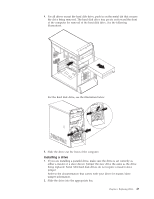
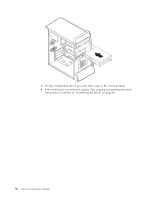
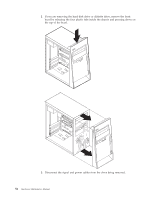
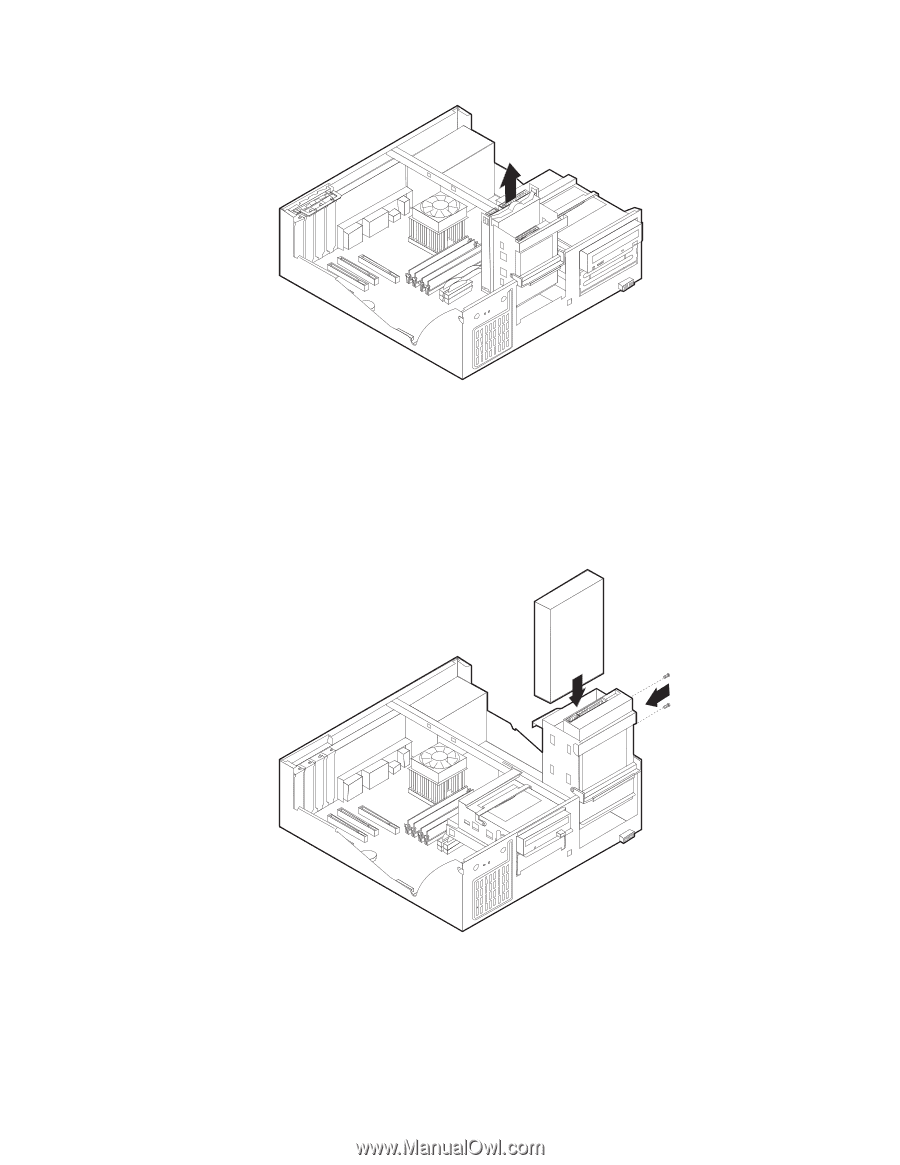
Installing a drive 1. If you are installing a parallel drive, make sure the drive is set correctly as either a master or a slave device. Jumper the new drive the same as the drive being replaced. Serial ATA hard disk drives do not require a master/slave jumper. Refer to the documentation that comes with your drive for master/slave jumper information. 2. Install the drive into the bay as shown. 3. Secure the new drive (if necessary) with the screws that were removed. 4. If necessary, place the drive-bay cages back into the chassis. 5. Continue at "Connecting the drive" on page 54. Chapter 6. Replacing FRUs 47
-
 1
1 -
2
-
3
-
4
-
5
-
6
-
7
-
8
-
9
-
10
-
11
-
12
-
13
-
14
-
15
-
16
-
17
-
18
-
19
-
20
-
21
-
22
-
23
-
24
-
25
-
26
-
27
-
28
-
29
-
30
-
31
-
32
-
33
-
34
-
35
-
36
-
37
-
38
-
39
-
40
-
41
-
42
-
43
-
44
-
45
-
46
-
47
-
 48
48 -
 49
49 -
 50
50 -
 51
51 -
 52
52 -
 53
53 -
 54
54 -
 55
55 -
 56
56 -
 57
57 -
 58
58 -
59
-
60
-
61
-
62
-
63
-
64
-
65
-
66
-
67
-
68
-
69
-
70
-
71
-
72
-
73
-
74
-
75
-
76
-
77
-
78
-
79
-
80
-
81
-
82
-
83
-
84
-
85
-
86
-
87
-
88
-
89
-
90
-
91
-
92
-
93
-
94
-
95
-
96
-
97
-
98
-
99
-
100
-
101
-
102
-
103
-
104
-
105
-
106
-
107
-
108
-
109
-
110
-
111
-
112
-
113
-
114
-
115
-
116
-
117
-
118
-
119
-
120
-
121
-
122
-
123
-
124
-
125
-
126
-
127
-
128
-
129
-
130
-
131
-
132
-
133
-
134
-
135
-
136
-
137
-
138
-
139
-
140
-
141
-
142
-
143
-
144
-
145
-
146
-
147
-
148
-
149
-
150
-
151
-
152
-
153
-
154
-
155
-
156
-
157
-
158
-
159
-
160
-
161
-
162
-
163
-
164
-
165
-
166
-
167
-
168
-
169
-
170
-
171
-
172
-
173
-
174
-
175
-
176
-
177
-
178
-
179
-
180
-
181
-
182
-
183
-
184
-
185
-
186
-
187
-
188
-
189
-
190
-
191
-
192
-
193
-
194
-
195
-
196
-
197
-
198
-
199
-
200
-
201
-
202
-
203
-
204
-
205
-
206
-
207
-
208
-
209
-
210
-
211
-
212
-
213
-
214
-
215
-
216
-
217
-
218
-
219
-
220
-
221
-
222
-
223
-
224
-
225
-
226
-
227
-
228
-
229
-
230
-
231
-
232
-
233
-
234
-
235
-
236
-
237
-
238
-
239
-
240
-
241
-
242
-
243
-
244
-
245
-
246
-
247
-
248
-
249
-
250
-
251
-
252
-
253
-
254
-
255
-
256
-
257
-
258
-
259
-
260
-
261
-
262
-
263
-
264
-
265
-
266
-
267
-
268
-
269
-
270
-
271
-
272
-
273
-
274
-
275
-
276
-
277
-
278
-
279
-
280
-
281
-
282
-
283
-
284
-
285
-
286
-
287
-
288
-
289
-
290
 |
 |
Installing
a
drive
1.
If
you
are
installing
a
parallel
drive,
make
sure
the
drive
is
set
correctly
as
either
a
master
or
a
slave
device.
Jumper
the
new
drive
the
same
as
the
drive
being
replaced.
Serial
ATA
hard
disk
drives
do
not
require
a
master/slave
jumper.
Refer
to
the
documentation
that
comes
with
your
drive
for
master/slave
jumper
information.
2.
Install
the
drive
into
the
bay
as
shown.
3.
Secure
the
new
drive
(if
necessary)
with
the
screws
that
were
removed.
4.
If
necessary,
place
the
drive-bay
cages
back
into
the
chassis.
5.
Continue
at
“Connecting
the
drive”
on
page
54.
Chapter
6.
Replacing
FRUs
47