Lexmark C520 Service Manual - Page 71
Print quality-blank
 |
View all Lexmark C520 manuals
Add to My Manuals
Save this manual to your list of manuals |
Page 71 highlights
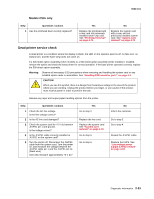
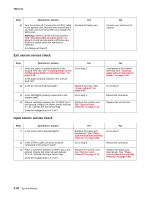
5022-xxx Step Questions / actions Yes 2 Replace the PC unit. See "Photoconductor unit removal" on page 4-70. Does this fix the problem? Problem solved. 3 Check the high voltage contact from the HVPS to the transfer belt assembly. Transfer belt high voltage path (typical 4X) Replace the spring or the transfer contact assembly. See "Transfer contact assembly removal" on page 4-92. No Go to step 3. Go to step 4. Is a problem found? 4 Reseat the JHVPS connector. Does this fix the problem? 5 Replace the HVPS. See "High voltage power supply (HVPS) removal" on page 4-62. Does this fix the problem? 6 Clean the printhead. Does this fix the problem? Problem solved. Problem solved. Problem solved. Print quality-blank page Step Questions / actions 1 Is all the packing material for the photoconductor unit in question removed? 2 Replace the photoconductor unit for the color in question. Does this fix the problem? 3 Yes Go to step 2. Problem solved. 4 Enter the Diagnostics mode (turn off the printer, press and hold and , turn on the printer, and release the buttons when the clock graphic displays), and run the appropriate cartridge drive motor test for the missing color. See "General motor tests" on page 3-8. Did the motor run? Go to step 5. 2-56 Service Manual Go to step 5. Go to step 6. Replace the printhead. See "Printhead removal" on page 4-74. No Remove the packing material. Go to step 3. Replace the EP drive assembly. See "Electrophotographic (EP) drive assembly removal- model C52x only" on page 4-48 or "Electrophotographic (EP) drive assembly removal- model C53x only" on page 4-51.
-
 1
1 -
2
-
3
-
4
-
5
-
6
-
7
-
8
-
9
-
10
-
11
-
12
-
13
-
14
-
15
-
16
-
17
-
18
-
19
-
20
-
21
-
22
-
23
-
24
-
25
-
26
-
27
-
28
-
29
-
30
-
31
-
32
-
33
-
34
-
35
-
36
-
37
-
38
-
39
-
40
-
41
-
42
-
43
-
44
-
45
-
46
-
47
-
48
-
49
-
50
-
51
-
52
-
53
-
54
-
55
-
56
-
57
-
58
-
59
-
60
-
61
-
62
-
63
-
64
-
65
-
 66
66 -
 67
67 -
 68
68 -
 69
69 -
 70
70 -
 71
71 -
 72
72 -
 73
73 -
 74
74 -
 75
75 -
 76
76 -
77
-
78
-
79
-
80
-
81
-
82
-
83
-
84
-
85
-
86
-
87
-
88
-
89
-
90
-
91
-
92
-
93
-
94
-
95
-
96
-
97
-
98
-
99
-
100
-
101
-
102
-
103
-
104
-
105
-
106
-
107
-
108
-
109
-
110
-
111
-
112
-
113
-
114
-
115
-
116
-
117
-
118
-
119
-
120
-
121
-
122
-
123
-
124
-
125
-
126
-
127
-
128
-
129
-
130
-
131
-
132
-
133
-
134
-
135
-
136
-
137
-
138
-
139
-
140
-
141
-
142
-
143
-
144
-
145
-
146
-
147
-
148
-
149
-
150
-
151
-
152
-
153
-
154
-
155
-
156
-
157
-
158
-
159
-
160
-
161
-
162
-
163
-
164
-
165
-
166
-
167
-
168
-
169
-
170
-
171
-
172
-
173
-
174
-
175
-
176
-
177
-
178
-
179
-
180
-
181
-
182
-
183
-
184
-
185
-
186
-
187
-
188
-
189
-
190
-
191
-
192
-
193
-
194
-
195
-
196
-
197
-
198
-
199
-
200
-
201
-
202
-
203
-
204
-
205
-
206
-
207
-
208
-
209
-
210
-
211
-
212
-
213
-
214
-
215
-
216
-
217
-
218
-
219
-
220
-
221
-
222
-
223
-
224
-
225
-
226
-
227
-
228
-
229
-
230
-
231
-
232
-
233
-
234
-
235
-
236
-
237
-
238
-
239
-
240
-
241
-
242
-
243
-
244
-
245
-
246
-
247
-
248
-
249
-
250
-
251
-
252
-
253
-
254
-
255
-
256
-
257
-
258
-
259
-
260
-
261
-
262
-
263
-
264
-
265
-
266
-
267
-
268
-
269
-
270
-
271
-
272
-
273
-
274
-
275
-
276
-
277
-
278
-
279
-
280
-
281
-
282
-
283
-
284
-
285
-
286
-
287
-
288
-
289
-
290
-
291
-
292
-
293
-
294
-
295
-
296
-
297
-
298
-
299
-
300
-
301
-
302
-
303
-
304
-
305
-
306
-
307
-
308
-
309
-
310
-
311
-
312
-
313
-
314
-
315
-
316
-
317
-
318
-
319
-
320
-
321
-
322
-
323
-
324
-
325
-
326
-
327
-
328
-
329
-
330
-
331
-
332
-
333
-
334
-
335
-
336
-
337
-
338
-
339
-
340
-
341
-
342
-
343
-
344
-
345
-
346
-
347
-
348
-
349
-
350
-
351
-
352
-
353
-
354
-
355
-
356
-
357
-
358
-
359
-
360
-
361
-
362
-
363
-
364
-
365
-
366
-
367
-
368
-
369
-
370
-
371
-
372
-
373
-
374
-
375
-
376
-
377
-
378
-
379
 |
 |
