Nokia IP390 Installation Guide - Page 25
Connecting to the Console or Auxiliary Port, To connect to the power supply - guide
 |
View all Nokia IP390 manuals
Add to My Manuals
Save this manual to your list of manuals |
Page 25 highlights
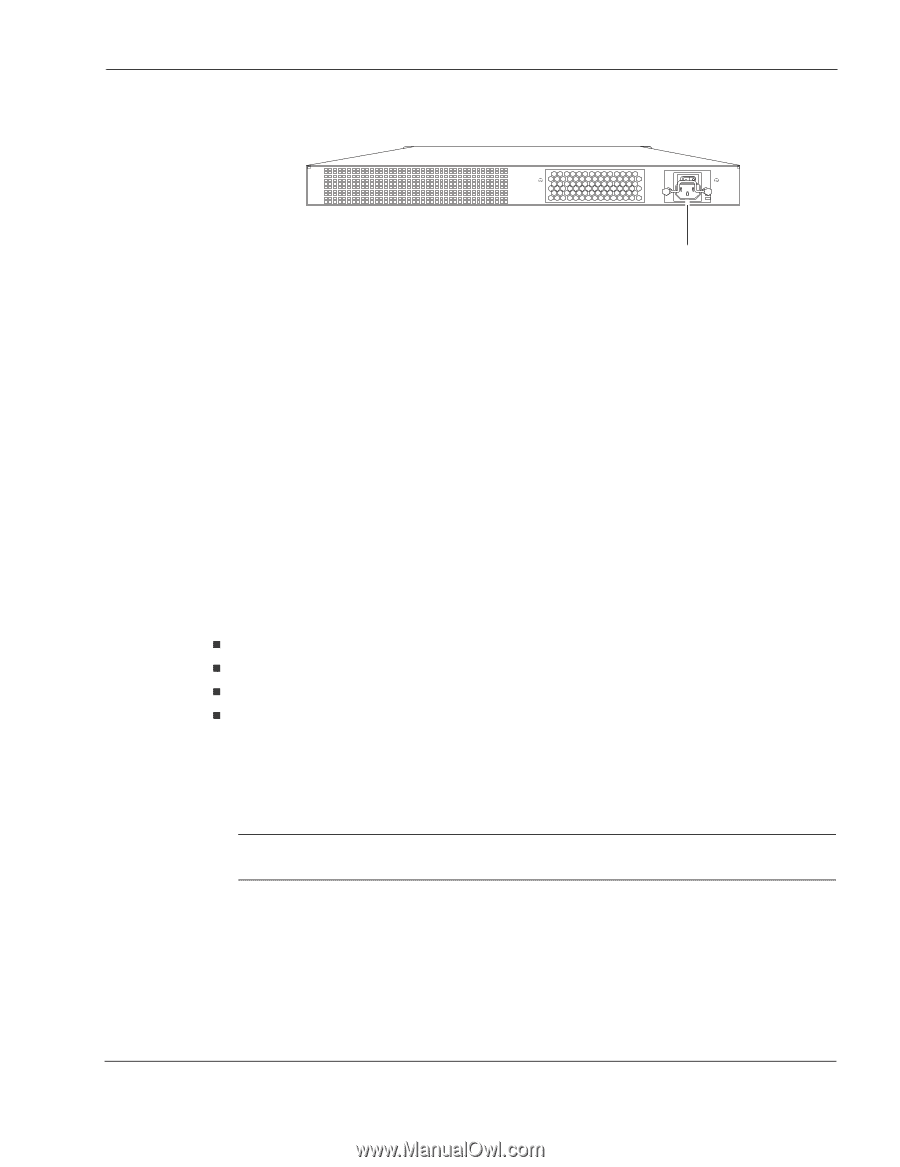
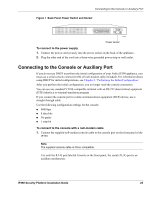
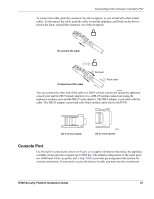
Connecting to the Console or Auxiliary Port Figure 7 Back Panel Power Switch and Socket 00527 Power socket To connect to the power supply 1. Connect the power cord securely into the power socket on the back of the appliance. 2. Plug the other end of the cord into a three-wire grounded power strip or wall outlet. Connecting to the Console or Auxiliary Port If you do not use DHCP to perform the initial configuration of your Nokia IP390 appliance, you must use a serial console connection (RJ-45 null-modem cable included). For information about using DHCP for initial configurations, see Chapter 3, "Performing the Initial Configuration." After you perform the initial configuration, you no longer need the console connection. You can use any standard VT100-compatible terminal with an RS-232 data terminal equipment (DTE) interface or terminal-emulation program If you connect the console port to a data communications equipment (DCE) device, use a straight-through cable. Use the following configuration settings for the console: „ 9600 bps „ 8 data bits „ No parity „ 1 stop bit To connect to the console with a null-modem cable 1. Connect the supplied null-modem console cable to the console port on the front panel of the IP390. Note The supplied console cable is Cisco compatible. Use only the RJ-45 port labeled Console on the front panel; the serial (AUX) port is an auxiliary modem port. IP390 Security Platform Installation Guide 25
-
 1
1 -
2
-
3
-
4
-
5
-
6
-
7
-
8
-
9
-
10
-
11
-
12
-
13
-
14
-
15
-
16
-
17
-
18
-
19
-
 20
20 -
 21
21 -
 22
22 -
 23
23 -
 24
24 -
 25
25 -
 26
26 -
 27
27 -
 28
28 -
 29
29 -
 30
30 -
31
-
32
-
33
-
34
-
35
-
36
-
37
-
38
-
39
-
40
-
41
-
42
-
43
-
44
-
45
-
46
-
47
-
48
-
49
-
50
-
51
-
52
-
53
-
54
-
55
-
56
-
57
-
58
-
59
-
60
-
61
-
62
-
63
-
64
-
65
-
66
-
67
-
68
-
69
-
70
-
71
-
72
-
73
-
74
-
75
-
76
-
77
-
78
-
79
-
80
-
81
-
82
-
83
-
84
-
85
-
86
-
87
-
88
-
89
-
90
-
91
-
92
-
93
-
94
-
95
-
96
-
97
 |
 |