Nokia IP390 Installation Guide - Page 66
Replacing or Upgrading Memory, To install and con an optional disk in an IP390
 |
View all Nokia IP390 manuals
Add to My Manuals
Save this manual to your list of manuals |
Page 66 highlights
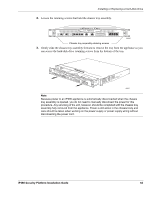
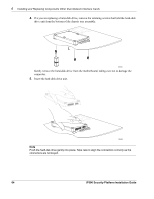
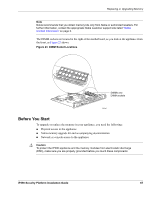
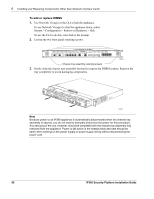
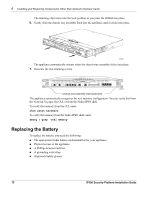
6 Installing and Replacing Components Other than Network Interface Cards To install and configure an optional disk in an IP390 1. If necessary, install the optional disk in the appliance as described in "Installing or Replacing a Hard-Disk Drive" on page 61. 2. Restart the appliance if appropriate. 3. Start Nokia Network Voyager. 4. Navigate to the Optional Disk configuration page. Network Voyager displays information about the device you installed. 5. Select the device in the Choose column. 6. Click Apply. 7. Wait until you see a message indicating that you should reboot the appliance. There is a short delay (possibly a few minutes) before the message appears. The delay is longer with devices of larger capacity. 8. When the message appears, click Reboot, Shutdown System. 9. Reboot the appliance. 10. When the appliance has rebooted, log into it and start Nokia Network Voyager. 11. Navigate to the System Logging configuration page. 12. Select the option Logging to Optional Disk. The other options on this page do not apply to Check Point logging. 13. Click Apply. 14. Click Save. Note The appliance can use only one local logging device at a time. For more information about storing Nokia IPSO system logs, see the Nokia Network Voyager Reference Guide or the CLI Reference Guide for the version of Nokia IPSO you are using. For more information about storing Check Point log messages, see Important Information: Storing Check Point Log Messages on Flash-Based Platforms. Replacing or Upgrading Memory The IP390 appliances have two dual inline memory-module (DIMM) sockets. This section explains how to upgrade or replace the memory in your appliance by using a Nokia-approved memory upgrade kit. The IP390 comes with different memory configurations. Contact Nokia customer support for more information on the supported memory configurations. 66 IP390 Security Platform Installation Guide
-
 1
1 -
2
-
3
-
4
-
5
-
6
-
7
-
8
-
9
-
10
-
11
-
12
-
13
-
14
-
15
-
16
-
17
-
18
-
19
-
20
-
21
-
22
-
23
-
24
-
25
-
26
-
27
-
28
-
29
-
30
-
31
-
32
-
33
-
34
-
35
-
36
-
37
-
38
-
39
-
40
-
41
-
42
-
43
-
44
-
45
-
46
-
47
-
48
-
49
-
50
-
51
-
52
-
53
-
54
-
55
-
56
-
57
-
58
-
59
-
60
-
 61
61 -
 62
62 -
 63
63 -
 64
64 -
 65
65 -
 66
66 -
 67
67 -
 68
68 -
 69
69 -
 70
70 -
 71
71 -
72
-
73
-
74
-
75
-
76
-
77
-
78
-
79
-
80
-
81
-
82
-
83
-
84
-
85
-
86
-
87
-
88
-
89
-
90
-
91
-
92
-
93
-
94
-
95
-
96
-
97
 |
 |