Nokia IP390 Installation Guide - Page 70
Replacing the Battery
 |
View all Nokia IP390 manuals
Add to My Manuals
Save this manual to your list of manuals |
Page 70 highlights
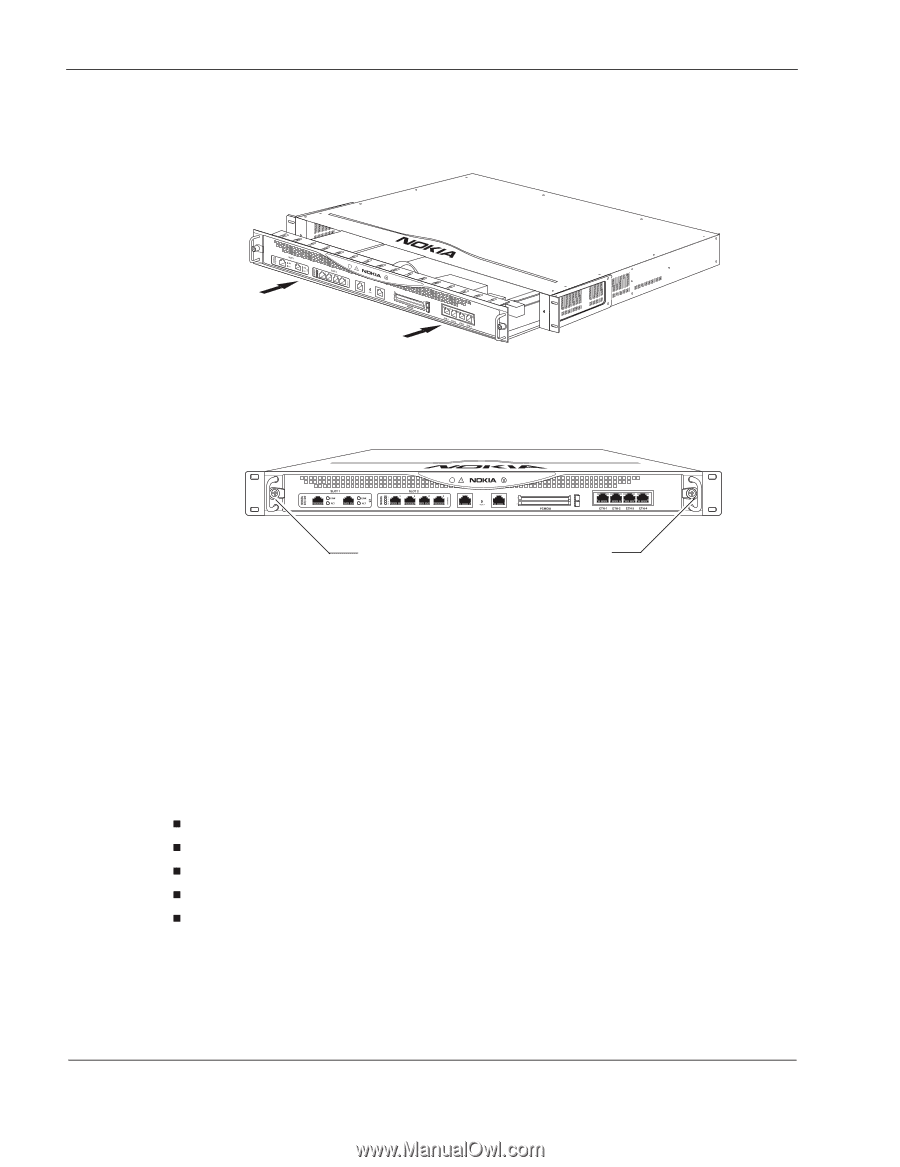
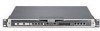
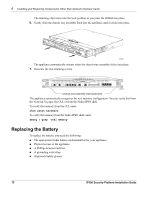
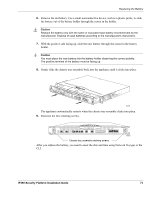
6 Installing and Replacing Components Other than Network Interface Cards The retaining clips move into the lock position as you press the DIMM into place. 6. Gently slide the chassis tray assembly back into the appliance until it clicks into place. IP390 00538 The appliance automatically restarts when the chassis tray assembly clicks into place. 7. Resecure the two retaining screws. IP390 00525 Chassis tray assembly retaining screws The appliance automatically recognizes the new memory configuration. You can verify this from the Network Voyager, the CLI, or from the Nokia IPSO shell. To verify the memory from the CLI, enter: show asset hardware To verify the memory from the Nokia IPSO shell, enter: dmesg | grep 'real memory' Replacing the Battery To replace the battery, you need the following: „ The appropriate Nokia battery replacement kit for your appliance „ Physical access to the appliance „ A Phillips-head screwdriver „ A grounding wrist strap „ (Optional) Safety glasses 70 IP390 Security Platform Installation Guide
-
 1
1 -
2
-
3
-
4
-
5
-
6
-
7
-
8
-
9
-
10
-
11
-
12
-
13
-
14
-
15
-
16
-
17
-
18
-
19
-
20
-
21
-
22
-
23
-
24
-
25
-
26
-
27
-
28
-
29
-
30
-
31
-
32
-
33
-
34
-
35
-
36
-
37
-
38
-
39
-
40
-
41
-
42
-
43
-
44
-
45
-
46
-
47
-
48
-
49
-
50
-
51
-
52
-
53
-
54
-
55
-
56
-
57
-
58
-
59
-
60
-
61
-
62
-
63
-
64
-
 65
65 -
 66
66 -
 67
67 -
 68
68 -
 69
69 -
 70
70 -
 71
71 -
 72
72 -
 73
73 -
 74
74 -
 75
75 -
76
-
77
-
78
-
79
-
80
-
81
-
82
-
83
-
84
-
85
-
86
-
87
-
88
-
89
-
90
-
91
-
92
-
93
-
94
-
95
-
96
-
97
 |
 |