Oki B6300 B6200/6300 Technical Reference/User's Guide - Page 33
At the Control Panel
 |
View all Oki B6300 manuals
Add to My Manuals
Save this manual to your list of manuals |
Page 33 highlights
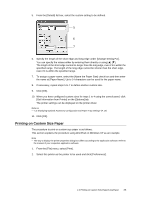
5. To enter a password, enter it at [Password]. Enter up to 12 numeric characters. 6. From [Retrieve Document Name], select either [Enter Document Name] or [Auto Retrieve]. If [Enter Document Name] is selected, specify a document name at [Document Name] using up to 12 characters. If [Auto Retrieve] is selected, the name of the document to be printed will become the Document Name. However, if the printer cannot recognize a document name, it will become the date/time (e.g. 09/03 10:30). 7. Click [OK]. 8. Click [OK] on the [Basic] tab. 9. Click [Print] in the [Print] dialog box to start printing. The document will be stored in the printer. At the Control Panel This section explains the procedure to print data stored in the printer by Secure Print. Note • You can also delete, without printing, secure print data stored in the printer. For details, refer to "Init/Del Data" (P. 81). 1. Press the < > button. 2. Check that [Secure Print] is displayed and then press the < > button. 3. Press the < > or < > button until the required user is selected and then press the < > button. 4. Move the cursor by the < > button and then enter the password (up to 12 digits) by the < > and < > buttons. 5. Press the button. 6. Press the < > or < > button until the required document is selected and then press the < > button. 7. After printing, press the < > or < > button to delete or save the document and then press the < > button. 8. Press the button. Printing will start. 9. Press the button when printing has completed. Note • The user ID displayed (up to eight characters) is the [User ID] set in the [Secure Print] dialog box of the [Basic] tab of the printer driver. • For the password, enter the [Password] set in the [Secure Print] dialog box of the [Basic] tab of the printer driver. If [Password] is not set, there will be no setting on the control panel. • The document name displayed (up to 12 characters) is the [Document Name] set in the [Secure Print] dialog box of the [Basic] tab of the printer driver. 2.5 Print Confidential Document - Secure Print 29
-
 1
1 -
2
-
3
-
4
-
5
-
6
-
7
-
8
-
9
-
10
-
11
-
12
-
13
-
14
-
15
-
16
-
17
-
18
-
19
-
20
-
21
-
22
-
23
-
24
-
25
-
26
-
27
-
 28
28 -
 29
29 -
 30
30 -
 31
31 -
 32
32 -
 33
33 -
 34
34 -
 35
35 -
 36
36 -
 37
37 -
 38
38 -
39
-
40
-
41
-
42
-
43
-
44
-
45
-
46
-
47
-
48
-
49
-
50
-
51
-
52
-
53
-
54
-
55
-
56
-
57
-
58
-
59
-
60
-
61
-
62
-
63
-
64
-
65
-
66
-
67
-
68
-
69
-
70
-
71
-
72
-
73
-
74
-
75
-
76
-
77
-
78
-
79
-
80
-
81
-
82
-
83
-
84
-
85
-
86
-
87
-
88
-
89
-
90
-
91
-
92
-
93
-
94
-
95
-
96
-
97
-
98
-
99
-
100
-
101
-
102
-
103
-
104
-
105
-
106
-
107
-
108
-
109
-
110
-
111
-
112
-
113
-
114
-
115
-
116
-
117
-
118
-
119
-
120
-
121
-
122
-
123
-
124
-
125
-
126
-
127
-
128
-
129
-
130
-
131
-
132
-
133
-
134
-
135
-
136
-
137
-
138
-
139
-
140
-
141
-
142
-
143
-
144
-
145
-
146
-
147
-
148
-
149
-
150
-
151
-
152
-
153
-
154
-
155
-
156
-
157
-
158
-
159
-
160
-
161
-
162
-
163
 |
 |