Oki B6300 B6200/6300 Technical Reference/User's Guide - Page 94
Inside Cover A, Inside Paper Tray
 |
View all Oki B6300 manuals
Add to My Manuals
Save this manual to your list of manuals |
Page 94 highlights
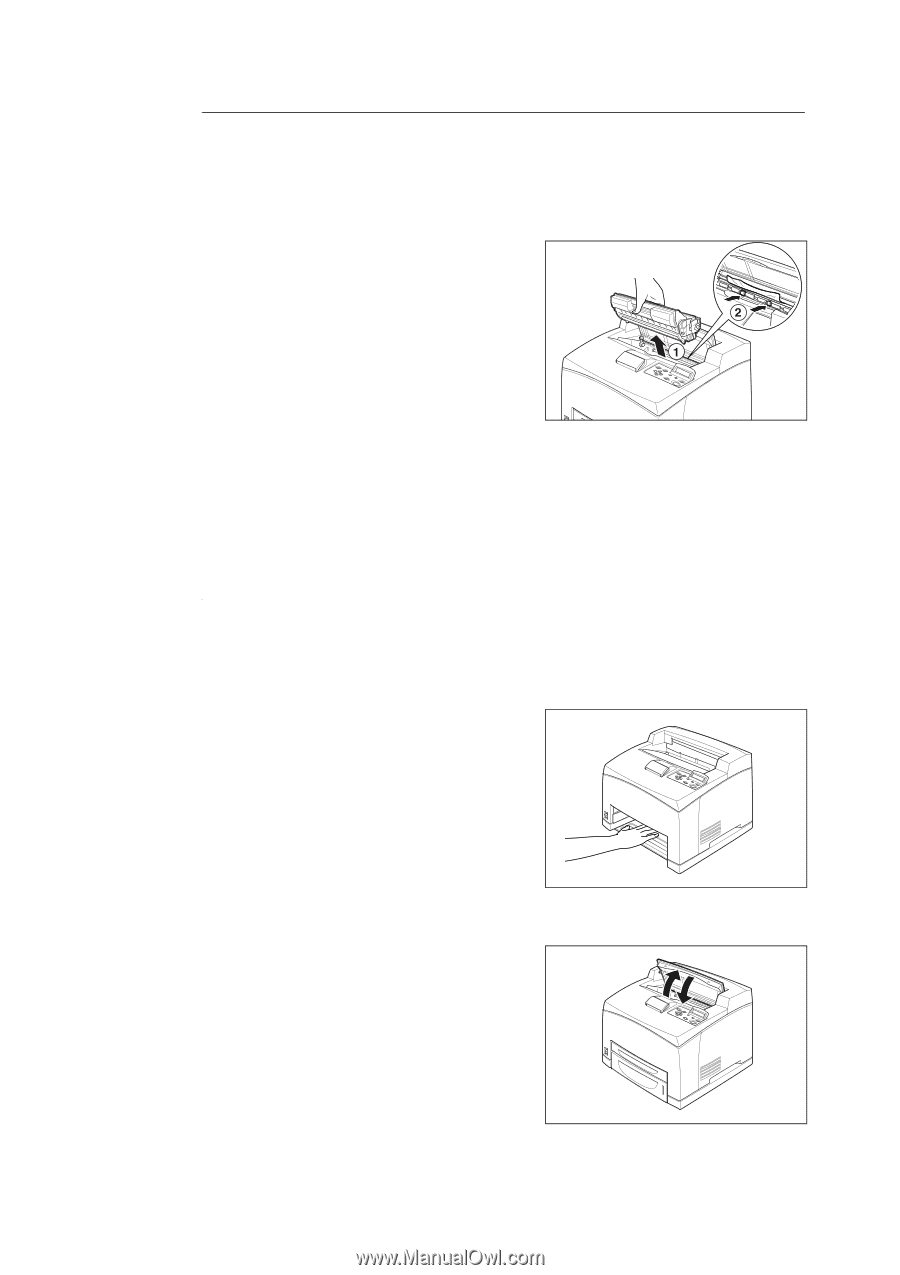
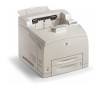
Inside Cover A Follow the procedure below to remove any jammed paper when the control panel displays the following messages: "Paper Jam Open Cover A" or "Remove cartridge Clear jam" 1. Open cover A, and holding the drum/toner cartridge by the grip, remove it from the printer (1). 2. Turn the roll as shown in the diagram and remove any jammed paper inside (2). 3. Return the drum/toner cartridge and cover A to their original positions. Note • When the optional offset catch tray is installed, close cover A first before returning the tray to its original position. • If you continue to print with the offset catch tray folded, this may cause a paper jam. Always use the printer with the tray open. Inside Paper Tray Follow the procedure below to remove any jammed paper when the following messages are displayed intermittently: "Pull out all trays. Clear jam", "Clear jam and close Cover A". Pulling out paper trays 1. Pull out all paper trays and remove any wrinkled paper. 2. Examine the inside of the printer and remove any jammed paper. After removing the paper 1. Push the paper trays completely back into the printer. 2. Open and close cover A. Doing this will clear the error message. 90 5 Troubleshooting
-
 1
1 -
2
-
3
-
4
-
5
-
6
-
7
-
8
-
9
-
10
-
11
-
12
-
13
-
14
-
15
-
16
-
17
-
18
-
19
-
20
-
21
-
22
-
23
-
24
-
25
-
26
-
27
-
28
-
29
-
30
-
31
-
32
-
33
-
34
-
35
-
36
-
37
-
38
-
39
-
40
-
41
-
42
-
43
-
44
-
45
-
46
-
47
-
48
-
49
-
50
-
51
-
52
-
53
-
54
-
55
-
56
-
57
-
58
-
59
-
60
-
61
-
62
-
63
-
64
-
65
-
66
-
67
-
68
-
69
-
70
-
71
-
72
-
73
-
74
-
75
-
76
-
77
-
78
-
79
-
80
-
81
-
82
-
83
-
84
-
85
-
86
-
87
-
88
-
 89
89 -
 90
90 -
 91
91 -
 92
92 -
 93
93 -
 94
94 -
 95
95 -
 96
96 -
 97
97 -
 98
98 -
 99
99 -
100
-
101
-
102
-
103
-
104
-
105
-
106
-
107
-
108
-
109
-
110
-
111
-
112
-
113
-
114
-
115
-
116
-
117
-
118
-
119
-
120
-
121
-
122
-
123
-
124
-
125
-
126
-
127
-
128
-
129
-
130
-
131
-
132
-
133
-
134
-
135
-
136
-
137
-
138
-
139
-
140
-
141
-
142
-
143
-
144
-
145
-
146
-
147
-
148
-
149
-
150
-
151
-
152
-
153
-
154
-
155
-
156
-
157
-
158
-
159
-
160
-
161
-
162
-
163
 |
 |