Oki B6300 B6200/6300 Technical Reference/User's Guide - Page 58
Changing Menu Settings
 |
View all Oki B6300 manuals
Add to My Manuals
Save this manual to your list of manuals |
Page 58 highlights
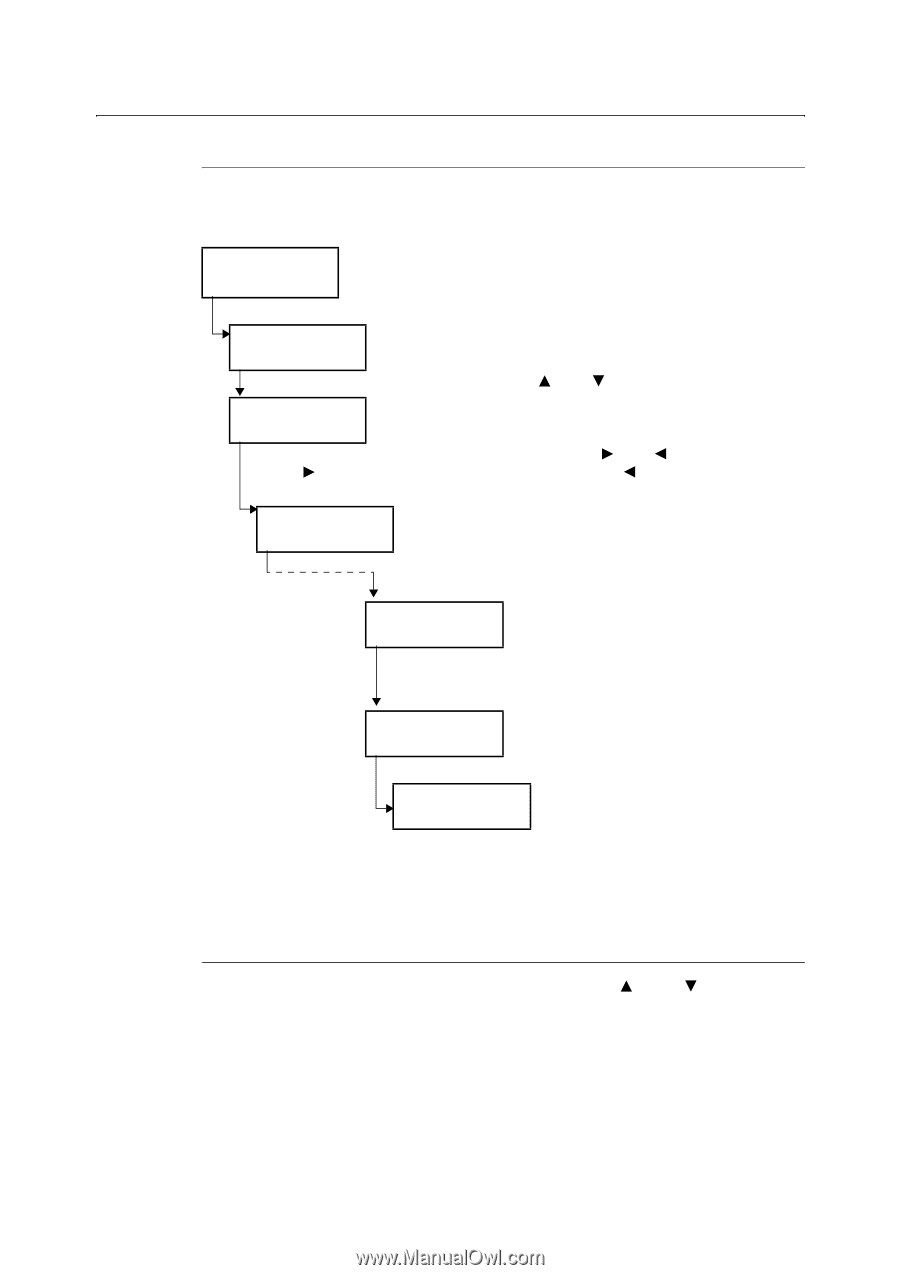
Changing Menu Settings Basic Operations Press one of the following buttons to display the menu screen or set the printer by browsing though each menu structure. Ready to print 1. To display the menu screen, press the button at the print screen. Menu Print Language 2. To move between items, press the < > or < > button. Menu Admin Menu 3. To move between structure levels, press the < > or < > button. Press the < > button to go to the lower level or press the < > button to return to the upper level. Admin Menu Network/Port Port Status Enable 4. Press the button to confirm your settings.The settings that have been confirmed are displayed with the affix "*". Port Status Enable * 5. Press the button to return to the print screen. Ready to print Note • If you want to change values after you have confirmed them by pressing the button (which has the affix " * "), you need to set them from the start again. Initializing Configured Values Display the item you want to initialize and then press both the < > and < > buttons at the same time. Once the change process is completed, the factory defaults will be displayed. Press the button to confirm the value. 54 4 Settings on the Control Panel
-
 1
1 -
2
-
3
-
4
-
5
-
6
-
7
-
8
-
9
-
10
-
11
-
12
-
13
-
14
-
15
-
16
-
17
-
18
-
19
-
20
-
21
-
22
-
23
-
24
-
25
-
26
-
27
-
28
-
29
-
30
-
31
-
32
-
33
-
34
-
35
-
36
-
37
-
38
-
39
-
40
-
41
-
42
-
43
-
44
-
45
-
46
-
47
-
48
-
49
-
50
-
51
-
52
-
 53
53 -
 54
54 -
 55
55 -
 56
56 -
 57
57 -
 58
58 -
 59
59 -
 60
60 -
 61
61 -
 62
62 -
 63
63 -
64
-
65
-
66
-
67
-
68
-
69
-
70
-
71
-
72
-
73
-
74
-
75
-
76
-
77
-
78
-
79
-
80
-
81
-
82
-
83
-
84
-
85
-
86
-
87
-
88
-
89
-
90
-
91
-
92
-
93
-
94
-
95
-
96
-
97
-
98
-
99
-
100
-
101
-
102
-
103
-
104
-
105
-
106
-
107
-
108
-
109
-
110
-
111
-
112
-
113
-
114
-
115
-
116
-
117
-
118
-
119
-
120
-
121
-
122
-
123
-
124
-
125
-
126
-
127
-
128
-
129
-
130
-
131
-
132
-
133
-
134
-
135
-
136
-
137
-
138
-
139
-
140
-
141
-
142
-
143
-
144
-
145
-
146
-
147
-
148
-
149
-
150
-
151
-
152
-
153
-
154
-
155
-
156
-
157
-
158
-
159
-
160
-
161
-
162
-
163
 |
 |