Oki B6500 Guide: User's, B6500 (English) - Page 29
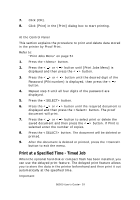
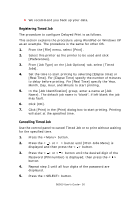
Print at a Specified Time - Timed Job
 |
View all Oki B6500 manuals
Add to My Manuals
Save this manual to your list of manuals |
Page 29 highlights
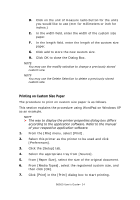
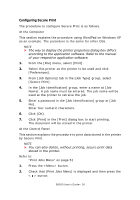
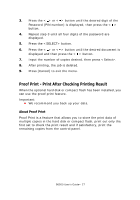
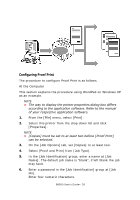
7. Click [OK]. 8. Click [Print] in the [Print] dialog box to start printing. At the Control Panel This section explains the procedure to print and delete data stored in the printer by Proof Print. Refer to: "Print Jobs Menu" on page 51 1. Press the button. 2. Press the < > or < > button until [Print Jobs Menu] is displayed and then press the < > button. 3. Press the < > or < > button until the desired digit of the Password (PIN number) is displayed, then press the < > button. 4. Repeat step 3 until all four digits of the password are displayed. 5. Press the button. 6. Press the < > or < > button until the required document is displayed and then press the button. The proof document will print. 7. Press the < > or < > button to select print or delete the saved document and then press the < > button. If Print is selected enter the number of copies. 8. Press the button. The document will be deleted or printed. 9. After the document is deleted or printed, press the button to exit the menu. Print at a Specified Time - Timed Job When the optional hard disk or compact flash has been installed, you can use the delayed print feature. The delayed print feature allows you to store the data in the printer beforehand and then print it out automatically at the specified time. Important: B6500 User's Guide> 29
-
 1
1 -
2
-
3
-
4
-
5
-
6
-
7
-
8
-
9
-
10
-
11
-
12
-
13
-
14
-
15
-
16
-
17
-
18
-
19
-
20
-
21
-
22
-
23
-
 24
24 -
 25
25 -
 26
26 -
 27
27 -
 28
28 -
 29
29 -
 30
30 -
 31
31 -
 32
32 -
 33
33 -
 34
34 -
35
-
36
-
37
-
38
-
39
-
40
-
41
-
42
-
43
-
44
-
45
-
46
-
47
-
48
-
49
-
50
-
51
-
52
-
53
-
54
-
55
-
56
-
57
-
58
-
59
-
60
-
61
-
62
-
63
-
64
-
65
-
66
-
67
-
68
-
69
-
70
-
71
-
72
-
73
-
74
-
75
-
76
-
77
-
78
-
79
-
80
-
81
-
82
-
83
-
84
-
85
-
86
-
87
-
88
-
89
-
90
-
91
-
92
-
93
-
94
-
95
-
96
-
97
-
98
-
99
-
100
-
101
-
102
-
103
-
104
-
105
-
106
-
107
-
108
-
109
-
110
-
111
-
112
-
113
-
114
-
115
-
116
-
117
-
118
-
119
-
120
-
121
-
122
-
123
-
124
-
125
-
126
-
127
-
128
-
129
-
130
-
131
-
132
-
133
-
134
-
135
-
136
 |
 |