Pioneer AVH-P8400BH Owner's Manual - Page 67
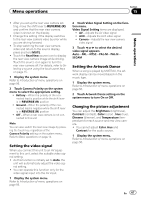
Setting the video signal, Setting the Artwork Dance, Changing the picture adjustment
 |
View all Pioneer AVH-P8400BH manuals
Add to My Manuals
Save this manual to your list of manuals |
Page 67 highlights
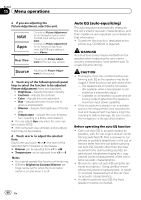
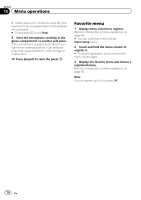
Menu operations Section 15 Menu operations ! After you set up the rear view camera setting, move the shift lever to REVERSE (R) and confirm that the rear view camera video is shown on the display. ! Change this setting if the display switches to the rear view camera video by error while you are driving forward. ! To stop watching the rear view camera video and return to the source display, press and hold MUTE. ! Touch the RearView source icon to display the rear view camera image while driving. Touch the source icon again to turn the rear view camera off. For details, refer to Selecting a source using the touch panel keys on page 15. 1 Display the system menu. Refer to Introduction of menu operations on page 56. 2 Touch Camera Polarity on the system menu to select the appropriate setting. ! Battery - When the polarity of the connected lead is positive while the shift lever is in REVERSE (R) position ! Ground - When the polarity of the connected lead is negative while the shift lever is in REVERSE (R) position ! Off - When a rear view camera is not connected to this unit Note You can also switch the rear view image by pressing the touch key, regardless of the Camera Polarity setting on the system menu. Refer to Basic operations on page 14. Setting the video signal When you connect this unit to an AV equipment to this unit, select the suitable video signal setting. ! As this function is initially set to Auto, the unit will automatically adjust the video signal setting. ! You can operate this function only for the video signal input into the AV input. 1 Display the system menu. Refer to Introduction of menu operations on page 56. 2 Touch Video Signal Setting on the function menu. Video Signal Setting items are displayed. ! AV - Adjusts the AV video signal ! AUX - Adjusts the AUX video signal ! Camera - Adjusts the rear view camera video signal 3 Touch c or d to select the desired video signal appears. Auto-PAL-NTSC-PAL-M-PAL-N- SECAM Setting the Artwork Dance When a song is played by MIXTRAX, the artwork display can be moved based on the music type. 1 Display the system menu. Refer to Introduction of menu operations on page 56. 2 Touch Artwork Dance setting on the system menu to turn On or Off. Changing the picture adjustment You can adjust the Brightness (brightness), Contrast (contrast), Color (color) , Hue (hue), Dimmer (dimmer), and Temperature (temperature) for each source and rear view camera. ! You cannot adjust Color, Hue and Contrast for the audio source. 1 Display the system menu. Refer to Introduction of menu operations on page 56. En 67
-
 1
1 -
2
-
3
-
4
-
5
-
6
-
7
-
8
-
9
-
10
-
11
-
12
-
13
-
14
-
15
-
16
-
17
-
18
-
19
-
20
-
21
-
22
-
23
-
24
-
25
-
26
-
27
-
28
-
29
-
30
-
31
-
32
-
33
-
34
-
35
-
36
-
37
-
38
-
39
-
40
-
41
-
42
-
43
-
44
-
45
-
46
-
47
-
48
-
49
-
50
-
51
-
52
-
53
-
54
-
55
-
56
-
57
-
58
-
59
-
60
-
61
-
 62
62 -
 63
63 -
 64
64 -
 65
65 -
 66
66 -
 67
67 -
 68
68 -
 69
69 -
 70
70 -
 71
71 -
 72
72 -
73
-
74
-
75
-
76
-
77
-
78
-
79
-
80
-
81
-
82
-
83
-
84
-
85
-
86
-
87
-
88
-
89
-
90
-
91
-
92
-
93
-
94
-
95
-
96
-
97
-
98
-
99
-
100
-
101
-
102
-
103
-
104
-
105
-
106
-
107
-
108
-
109
-
110
-
111
-
112
-
113
-
114
-
115
-
116
 |
 |
