Pioneer AVH-P8400BH Owner's Manual - Page 69
Performing auto EQ - drivers
 |
View all Pioneer AVH-P8400BH manuals
Add to My Manuals
Save this manual to your list of manuals |
Page 69 highlights
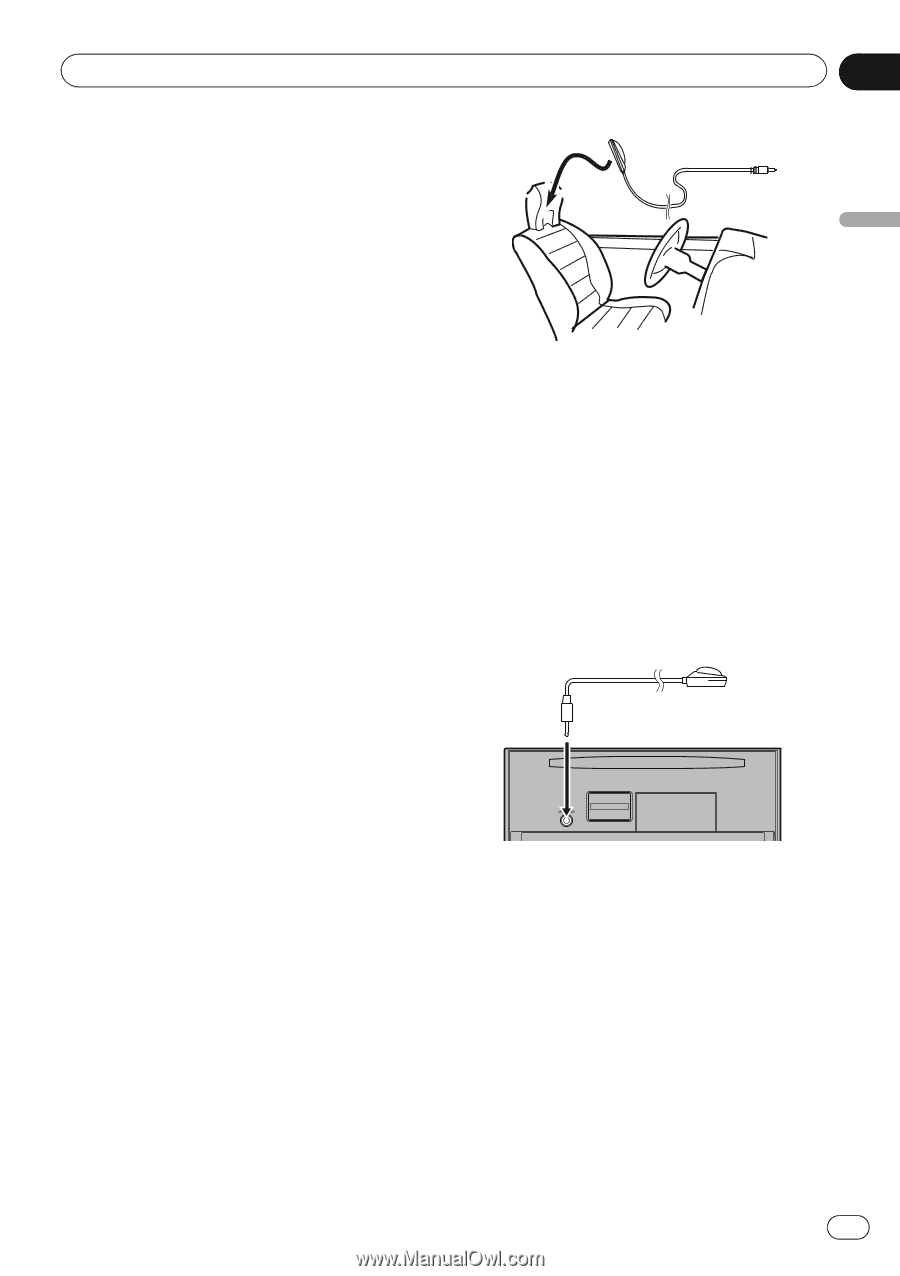
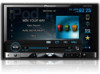
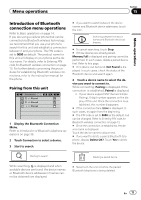
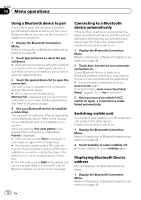
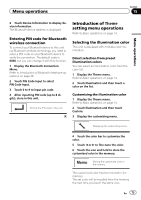
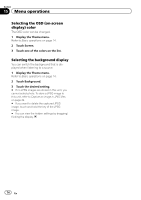
Menu operations Section 15 Menu operations ! When this unit is connected to a power amp with input level control, auto EQ may not be possible if the power amp's input level is set below the standard level. ! When this unit is connected to a power amp with an LPF, turn this LPF off before performing auto EQ. Also set the cut-off frequency for the built-in LPF of an active subwoofer to the highest frequency. ! The distance has been calculated by computer to be the optimum delay to give accurate results for the circumstances, so please continue to use this value. - The reflected sound within the car is strong and delays occur. - The LPF on active subwoofers or external amps delay the lower sounds. ! Auto EQ changes the audio settings as follows: - The fader/balance settings return to the center position. (Refer to Using fader/ balance adjustment on page 57.) - The equalizer curve switches to Flat. (Refer to Recalling equalizer curves on page 57.) - The front, center and rear speakers will automatically be adjusted to a high pass filter setting. ! Previous settings for auto EQ will be overwritten. 3 Turn the ignition switch to ON or ACC. If the car's air conditioner or heater is turned on, turn it off. Noise from the fan in the air conditioner or heater may prevent correct auto EQ. 4 Display the system menu. Refer to Introduction of menu operations on page 56. 5 Touch Auto EQ Measurement to enter auto EQ measurement mode. 6 Plug the microphone into the microphone input jack on this unit. Performing auto EQ 1 Stop the car in a place that is quiet, close all the doors, windows and sun roof, and then turn the engine off. If the engine is left running, engine noise may prevent correct auto EQ. 2 Fix the optional microphone in the center of the headrest of the driver's seat, facing forward. The auto EQ may differ depending on where you place the microphone. If desired, place the microphone on the front passenger seat to carry out auto EQ. 7 Touch Start to start auto EQ. 8 When the 10-second countdown starts, get out of the car and close the door within 10 seconds. A measurement tone (noise) is emitted from the speakers, and auto EQ measurement begins. When auto EQ is completed, The measurement has finished. Please disconnect the microphone and then push HOME key. is displayed. When the car's interior acoustic characteristics cannot be measured correctly, an error message will be displayed. (Refer to Understanding auto EQ error messages on page 97.) En 69
-
 1
1 -
2
-
3
-
4
-
5
-
6
-
7
-
8
-
9
-
10
-
11
-
12
-
13
-
14
-
15
-
16
-
17
-
18
-
19
-
20
-
21
-
22
-
23
-
24
-
25
-
26
-
27
-
28
-
29
-
30
-
31
-
32
-
33
-
34
-
35
-
36
-
37
-
38
-
39
-
40
-
41
-
42
-
43
-
44
-
45
-
46
-
47
-
48
-
49
-
50
-
51
-
52
-
53
-
54
-
55
-
56
-
57
-
58
-
59
-
60
-
61
-
62
-
63
-
 64
64 -
 65
65 -
 66
66 -
 67
67 -
 68
68 -
 69
69 -
 70
70 -
 71
71 -
 72
72 -
 73
73 -
 74
74 -
75
-
76
-
77
-
78
-
79
-
80
-
81
-
82
-
83
-
84
-
85
-
86
-
87
-
88
-
89
-
90
-
91
-
92
-
93
-
94
-
95
-
96
-
97
-
98
-
99
-
100
-
101
-
102
-
103
-
104
-
105
-
106
-
107
-
108
-
109
-
110
-
111
-
112
-
113
-
114
-
115
-
116
 |
 |