Pioneer AVH-P8400BH Owner's Manual - Page 75
Setting rear monitor output, Adjusting the response, positions of the touch panels, Touch Panel
 |
View all Pioneer AVH-P8400BH manuals
Add to My Manuals
Save this manual to your list of manuals |
Page 75 highlights
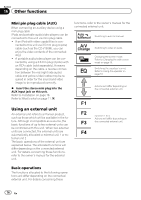
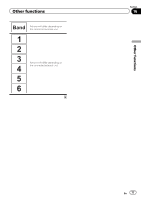
Other functions Section 16 Other functions Setting rear monitor output The output source for the rear monitor can be switched to the following: ! Mirror - The source on the front screen of this unit Disc - The video and sound from the disc USB/iPod 1 - The video and sound from the USB storage device SD - The video and sound from the SD card AV - The video and sound from AV input Off- No source Notes ! You cannot play DivX files on the rear and front monitors at the same time. ! The port that supports the rear monitor will only be USB input 1. ! USB/iPod 1 and SD are compatible DivX/ MPEG-4/WMV/H.264 only. ! You cannot use this function while using MIX- TRAX. If you use MIXTRAX while this function is in use, this function will turn off. Adjusting the response positions of the touch panels (Touch Panel Calibration) If you feel that the touch panel keys on the screen deviate from the actual positions that respond to your touch, adjust the response positions of the touch panel. There are two adjustment methods: 4-point adjustment, in which you touch four corners of the screen; and 16-point adjustment, in which you make fine-adjustments on the entire screen. ! Park your car in a safe place and use this function. Do not operate it while driving. ! Touch the screen gently for adjustment. Forcefully pressing the touch panel may damage the touch panel. Do not use a sharp pointed tool such as a ballpoint pen or mechanical pen. Doing so may damage the screen. ! If the touch panel cannot be adjusted properly, consult your local Pioneer dealer. 1 Turn the unit off. Refer to Basic operations on page 14. 2 Press and hold HOME to start Touch Panel Calibration. The 4-point touch panel adjustment screen appears. When 2-point appears at once, touch both. 3 Touch each of the arrows on the four corners of the screen. # To cancel the adjustment, press and hold HOME. 4 Press HOME to complete 4-point adjustment. Data for the adjusted position is saved. # Do not turn off the engine while the data is being saved. 5 Press HOME to proceed to 16-point adjustment. The 16-point touch panel adjustment screen appears. # To cancel the adjustment, press and hold HOME. 6 Gently touch the center of the + mark displayed on the screen. After you touch all the marks, the data for the adjusted position is saved. # Do not turn off the engine while the data is being saved. 7 Press and hold HOME to complete the adjustment. Using an AUX source A separately sold auxiliary device such as a VCR or portable device can be connected to this unit. When connected, the auxiliary device is automatically recognized as an AUX source and is assigned to AUX. About AUX connection methods You can connect auxiliary devices to this unit. En 75
-
 1
1 -
2
-
3
-
4
-
5
-
6
-
7
-
8
-
9
-
10
-
11
-
12
-
13
-
14
-
15
-
16
-
17
-
18
-
19
-
20
-
21
-
22
-
23
-
24
-
25
-
26
-
27
-
28
-
29
-
30
-
31
-
32
-
33
-
34
-
35
-
36
-
37
-
38
-
39
-
40
-
41
-
42
-
43
-
44
-
45
-
46
-
47
-
48
-
49
-
50
-
51
-
52
-
53
-
54
-
55
-
56
-
57
-
58
-
59
-
60
-
61
-
62
-
63
-
64
-
65
-
66
-
67
-
68
-
69
-
 70
70 -
 71
71 -
 72
72 -
 73
73 -
 74
74 -
 75
75 -
 76
76 -
 77
77 -
 78
78 -
 79
79 -
 80
80 -
81
-
82
-
83
-
84
-
85
-
86
-
87
-
88
-
89
-
90
-
91
-
92
-
93
-
94
-
95
-
96
-
97
-
98
-
99
-
100
-
101
-
102
-
103
-
104
-
105
-
106
-
107
-
108
-
109
-
110
-
111
-
112
-
113
-
114
-
115
-
116
 |
 |
