Pioneer VSX-1021-K Owner's Manual - Page 79
Status messages, Causes, Remedy - network reset
 |
UPC - 884938132978
View all Pioneer VSX-1021-K manuals
Add to My Manuals
Save this manual to your list of manuals |
Page 79 highlights
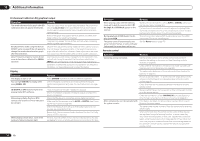
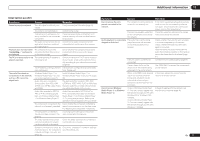
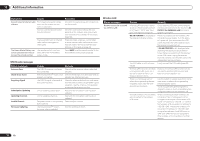
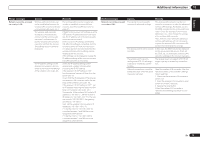
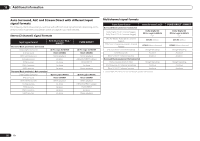
Additional information 13 Status messages Network cannot be accessed via wireless LAN. Causes Wireless LAN connections cannot be established between the wireless LAN converter and base unit (wireless LAN router, etc.). The wireless LAN converter is properly connected to the receiver and the wireless LAN converter's indicators are lit, but the wireless LAN converter cannot be set from the receiver (the settings screen cannot be displayed). The IP address settings of the receiver and wireless LAN converter do not match the settings of the wireless LAN router, etc. Remedy The wireless LAN converter must be set in order to establish wireless LAN connections. See Wireless LAN Converter on page 67 . If DHCP in the receiver's IP settings is set to OFF and the IP address has been set manually, the IP address set in the wireless LAN converter may not match. In the receiver's IP settings, set DHCP to ON. After the setting is completed, turn the receiver's power off. Next, turn the receiver's power back on and check whether the wireless LAN converter's settings can be displayed with the receiver. If the settings can be displayed, change the IP address settings of the receiver and wireless LAN converter as necessary. Check the IP address settings of the receiver and wireless LAN converter (including the DHCP setting). If the receiver's DHCP setting is "ON", turn the receiver's power off, then turn the power back on. Check that the IP addresses of the receiver and wireless LAN converter match the settings of the wireless LAN router, etc. If the receiver's DHCP setting is "OFF", set an IP address matching the network of the base unit (wireless LAN router, etc.). For example, if the wireless LAN router's IP address is "192.168.1.1", set the receiver's IP address to "192.168.1.XXX" (*1), the subnet mask to "255.255.255.0", the gateway and DNS to "192.168.1.1". Next, set the wireless LAN converter's IP address to "192.168.1.249" (*2). (*1) Set the "XXX" in "192.168.1.XXX" to a number between 2 and 248 that is not assigned to other devices. (*2) Set the "249" in "192.168.1.249" to a number between 2 and 249 that is not assigned to other devices. Status messages Network cannot be accessed via wireless LAN. Causes Remedy Try making the wireless LAN converter's advanced settings. The wireless LAN converter can be connected to a computer to make the advanced wireless LAN settings. For details, see the CD-ROM included for the wireless LAN converter. Check the settings of the wireless LAN router, etc., then change the settings of the wireless LAN converter. Note, however, that making the advanced wireless LAN settings will not necessarily improve the wireless LAN environment. Be careful when changing the settings. The access point is set to conceal the SSID. In this case, the SSID may not be displayed on the access point list screen. If not, set the SSID, etc., by making the wireless LAN converter settings on the receiver manually. The access point's security settings use WEP 152-bit length code key or shared key authentication. The receiver does not support WEP 152-bit length code key or shared key authentication. Network connections cannot be established even when the above measures are taken. Reset the wireless LAN converter. After this, redo the wireless LAN converter's settings. About resetting 1. Check that the wireless LAN converter's power is on. 2. Press the wireless LAN converter's reset button for at least 3 seconds. 3. Release the reset button. When the wireless LAN converter is restarted, the resetting procedure is completed. En 79
-
 1
1 -
2
-
3
-
4
-
5
-
6
-
7
-
8
-
9
-
10
-
11
-
12
-
13
-
14
-
15
-
16
-
17
-
18
-
19
-
20
-
21
-
22
-
23
-
24
-
25
-
26
-
27
-
28
-
29
-
30
-
31
-
32
-
33
-
34
-
35
-
36
-
37
-
38
-
39
-
40
-
41
-
42
-
43
-
44
-
45
-
46
-
47
-
48
-
49
-
50
-
51
-
52
-
53
-
54
-
55
-
56
-
57
-
58
-
59
-
60
-
61
-
62
-
63
-
64
-
65
-
66
-
67
-
68
-
69
-
70
-
71
-
72
-
73
-
 74
74 -
 75
75 -
 76
76 -
 77
77 -
 78
78 -
 79
79 -
 80
80 -
 81
81 -
 82
82 -
 83
83 -
 84
84 -
85
-
86
-
87
-
88
-
89
-
90
-
91
-
92
-
93
-
94
-
95
-
96
-
97
-
98
-
99
-
100
-
101
-
102
-
103
-
104
-
105
-
106
-
107
-
108
-
109
-
110
-
111
-
112
-
113
-
114
-
115
-
116
-
117
-
118
-
119
-
120
-
121
-
122
-
123
-
124
-
125
-
126
-
127
-
128
-
129
-
130
-
131
-
132
-
133
-
134
-
135
-
136
-
137
-
138
-
139
-
140
-
141
-
142
-
143
-
144
-
145
-
146
-
147
-
148
-
149
-
150
-
151
-
152
-
153
-
154
-
155
-
156
-
157
-
158
-
159
-
160
-
161
-
162
-
163
-
164
-
165
-
166
-
167
-
168
-
169
-
170
-
171
-
172
-
173
-
174
-
175
-
176
-
177
-
178
-
179
-
180
-
181
-
182
-
183
-
184
 |
 |
