Samsung SCD303 User Manual (user Manual) (English, French) - Page 77
Transfert de données IEEE 1394, IEEE 1394 Data Transfer
 |
View all Samsung SCD303 manuals
Add to My Manuals
Save this manual to your list of manuals |
Page 77 highlights
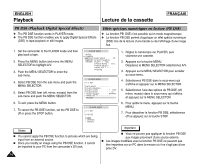
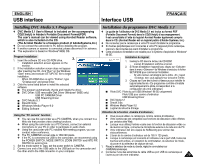
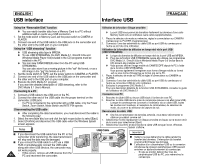
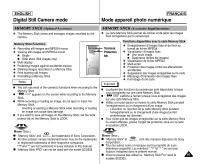
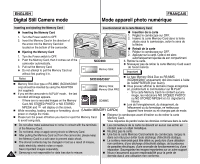
ENGLISH IEEE 1394 Data Transfer FRANÇAIS Transfert de données IEEE 1394 Transferring IEEE1394 (i.LINK)-DV standard data connections Connecting to a DV device ✤ Connecting with other standard products. I A standard DV connection is quite simple. If a product has a DV port, you can transfer data by connecting to the DV port using an ieee cable. !!! Please be careful since there are two types of DV ports, (4pin, 6pin). This camcorder has a 4pin terminal. ✤ With a digital connection, video and audio signals are transmitted in digital format, allowing high quality images to be transferred. Connecting to a PC ✤ If you want to transmit data to a PC, you must install a IEEE 1394 add-on card onto the PC. (not supplied) ✤ The frame rate recorded for video capturing is dependent on the capacity of the PC. Notes I When you transmit data from the camcorder to another DV device, some functions may not work. If this occurs, please reconnect the DV cable or turn the power OFF and ON again. I When you transmit data from the camcorder to PC, PC function button is not available in M.PLAY mode. I Do not use the camcorder and IEEE1394 together as this will cause IEEE1394 to shut off. G System requirements I CPU : faster Intel® Pentium III™ 450Mhz compatible. I Operating system : Windows® 98SE, ME, XP, Mac OS (9.1~10.2) I Main memory : more than 64 MB RAM I IEEE1394 add-on card or built in IEEE1394 card Recording with a DV connection cable 1. Set the power switch to PLAYER mode. 2. Connect the DV cable (not supplied) from the DV jack of the camcorder to the DV jack of the other DV device. I Make sure that DV IN appears on the screen. 3. Press the START/STOP button to begin REC PAUSE mode. I PAUSE is displayed on the OSD. 4. Start playback on the other DV device while you monitor the picture. 5. Press the START/STOP button to start recording. I If you want to pause recording momentarily, press the START/STOP button again. 6. To stop recording, press the (STOP) button. Notes I When using this camcorder as a recorder, the pictures that appear on a monitor may seem uneven, however recorded pictures will not be affected. I Operation is not guaranteed for all computer environments recommended above. Connexion pour transfert de données numériques-IEEE 1394 (i.LINK) Connexion à un autre appareil vidéo numérique ✤ Connexion à d'autres appareils vidéo numériques standard. I Cette connexion est très simple. Si l'appareil comporte un port DV, vous pouvez transférer des données en vous connectant au port à l'aide d'un câble adapté. !!! Attention: il existe deux types de ports DV, à savoir 4 et 6 broches (a et b). Celui de ce caméscope est à 4 broches. ✤ Sur une connexion numérique, les signaux vidéo et audio sont transmis au format numérique et offrent une excellente qualité d'image. Connexion à un PC ✤ Si vous voulez transférer des données à un PC, vous devez installer une carte IEEE 1394 sur votre PC (non fournie). ✤ Le débit d'images enregistrées lors de la capture vidéo dépend des capacités du PC. Important I Lorsque vous transférez des données du caméscope vers un autre périphérique DV, certaines fonctions sont désactivées. Dans ce cas, reconnectez le câble DV ou éteignez le caméscope et rallumez-le. I Lorsque vous transférez des données du caméscope vers un PC, la touche de fonction PC n'est pas disponible en mode M.PLAY. I Ne pas utiliser la fonction PC Camera et la connectique IEEE1394 en même temps. Cela couperait le circuit IEEE1394. G Configuration système requise I Unité centrale: Intel® Pentium III™ 450 MHz ou compatible. I Système d'exploitation: Windows® 98 SE, ME, XP, Mac OS (9.1~10.2) I Mémoire vive : plus de 64 Mo de RAM I Carte IEEE 1394 additionnelle ou intégrée Enregistrement avec un câble de connexion DV 1. Réglez le commutateur sur PLAYER. 2. Connectez le câble DV (non fourni) au port DV du caméscope et au port DV d'un autre appareil vidéo numérique. I Assurez-vous que DV IN apparaît bien à l'écran. 3. Appuyez sur START/STOP pour commencer USB DV l'enregistrement en mode REC PAUSE. I L'indication PAUSE est affichée. 4. Commencez la lecture sur l'autre appareil DV pendant que l'image apparaît. 5. Appuyez sur la touche START/STOP pour commencer l'enregistrement. I Si vous souhaitez arrêter l'enregistrement temporairement, appuyez sur START/STOP. 6. Pour arrêter l'enregistrement, appuyez sur la touche (STOP). Important I Lorsque vous utilisez ce caméscope pour enregistrer des images transférées, leur affichage sur un moniteur peut être affecté. Cependant, la qualité des images elles- mêmes n'est pas remise en cause. I Le fonctionnement n'est pas garanti pour toutes les configurations recommandées 77 mentionnées ci-dessus.
-
 1
1 -
2
-
3
-
4
-
5
-
6
-
7
-
8
-
9
-
10
-
11
-
12
-
13
-
14
-
15
-
16
-
17
-
18
-
19
-
20
-
21
-
22
-
23
-
24
-
25
-
26
-
27
-
28
-
29
-
30
-
31
-
32
-
33
-
34
-
35
-
36
-
37
-
38
-
39
-
40
-
41
-
42
-
43
-
44
-
45
-
46
-
47
-
48
-
49
-
50
-
51
-
52
-
53
-
54
-
55
-
56
-
57
-
58
-
59
-
60
-
61
-
62
-
63
-
64
-
65
-
66
-
67
-
68
-
69
-
70
-
71
-
 72
72 -
 73
73 -
 74
74 -
 75
75 -
 76
76 -
 77
77 -
 78
78 -
 79
79 -
 80
80 -
 81
81 -
 82
82 -
83
-
84
-
85
-
86
-
87
-
88
-
89
-
90
-
91
-
92
-
93
-
94
-
95
-
96
-
97
-
98
-
99
-
100
-
101
-
102
-
103
-
104
-
105
-
106
-
107
 |
 |