Sharp AR-M205 AR-M160 AR-M205 Operation Manual - Page 19
the [PAPER SIZE ENTER] key. - printer driver
 |
View all Sharp AR-M205 manuals
Add to My Manuals
Save this manual to your list of manuals |
Page 19 highlights
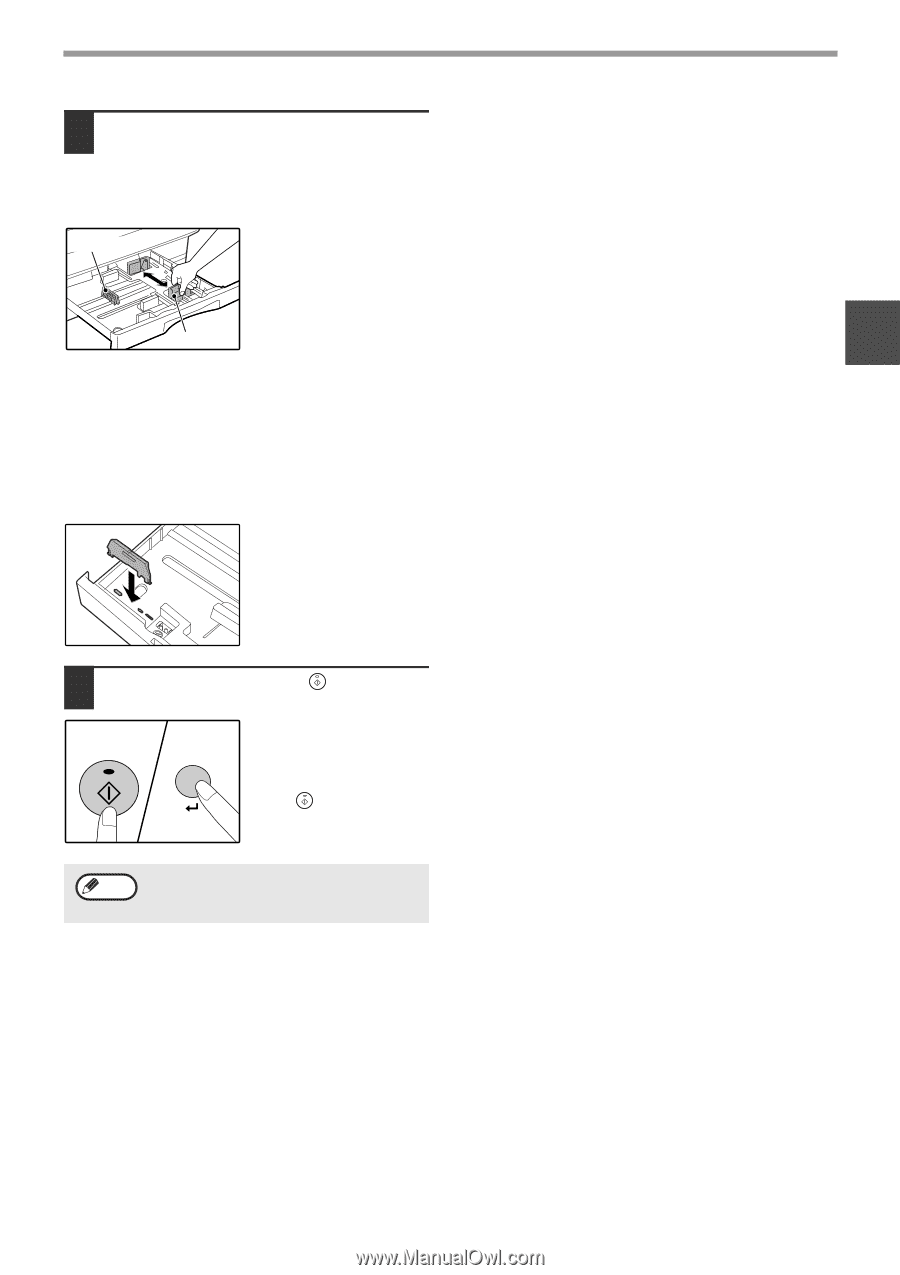
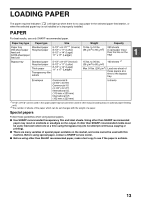
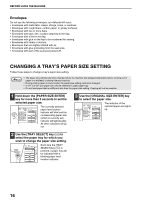
BEFORE USING THE MACHINE 4 Squeeze the lock lever of the front guide and slide the front guide to match the width of the paper, and move the left guide to the appropriate slot as marked on the tray. Left guide Front guide • The front guide is a slide-type guide. Grasp the locking knob on the guide and slide the guide to the indicator line of the paper to be loaded. • The left guide is an insert-type guide. Remove it and then insert it at the indicator line of the paper to be loaded. • When using 11" x 17" sized paper store the left guide in the slot at the left front of the paper tray. Important points when using the printer mode • Make sure that the tray's paper size setting is the same as the tray's paper size setting in the printer driver. For example, if the tray's paper size setting is 8-1/2" x 11"R, set "Setting Paper Size" to "Letter-R". For more information, see "CONFIGURING THE PRINTER DRIVER" (p.11) in the "Software Setup Guide". • If the dual function board is not installed, printing will not take place correctly if the tray paper size setting is 8-1/2" x 11"R. To prevent incorrect printing when the tray paper size setting is 8-1/2" x 11"R, specify the tray to be used and set the tray's paper size to 8-1/2" x 11"R in the printer driver. 1 5 Press the [START] key ( ) and then the [PAPER SIZE ENTER] key. START To change the paper size setting of another tray, repeat steps 2 to 5 after pressing the [START] key ( ). Note Affix the paper size label for the paper size selected in step 3 to the label position on the right end of the tray. 17
-
 1
1 -
2
-
3
-
4
-
5
-
6
-
7
-
8
-
9
-
10
-
11
-
12
-
13
-
 14
14 -
 15
15 -
 16
16 -
 17
17 -
 18
18 -
 19
19 -
 20
20 -
 21
21 -
 22
22 -
 23
23 -
 24
24 -
25
-
26
-
27
-
28
-
29
-
30
-
31
-
32
-
33
-
34
-
35
-
36
-
37
-
38
-
39
-
40
-
41
-
42
-
43
-
44
-
45
-
46
-
47
-
48
-
49
-
50
-
51
-
52
-
53
-
54
-
55
-
56
-
57
-
58
-
59
-
60
-
61
-
62
-
63
-
64
-
65
-
66
-
67
-
68
-
69
-
70
-
71
-
72
-
73
-
74
-
75
-
76
-
77
-
78
-
79
-
80
-
81
-
82
-
83
-
84
-
85
-
86
-
87
-
88
-
89
-
90
-
91
-
92
-
93
-
94
-
95
-
96
 |
 |