Sony BVM-HX3110 Operating Instructions - Page 9
About error/warning signals of the indicator, About operations using the Sony monitor control
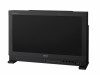 |
View all Sony BVM-HX3110 manuals
Add to My Manuals
Save this manual to your list of manuals |
Page 9 highlights
Power status Off (main power is Off.) Off (main power is On.) Sleep (page 9) During power-up On Indicator display Off Lights up in red (when the power status is Sleep, the STATUS indicator also lights up in red). Flashes in green Lights up in green Notes The switch does not completely disconnect the power supply to the unit. If a no input-signal state continues for 60 minutes, the monitor is automatically turned off by the auto power-off function. To turn on the monitor, press the (Power) switch. To change the settings, see "Auto Power Down" (page 69) of "System Setting" in the "System" menu. About error/warning signals of the indicator While the unit is in use, the (Power) switch indicator or CAUTION indicator of the front panel may show error or warning signals. If an error display appears, refer to Sony qualified service personnel. Error display CAUTION indicator - - Power indicator Symptom Flashes in red (every second) Power abnormality, circuit board abnormality, sensor abnormality Flashes in red (every two seconds) Fan abnormality, circuit board abnormality, backlight abnormality Warning display CAUTION indicator Flashes in amber (every second) 1) Power indicator - Flashes in amber - (every two seconds) 2) Lights up in amber - Symptom Decreases the brightness to protect the panel from overheating The IP input LAN1/LAN2 is in Link down. ABL is working. 1) When using in the HDR display, regardless of the input signal, the screen brightness may decrease when the protective function for the LCD panel activates. Keep the temperature of the peripheral environment of the unit around 25 °C (77 °F) to avoid brightness decrease due to the protection function. For the installation environment of the unit, see "On Installation" (page 3). For details on the HDR (High Dynamic Range) display, see "On High Brightness Display" (page 5). 2) Displayed when LAN1/LAN2 of the IP input is set to Enable. About operations using the Sony monitor control unit (the controller) When the optional controller (BKM-17R) is connected, the following operations are possible using the controller buttons. Menu operation buttons Button MENU button ENTER button UP button DOWN button Operations When the on-screen menu is not displayed, press the button to display the menu. Press again to clear the menu. When the menu is displayed, press the button to reset the value of an item to the previous value. When the menu is displayed, press the button to confirm a menu item or setting value. However, displaying the signal format by pressing and holding the button is not available. When the menu is displayed, press the button to select a menu item or setting value. Power button Button MONITOR switch Operations Switches the unit status. The unit enters sleep mode if this is pressed when the unit is in operating mode. The Power indicator and STATUS indicator on the front panel of the unit light up in red. Press the button for On mode when the unit is in sleep mode. Rotary encoder/MANUAL buttons Knob CONTRAST knob BRIGHT knob CHROMA knob PHASE knob Operations Adjust the contrast. Adjust the brightness. Adjust the color intensity. Available only in the color temperature adjustment menu. Not available in other cases. Button CONTRAST MANUAL button BRIGHT MANUAL button CHROMA MANUAL button Operations Press to manually adjust the contrast. Press to manually adjust the brightness. Press to manually adjust the color intensity. 9
-
 1
1 -
2
-
3
-
 4
4 -
 5
5 -
 6
6 -
 7
7 -
 8
8 -
 9
9 -
 10
10 -
 11
11 -
 12
12 -
 13
13 -
 14
14 -
15
-
16
-
17
-
18
-
19
-
20
-
21
-
22
-
23
-
24
-
25
-
26
-
27
-
28
-
29
-
30
-
31
-
32
-
33
-
34
-
35
-
36
-
37
-
38
-
39
-
40
-
41
-
42
-
43
-
44
-
45
-
46
-
47
-
48
-
49
-
50
-
51
-
52
-
53
-
54
-
55
-
56
-
57
-
58
-
59
-
60
-
61
-
62
-
63
-
64
-
65
-
66
-
67
-
68
-
69
-
70
-
71
-
72
-
73
-
74
-
75
-
76
-
77
-
78
-
79
-
80
-
81
-
82
-
83
-
84
-
85
-
86
-
87
-
88
-
89
-
90
-
91
-
92
-
93
-
94
-
95
-
96
-
97
-
98
-
99
-
100
-
101
-
102
-
103
-
104
-
105
-
106
-
107
-
108
-
109
-
110
-
111
-
112
-
113
-
114
-
115
-
116
-
117
-
118
-
119
-
120
-
121
-
122
-
123
-
124
-
125
-
126
-
127
-
128
-
129
-
130
-
131
-
132
-
133
-
134
-
135
-
136
-
137
-
138
-
139
-
140
-
141
 |
 |
