Sony DSR 11 Operating Instructions
Sony DSR 11 - Professional Editing Video Cassete recorder/player Manual
 |
View all Sony DSR 11 manuals
Add to My Manuals
Save this manual to your list of manuals |
Sony DSR 11 manual content summary:
- Sony DSR 11 | Operating Instructions - Page 1
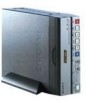
DSR-11 3-065-956-13(1) Digital Videocassette Recorder Operating Instructions GB Mode d'emploi FR DSR-11 2000 Sony Corporation - Sony DSR 11 | Operating Instructions - Page 2
Information Services Center 6900-29 Daniels Parkway, PMB 330 Fort Myers, Florida 33912 Declaration of Conformity Trade Name: Model: Responsible Party: Address: Telephone Number: SONY DSR-11 Sony Electronics Inc. 1 Sony Drive, Park Ridge, NJ 07656 U.S.A 201-930-6972 This device complies with Part - Sony DSR 11 | Operating Instructions - Page 3
of the copyright laws. Also, use of this recorder with cable television transmission may require authorization from the cable television transmission and/or program owner. Precautions • Do not damage the power cord and AC adaptor. • Use only the supplied power cord and supplied AC adaptor. • Do not - Sony DSR 11 | Operating Instructions - Page 4
) DVCAM Format 6 (GB) Other Features 7 (GB) Location and Function of Parts 8 (GB) Front Panel 8 (GB) Rear Panel 11 (GB) Supplied Remote Commander 13 (GB) Notes on Video Cassettes 15 (GB) Preparations 17 (GB) Power Preparations 17 (GB) Inserting/Ejecting Cassettes 17 (GB) Notes on Recording - Sony DSR 11 | Operating Instructions - Page 5
Chapter 4 Maintenance Appendix Troubleshooting 50 (GB) Alarm Messages 51 (GB) Notes on Use 52 (GB) Compatibility of DVCAM and DV Format 55 (GB) Specifications 58 (GB) Glossary 60 (GB) Index 61 (GB) GB English 5 Table of Contents (GB) - Sony DSR 11 | Operating Instructions - Page 6
. The DSR-11's main features are described below. DVCAM Format DVCAM is based on the consumer DV format, which uses the 4:1:1 component digital format (NTSC) or the 4:2:0 format (PAL), and provides a 1/4-inch digital recording format for professional use. High picture quality, high stability Video - Sony DSR 11 | Operating Instructions - Page 7
by remote control from a CONTROL-S system remote control unit, the DSRM20 (not supplied). Superimposition function Time code, operation mode indications, menus, error messages, and other text data can be superimposed and output in analog video signals. High-speed search function When you use an - Sony DSR 11 | Operating Instructions - Page 8
sensor 3 INPUT SELECT selector 2 REMOTE CONTROL switch 1 Tape transport control section (see page 9 (GB)) 1 Cassette lid To insert/eject a cassette, open the lid. For details of usable cassettes, see "Notes on Video Cassettes" on page 15 (GB). 2 REMOTE CONTROL switch Selects whether the unit is - Sony DSR 11 | Operating Instructions - Page 9
record in the LP mode of the consumer DV format. Only recording in the SP mode is available. • To set the unit to recording pause mode with the remote control unit (DSRM-20, not supplied change the tape transport mode in FF/REW SPD on the VTR SET menu. For details on the VTR SET menu, see "VTR SET - Sony DSR 11 | Operating Instructions - Page 10
when a digital video cassette is loaded. Even if the unit is in the standby mode, the indicator lights as long as the cassette is inside of the unit. While the cassette is being ejected, the indicator flashes. 4 DVCAM indicator Lights when the unit is playing back a tape recorded in DVCAM format - Sony DSR 11 | Operating Instructions - Page 11
the S VIDEO connector on the unit. 4 DC IN 12V connector Connects to an AC power outlet using the supplied AC power adaptor and power cord. 5 AUTO REPEAT switch Used to repeat the playback of all or a part of the tape. For details on the auto repeat function, see "Auto Repeat" on page 32 (GB). 11 - Sony DSR 11 | Operating Instructions - Page 12
during recording. 8 RESET button Press this button to initialize the internal clock and all menu items. Press this button with the tip of a ballpoint pen or similar tool. 9 CONTROL S jack Connects to a remote control unit (DSRM-20, not supplied) for controlling this unit. Note When using a CONTROL - Sony DSR 11 | Operating Instructions - Page 13
a counter reset button on a Sony remote commander while pointing it toward this unit during recording or in the recording pause mode, the time code will be reset to zero. • This button functions only when the unit or other Sony device is recording in the DVCAM format. 2 SEARCH SELECT buttons Press - Sony DSR 11 | Operating Instructions - Page 14
tape" on page 25 (GB). 0 Buttons for menu operation Press these buttons to operate the menu. qa REC buttons When you press these buttons at the same time, the REC and PLAY indicators light and recording begins. qs FF button qd STOP button Note When using the Remote Commander, set the REMOTE CONTROL - Sony DSR 11 | Operating Instructions - Page 15
unit. The PDV-184 can record programs for 184 minutes (DVCAM format) / 270 minutes (DV format) and the PDVM-40 can record for 40 minutes (DVCAM format) / 60 minutes (DV format). You can get the highest quality pictures with this digital videocassette recorder using DVCAM cassettes. You may not be - Sony DSR 11 | Operating Instructions - Page 16
Notes on Video Cassettes Cassette memory To save a recording Cassette memory is an optional feature that is mounted on some Standard DVCAM/DV cassettes and Mini DVCAM/Mini DV cassettes. When you record a program, the recording date and time, and the programs' position on the tape are stored - Sony DSR 11 | Operating Instructions - Page 17
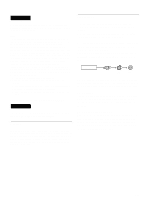
wall outlet. When you undo these connections, be sure to disconnect the power cord from the wall outlet first. DSR-11 to DC IN 12V connector AC adaptor AC-SU1 (supplied) to wall outlet Power cord (supplied) Inserting/Ejecting Cassettes To insert a cassette Notes • Do not insert the cassette - Sony DSR 11 | Operating Instructions - Page 18
and Recording Preparations 2 After checking the tape for slack, hold the cassette so that the tape window is facing upward, then insert it into the unit. Mini cassette Insert the mini cassette into the center of the cassette compartment. Standard cassette To eject the cassette Tape window facing - Sony DSR 11 | Operating Instructions - Page 19
video tape, etc. Copyright precautions On recording You cannot record any software having copyright protection signals on this unit. If you start recording protected video unit can record and play back tapes recorded in DVCAM format. It can also record and play back tapes recorded in DV format (SP - Sony DSR 11 | Operating Instructions - Page 20
Monitor Player DSR-11 to the DV jack Chapter 2 Playback and Recording i.LINK cable (DV cable) (not supplied) l: Signal flow Notes •Set DV EE OUT on the VTR SET menu to OFF. For details on the VTR SET menu, see "VTR SET menu" on page 43 (GB). • With the DV connection, data codes (recording date - Sony DSR 11 | Operating Instructions - Page 21
for input and output. Recorder Other VCR Monitor Player DSR-11 to the DV jack to the LANC jack LANC cable (not supplied) i.LINK cable (DV cable) (not supplied) l: Signal flow Notes • Set DV EE OUT on the VTR SET menu to OFF. For details on the VTR SET menu, see "VTR SET menu" on page - Sony DSR 11 | Operating Instructions - Page 22
Playback and Recording Playback To video equipment without a DV jack Recorder Other VCR Monitor Player DSR-11 to the audio input jacks to the video input jack to the S-video input connector to the LANC jack Audio cable (not supplied) Video cable (not supplied) S-video cable (not supplied) LANC - Sony DSR 11 | Operating Instructions - Page 23
input switch according to the signals input from the recorder. 2 Set up the recorder. For details, refer to the instruction manual of the recorder. 3 Power on this unit by pressing the ON/STANDBY switch on this unit. 4 When you play back a tape recorded in 4-channel mode (Fs32k), adjust the balance - Sony DSR 11 | Operating Instructions - Page 24
procedures required when using a computer as a recorder, refer to the instruction manual of your computer or the user's manuals of the software installed in it. 1 After checking the tape for slack and confirming that the q indicator is off, hold the cassette so that the tape window is facing upward - Sony DSR 11 | Operating Instructions - Page 25
data recorded on a tape If you record on a tape using a Sony digital camcorder (DSR-200/200P, 200A/200AP, PD100/PD100P, PD100A/PD100AP, PD150/PD150P, 250/ 250P, etc.), data codes (the shutter speed, SteadyShot, program AE mode, white balance, iris, gain, date and time) can be recorded on the tape - Sony DSR 11 | Operating Instructions - Page 26
the digital camcorder. You can check various data items such as the time code, tape remaining time, etc. on the monitor screen. These data items are useful for normal recording/playback operation. 1 2 3 N 00:12:34:12 122min PHOTO -10 SEARCH % 4 5, 6 7 MANUAL 1 0 0 0 0 ATW F1. 6 1 2 dB DVCAM - Sony DSR 11 | Operating Instructions - Page 27
Messages" on page 51 (GB). 8 DVCAM/DV indicator* In the EE and recording modes, displays the recording format selected in REC MODE on the VTR SET menu. During playback, displays the recording format recorded on the tape. 9 Audio mode indicator* In the EE and recording modes, displays the audio mode - Sony DSR 11 | Operating Instructions - Page 28
and Recording Playback Playing at various speeds You can enjoy playback functions using the Remote Commander. the command mode of a Sony device / remote commander is set to VTR 4; • if you press the ×1/3 button while pointing the Remote Commander toward a Sony device other than this unit, - Sony DSR 11 | Operating Instructions - Page 29
: Index search - Searching for the boundaries of recorded tape by title: Title search* - Searching for a point on the tape where the recorded date changes: Date search - Searching for scenes recorded in the photo mode with a digital camcorder: Photo search *:A function available only on a cassette - Sony DSR 11 | Operating Instructions - Page 30
digital camcorder (DSR-200/200P, 200A/200AP, PD100/PD100P, PD100A/PD100AP, PD150/PD150P, 250/250P, etc.). However, the type of signal recorded and where it is recorded (on the tape or in the cassette memory) depends on whether the cassette has cassette memory or which type of video equipment is used - Sony DSR 11 | Operating Instructions - Page 31
the day of the week. • Searching may not be done correctly if the signals were not recorded on a piece of Sony-brand digital video equipment. About the cassette memory • A tape with mark has cassette memory. When using the 16 kbits cassette memory, you can store up to 135 search signals. (The number - Sony DSR 11 | Operating Instructions - Page 32
portion, to the end of the tape). Auto Repeat using an external AC timer If you connect an external AC timer (not supplied) to this unit, you can repeat playback automatically at the preset time. 1 Connect an external AC timer (not supplied) to this unit. DSR-11 AC adaptor AC timer to a wall - Sony DSR 11 | Operating Instructions - Page 33
press the STOP button on this unit first to stop the tape transport, then turn off the power. To stop Auto Repeat Press the STOP button on this unit. To release the Auto Repeat mode Set the AUTO REPEAT switch on the rear panel to OFF. Chapter 2 Playback and Recording 33 Chapter 2 Playback and - Sony DSR 11 | Operating Instructions - Page 34
so you do not need to make separate connections for input and output. Player Computer Monitor Recorder DSR-11 to the DV jack i.LINK cable (DV cable) (not supplied) l: Signal flow Notes • With the DV connection, data codes (recording date/time, camera data) are transmitted from the computer - Sony DSR 11 | Operating Instructions - Page 35
and output. Player Other VCR Monitor Recorder DSR-11 to the DV jack to the LANC jack LANC cable (not supplied) i.LINK cable (DV cable) (not supplied) l: Signal flow Notes • With the DV connection, the sound is recorded in the same audio recording mode as that of the source tape. To record in - Sony DSR 11 | Operating Instructions - Page 36
equipment without a DV jack Player Other VCR Monitor to the audio output jacks to the video output jack to the S-video output connector to the LANC jack Recorder DSR-11 Chapter 2 Playback and Recording Audio cable (not supplied) Video cable (not supplied) S-video cable (not supplied) LANC cable - Sony DSR 11 | Operating Instructions - Page 37
possible with a tape that is copyright protected. 1 Power on the video monitor, then set the monitor's input switch according to the signals input from this unit. 2 Set up the player to play back a tape. For details, refer to the instruction manual of the player. 3 When the player is connected to - Sony DSR 11 | Operating Instructions - Page 38
DV: to record input signals from the DV IN/OUT connector S VIDEO: to record input signals from the S VIDEO connector on the INPUT jacks VIDEO: to record input signals from the VIDEO AUDIO SET menu" on page 44 (GB). Notes • In the DVCAM format, there are two audio modes, with either two channels at - Sony DSR 11 | Operating Instructions - Page 39
2 Playback and Recording Recording Procedure This section describes the procedures used to record signals sent from another VCR to this unit. For details on the procedures required when using a computer as a player, refer to the instruction manual of your computer or the user's manuals of the - Sony DSR 11 | Operating Instructions - Page 40
F on the unit with the f on the rack. Notes • Be sure to use the supplied rack. Without the rack, the unit may topple over and may be damaged or and the tape may be damaged. For details on inserting a cassette, see "Notes on Video Cassettes" on page 15 (GB). Chapter 2 Playback and Recording 40 (GB - Sony DSR 11 | Operating Instructions - Page 41
various parameters in the menus. Before you start using the unit, set the internal clock in CLOCK SET on the OTHERS the Remote Commander. The menu is superimposed on the analog video output. Icons VTR SET VTR REC MODE A FF / REW SPD DISP ST I LL T I ME CM FROM ST I LL ETC FROM REC P DV EE - Sony DSR 11 | Operating Instructions - Page 42
VTR qREMAIN (page 45 (GB)) DATA CODE (page 45 (GB)) COLOR BAR TAPE LABEL (page 46 (GB)) ITEM ERASE (page 47 (GB)) ERASE ALL (page 48 (GB)) DV IN TC (page 49 (GB)) TC FORMAT (page 49 (GB)) b) CLOCK SET (page 49 (GB)) HRS METER (page 49 (GB)) a) COLOUR BAR for PAL model b) available only when you use - Sony DSR 11 | Operating Instructions - Page 43
Icon/Menu VTR VTR SET Submenu (page) REC MODE Setting Switches the recording mode between DVCAM and DV (SP mode only). When you play back a tape, the DVCAM/DV setting will be automatically switched; you do not need to use this item. DVCAM : Records in DVCAM format. DV SP: Records in DV format (SP - Sony DSR 11 | Operating Instructions - Page 44
pause mode. Note When the recording pause mode continues for a long time after you select REC PAUSE, the tape may be damaged or the video heads may be damaged or clogged. If there is no other reason to do this, select STOP. Particularly when you use a Mini-DV cassette that is longer than 60 - Sony DSR 11 | Operating Instructions - Page 45
will be automatically set to OFF if you set the INPUT SELECT selector to DV or you operate the tape transport control that display the pictures recorded on the tape. DATE DISP Selects the date display in the search screen, the data code display and so on. Y/M/D: Displays YY/MM/DD (year/month/day - Sony DSR 11 | Operating Instructions - Page 46
mode which searches recordings. ON : Searches recordings using the cassette memory. (If the tape does not have cassette memory, the beginning of recording is searched for using the search signals on the tape.) OFF: Always searches recordings using the search signals on the tape. TITLE DISP Selects - Sony DSR 11 | Operating Instructions - Page 47
other than the tape label data. • The tape is write-protected. • The tape is being recorded. • The cassette memory is being used. ITEM ERASE the COMPLETE message.) CM SET VTR I TEM ERASE A I NDEX ALL ERASING DISP T I T LE ALL CM DATE ALL ETC PHOTO ALL RETURN , CM SET VTR I TEM ERASE A I NDEX - Sony DSR 11 | Operating Instructions - Page 48
in the following cases: • The unit does not have a tape inserted or the tape is being unloaded. • The tape does not have cassette memory. • The tape is write-protected. • The tape is being recorded. • The cassette memory is being used. Chapter 3 Adjusting and Setting Through Menus 48 (GB) Chapter - Sony DSR 11 | Operating Instructions - Page 49
time code already recorded on the tape, the unit records continuous time code from this point.) EXTERNAL: Records the time code with video and audio signals input from the DV IN/ OUT connector. TC FORMAT Notes • When you set the REC MODE on the VTR SET menu to DV SP, this item cannot be used. Even - Sony DSR 11 | Operating Instructions - Page 50
not work. The REMOTE CONTROL switch setting is not appropriate. t Set it to a suitable position for the device you use. Though DV IN TC on the OTHERS menu was set to EXTERNAL, the time code of the signals input from the DV IN/OUT connector cannot be recorded. The REC MODE on the VTR SET menu is - Sony DSR 11 | Operating Instructions - Page 51
and turn the power on, then wait more than one hour. You tried to record without a cassette inserted. t Insert a cassette. The tape is reaching the end during recording. t Provide a new cassette. The tape reached the end and still tried to record. t Rewind the tape or replace the tape with a new one - Sony DSR 11 | Operating Instructions - Page 52
. Do not use the unit in an area exposed to radiation A malfunction may occur. Checking the video heads every 1000 hours A VCR is a high-precision piece of equipment that records and plays back the picture on a magnetic tape. In particular, the video heads and other mechanical parts become dirty or - Sony DSR 11 | Operating Instructions - Page 53
rotation time, the tape running time and the number of unthreading operations. These counts can be displayed on the monitor screen. Use them as guidelines for scheduling maintenance. In general, consult your Sony dealer about necessary periodic maintenance checks. The digital hours meter has the - Sony DSR 11 | Operating Instructions - Page 54
and turn the power on. After waiting more than one hour, insert the cassette again. Clean the heads using the cleaning cassette (supplied). • Remove the resolve the problem, or a code other than those in the above chart appears, contact your Sony dealer or local authorized Sony service facility and - Sony DSR 11 | Operating Instructions - Page 55
Audio sampling frequency Audio recording mode 1) Time code system DVCAM 15 µm 12 bit: 32 kHz 16 bit: 48 kHz Lock mode DV 10 µm 12 bit: 32 kHz 16 bit: 32 kHz, 44.1 kHz, 48 kHz 2) Unlock mode NTSC; SMPTE time code (DF/NDF/including user bits)3) PAL; EBU time code (including user bits)3) Drop frame - Sony DSR 11 | Operating Instructions - Page 56
record in DV format. (SP mode only) • This digital videocassette recorder complies with the DVCAM format. Though DV cassettes can be used for recording, we recommend that you use DVCAM cassettes. Particularly when you use a Mini-DV cassette that is longer than 60 minutes, do not play back the tape - Sony DSR 11 | Operating Instructions - Page 57
on the VTR SET menu. 3) When you copy a DV-formatted tape using DVCAM video equipment, the recorded format of the copied tape is the following DVCAM format. • The audio recording mode of the copied tape is unlock mode. • The time code of the copied tape is partly inaccurate. 4) If you use a DVCAM - Sony DSR 11 | Operating Instructions - Page 58
Recording format DVCAM/DV (SP) format, rotating 2-head helical scan, digital component recording Video signal EIA STANDARD, NTSC color system CCIR STANDARD, PAL colour system Video Control S input Minijack LANC input/output Stereo mini-mini jack DV input/output 4-pin jack General Power - Sony DSR 11 | Operating Instructions - Page 59
including projecting parts and controls) 226.1 (9) Optional accessories DSRM-20 Remote Control Unit Digital video cassette (With Supplied accessories Remote Commander (1) Size AA (R6) batteries (2) AC power adaptor (1) Power cord (1) Rack (1) Cleaning cassette (1) Operating instructions - Sony DSR 11 | Operating Instructions - Page 60
cassette case from the tape path of the VCR. Generally, this is done automatically when you press the EJECT button. Also called unthreading. Unthreading See "Unloading." 12bit (Fs32k) mode In the DVCAM format, the 12bit (Fs32k) mode separates the audio area into 2 parts. You can record two kinds of - Sony DSR 11 | Operating Instructions - Page 61
DV cassette 56 (GB) format 55 (GB) IN/OUT connector 11 (GB), 20 (GB), 34 (GB) DVCAM Remote Commander 13 (GB) S Searching using search function ... 29 (GB) Standard DVCAM cassette 15 (GB) T Tape remaining time ...... 27 (GB), 45 (GB) Time code 49 (GB) Title search 29 (GB) I, J, K i.LINK 11 - Sony DSR 11 | Operating Instructions - Page 62
AVERTISSEMENT Pour éviter tout risque d'incendie ou d'électrocution, ne pas exposer cet appareil à la pluie ou à l'humidité. L'adaptateur secteur ne doit être remplacé que dans un magasin spécialisé. La plaque signalétique de l'adaptateur secteur est située sous ce dernier. Pour les clients europé - Sony DSR 11 | Operating Instructions - Page 63
Chapitre 3 Ajustement et réglage via les menus Caractéristiques 6 (FR) Format DVCAM 6 (FR) Autres caractéristiques 7 (FR) Emplacement et fonction des pièces 8 (FR) Panneau avant 8 (FR) Panneau arrière 11 (FR) Télécommande fournie 13 (FR) Remarques sur les cassettes vidéo 15 (FR - Sony DSR 11 | Operating Instructions - Page 64
Table des matières Chapitre 4 Entretien Annexe Guide de dépannage 51 (FR) Messages d'alarme 52 (FR) Remarques sur l'utilisation 53 (FR) Compatibilité des formats DVCAM et DV 56 (FR) Spécifications 59 (FR) Glossaire 61 (FR) Index 62 (FR) 4 (FR) Table des matières - Sony DSR 11 | Operating Instructions - Page 65
- Sony DSR 11 | Operating Instructions - Page 66
éscope DSR-11 sont présentées ci-dessous. Format DVCAM Le format DVCAM est basé sur le format DV commercial, Digital Audio Tape), ou le mode 4 canaux (échantillonnage 32 kHz et code non linéaire 12 bits). Compatibilité avec le format DV Vous pouvez donc lire une cassette DV enregistrée au format DV - Sony DSR 11 | Operating Instructions - Page 67
L'unité peut utiliser des cassettes DVCAM et DV de taille standard et de petite format DVCAM). Télécommande L'unité peut être activée à partir d'une télécommande CONTROL-S Fonction de superposition Le code temporel, des indications sur Sony corporation. Chapitre 1 Aperçu 7 (FR) Chapitre 1 Aperçu - Sony DSR 11 | Operating Instructions - Page 68
REMOTE CONTROL CONTROL S située sur le panneau arrière. Remarque Il vous est possible de contrôler l'appareil depuis son panneau avant indépendamment de la position du commutateur. 3 Sélecteur INPUT SELECT Vous pouvez sélectionner DV, S VIDEO, S VIDEO ou VIDEO pour entrer les signaux. DV - Sony DSR 11 | Operating Instructions - Page 69
d'arrêt et que DV IN TC du menu OTHERS est réglé sur EXTERNAL, l'indicateur REC s'allume et vous pouvez contrôler le code temporel des signaux sonores de l'option FF/REW SPD du menu VTR SET. Pour plus de détails sur le menu VTR SET, reportez-vous à la section "Menu VTR SET", page 43 (FR). Remarque - Sony DSR 11 | Operating Instructions - Page 70
les formats DVCAM et DV, l'image VTR SET sur SHUTTLEMAX, vous pouvez afficher l'image lors du rembobinage de la bande. 7 Touche STOP (arrêt) Appuyez sur cette touche pour arrêter l'opération de transport de la bande en cours. 1 Indicateur POWER 2 Indicateur CAUTION 3 Indicateur q 4 Indicateur DVCAM - Sony DSR 11 | Operating Instructions - Page 71
Panneau arrière 9 Prise CONTROL S 8 Touche RESET 1 Prise LANC 2 Connecteur DV IN/OUT Chapitre 1 Caracté . Pour raccorder un magnétoscope équipé d'une sortie S-video, utilisez le connecteur S VIDEO de cet appareil. 4 Connecteur DC IN 12V Se raccorde 32 (FR). 11 Chapitre 1 Caractéristiques (FR) - Sony DSR 11 | Operating Instructions - Page 72
généré par l'appareil lors de l'enregistrement au format DVCAM passe en mode de non-compensation du temps réel. Même si un signal formaté NTSC est envoyé depuis le connecteur DV IN/OUT, le code temporel généré par l'appareil est en mode de non compensation du temps réel tant que le commutateur - Sony DSR 11 | Operating Instructions - Page 73
• Lorsque le mode de commande d'un appareil ou d'une télécommande Sony est réglé sur VTR 4; - si vous appuyez sur cette touche tout en pointant la télé code temporel sera réinitialisé. • Cette touche fonctionne uniquement lorsque l'appareil ou tout autre dispositif Sony enregistre en format DVCAM - Sony DSR 11 | Operating Instructions - Page 74
sur cette touche pour afficher à l'écran des indications, comme par exemple le code temporel ou la durée de bande restante. Pour obtenir plus de détails Remarque Lorsque vous utilisez la télécommande, positionnez le commutateur REMOTE CONTROL du panneau avant sur WIRELESS. Dans le cas contraire, - Sony DSR 11 | Operating Instructions - Page 75
cette unité. La durée d'enregistrement du PDV-184 est de 184 minutes (format DVCAM) / 270 minutes (format DV) et celle du PDVM-40 est de 40 minutes (format DVCAM) / 60 minutes (format DV). Les cassettes DVCAM permettent d'obtenir des images de la plus haute qualité sur cet enregistreur de cassettes - Sony DSR 11 | Operating Instructions - Page 76
cassettes vidéo Mémoire de cassette La mémoire de cassette est une fonction facultative qui est fournie sur certaines cassettes DVCAM/DV et mini-DVCAM/mini-DV standard. Lors de l'enregistrement d'un programme, les date et heure de l'enregistrement, ainsi que l'emplacement du programme sur la - Sony DSR 11 | Operating Instructions - Page 77
d'alimentation à la prise murale. Lorsque vous débranchez ces connexions, veillez à déconnecter d'abord le cordon d'alimentation de la prise murale. DSR-11 vers connecteur DC IN 12V Adaptateur secteur AC-SU1 (fourni) Cordon d'alimentation (fourni) Vers une prise murale Insertion/éjection de - Sony DSR 11 | Operating Instructions - Page 78
unité. 3 Fermez le couvercle du compartiment à cassette. 1 L'unité étant sous tension, ouvrez le couvercle du compartiment à cassette. Appuyez sur la touche EJECT située sur le côté droit du compartiment à cassette. La cassette est déchargée et éjectée. 2 Retirez la cassette du caméscope. Fermez le - Sony DSR 11 | Operating Instructions - Page 79
. Limitations dues aux différences de format Cette unité peut enregistrer et lire des bandes enregistrées au format DVCAM. Il peut également enregistrer et lire des bandes enregistrées au format DV (mode SP). Cependant, en raison des différences de format, il est possible que vous ne puissiez pas - Sony DSR 11 | Operating Instructions - Page 80
DV Raccordement DSR-11 vers la prise DV Câble i.LINK (câble DV) (non fourni) l: Sens du signal Remarques • Réglez l'option DV EE OUT du menu VTR SET sur OFF. Pour plus de détails sur le menu VTR SET, reportez-vous à la section "Menu VTR SET", page 43 (FR). • Grâce à la connexion DV, les codes - Sony DSR 11 | Operating Instructions - Page 81
DSR-11 vers la prise DV vers la prise LANC Câble LANC (non fourni) Câble i.LINK (câble DV) (non fourni) l: Sens du signal Remarques • Réglez l'option DV EE OUT du menu VTR utilisez la connexion analogique. • Grâce à la connexion DV, les codes de données (date/heure d'enregistrement, données de - Sony DSR 11 | Operating Instructions - Page 82
des signaux tels que les signaux de contrôle, le code temporel, les données du compteur et les données d'état. • Les prises étiquetées CONTROL L possèdent les mêmes fonctions que les prises LANC. Les prises étiquetées REMOTE peuvent également avoir la même fonction. • Positionnez le commutateur LANC - Sony DSR 11 | Operating Instructions - Page 83
ou du connecteur S VIDEO des prises OUTPUT. Si vous souhaitez enregistrer des signaux vidéo sans données textuelles, suivez la procédure suivante. • Réglez TITLE DISP et LABEL DISP du menu CM SET sur OFF. • En fonction des éléments affichés, appuyez sur la touche MENU, DATA CODE, DISPLAY ou SEARCH - Sony DSR 11 | Operating Instructions - Page 84
Appuyez sur la touche PAUSE de l'unité. Remarques • Lorsque cette unité lit un passage de la bande dont le format d'enregistrement a changé entre les formats DVCAM et DV, l'image et le son peuvent être déformés. • Cette unité ne peut pas lire de cassettes enregistrées en mode LP du format - Sony DSR 11 | Operating Instructions - Page 85
éscope numérique Sony (DSR-200/200P, 200A/200AP, PD100/PD100P, PD100A/PD100AP, PD150/PD150P, 250/250P, etc.), les codes de données CODE, l'affichage change comme suit : Pas d'indicateur Chapitre 2 Lecture et enregistrement Date/heure d'enregistrement 2000 12 25 19 : 20 : 30 Données de caméra MANUAL - Sony DSR 11 | Operating Instructions - Page 86
bande enregistrée par un caméscope numérique (DSR-200/200P, 200A/200AP, PD100/PD100P, PD100A/ cran du moniteur des informations diverses telles que le code temporel, la durée restante sur la bande, SEARCH % 4 5, 6 7 MANUAL 1 0 0 0 0 ATW F1. 6 1 2 dB DVCAM 8 NS 48K 9 DV I N 0 qa Un élément - Sony DSR 11 | Operating Instructions - Page 87
58:00) • Si la fonction d'autodiagnostic est activée affiche, les numéros de code de diagnostic. 4 Indicateur de durée restante sur la bande* Si l'option qREMAIN du DVCAM/DV* Dans les modes EE et d'enregistrement, affiche le format d'enregistrement sélectionné dans l'option REC MODE du menu VTR SET - Sony DSR 11 | Operating Instructions - Page 88
SET, reportez-vous à la section "Menu AUDIO SET", page 45 (FR). Remarque Lorsque le mode de commande d'un appareil ou d'une télécommande Sony est réglé sur VTR 4; • si vous appuyez sur la touche ×1/3 tout en pointant la télécommande vers un appareil autre que celui-ci, la vitesse de lecture risque - Sony DSR 11 | Operating Instructions - Page 89
Chapitre 2 Lecture et enregistrement Recherche à l'aide de la fonction de recherche Ce caméscope propose quatre types de recherche: - Recherche du début d'un enregistrement: Recherche d'index - Recherche des limites d'une bande enregistrée suivant le titre: Recherche par titre* - Recherche d'un - Sony DSR 11 | Operating Instructions - Page 90
Chapitre 2 Lecture et enregistrement Lecture Recherche sans mémoire de cassette Lorsque vous utilisez une bande qui ne dispose pas de la fonction de mémoire de cassette, l'appareil lance une recherche dans l'ordre des enregistrements tels qu'ils figurent sur la bande, indépendamment de l'option CM - Sony DSR 11 | Operating Instructions - Page 91
de recherche (index, titre, date et photos). Ces signaux sont enregistrés par le caméscope numérique (DSR-200/200P, 200A/200AP, PD100/PD100P, PD100A/PD100AP, PD150/PD150P, 250/250P, etc.). Cependant, le matériel vidéo qui ne soit pas de la marque Sony. 31 Chapitre 2 Lecture et enregistrement (FR) - Sony DSR 11 | Operating Instructions - Page 92
Chapitre 2 Lecture et enregistrement Lecture Répétition automatique A propos de la mémoire de cassette • Une bande possédant la marque dispose de la fonction de mémoire de cassette. Les 16 ko de cette mémoire vous permettent de stocker un maximum de 135 signaux d'index. (Cette valeur varie en - Sony DSR 11 | Operating Instructions - Page 93
pourrez lancer automatiquement une lecture répétée à une heure fixe. 1 Raccordez le programmateur secteur externe (non fourni) à cet appareil. DSR-11 Adaptateur secteur Programmateur secteur Chapitre 2 Lecture et enregistrement vers une prise murale 2 Réglez le commutateur AUTO REPEAT situ - Sony DSR 11 | Operating Instructions - Page 94
des raccordements distincts pour l'entrée et la sortie. Lecteur Ordinateur Moniteur Enregistreur DSR-11 vers la prise DV Câble i.LINK (câble DV) (non fourni) l: Sens du signal Remarques • Grâce à la connexion DV, les codes de données (date/heure d'enregistrement, données de caméra) sont - Sony DSR 11 | Operating Instructions - Page 95
DSR-11 vers la prise DV vers la prise LANC Câble LANC (non fourni) Câble i.LINK (câble DV) (non fourni) l: Sens du signal Remarques • Avec la connexion DV une bande enregistrée et appuyez sur la touche DATA CODE sur la télécommande, les mêmes codes de données enregistrés sur la bande source sont - Sony DSR 11 | Operating Instructions - Page 96
transmettre des signaux tels que les signaux de contrôle, le code temporel, les données du compteur et les données d'état. • Les prises étiquetées CONTROL L possèdent les mêmes fonctions que les prises LANC. Les prises étiquetées REMOTE peuvent également avoir la même fonction. Chapitre 2 Lecture et - Sony DSR 11 | Operating Instructions - Page 97
temporel généré par l'appareil lors de l'enregistrement en format DVCAM passe en mode de non compensation du temps réel. Même si un signal au format NTSC est envoyé depuis le connecteur DV IN/ OUT, le code temporel généré par l'appareil est en mode de non compensation du temps réel, quelque soit - Sony DSR 11 | Operating Instructions - Page 98
DV: pour enregistrer les signaux d'entrée du connecteur DV IN/OUT S VIDEO: pour enregistrer les signaux d'entrée du connecteur S VIDEO sur les prises INPUT VIDEO: pour enregistrer les signaux d'entrée de la prise VIDEO page 45 (FR). Remarques • Le format DVCAM propose deux modes audio, l'un avec - Sony DSR 11 | Operating Instructions - Page 99
Chapitre 2 Lecture et enregistrement Procédure d'enregistrement Cette section décrit la procédure à suivre pour enregistrer des signaux envoyés à cet appareil par un autre magnétoscope. Pour obtenir des détails sur la procédure à suivre lors de l'utilisation d'un ordinateur comme lecteur, reportez- - Sony DSR 11 | Operating Instructions - Page 100
, sur son côté gauche ou sur son côté droit. Alignez le F de l'appareil avec le f de l'étagère. Remarques • Veillez à n'utiliser que le support fourni. Dans le cas contraire, l'appareil pourra basculer et être endommagé ou blesser quelqu'un. • Installez l'appareil sur une surface plate. • Lors de - Sony DSR 11 | Operating Instructions - Page 101
la sortie vidéo analogique. Icônes VTR SET VTR REC MODE A FF / REW SPD DISP ST I LL T I ME CM FROM ST I LL ETC FROM REC P DV EE OUT ST I LL P I pour revenir au sous- menu. 5 Répétez les étapes 2 à 4, selon vos besoins. Pour revenir à l'étape 1 A l'aide des touches M/m, sélectionnez RETURN, puis - Sony DSR 11 | Operating Instructions - Page 102
menus et sous-menus suivants. Menu VTR SET AUDIO SET DISPLAY SET CM FR)) AUDIO MIX (page 45 (FR)) qREMAIN (page 46 (FR)) DATA CODE (page 46 (FR)) COLOR BAR (page 46 (FR)) a) DATE DISP DISP (page 47 (FR)) TAPE LABEL (page 47 (FR)) ITEM ERASE (page 48 (FR)) ERASE ALL (page 49 (FR)) DV IN TC (page 50 - Sony DSR 11 | Operating Instructions - Page 103
bande ayant un format incorrect dans les unités DSR-70/ 70P, DSR-80/80P, DSR-85/85P, DSR-2000/2000P, etc., il risque d'exister des restrictions. Pour plus de détails sur la compatibilité du format DVCAM/DV, reportez-vous à la section "Compatibilité des formats DVCAM et DV", page 56 (FR). FF/REW SPD - Sony DSR 11 | Operating Instructions - Page 104
réglage via les menus Utilisation des menus Icône/Menu VTR VTR SET Sous-menu (page) STILL TIME Réglage Sélectionne le lectionnez la période la plus courte possible (particulièrement lors de l'utilisation d'une minicassette DV dont la longueur est supérieure à 60 minutes, sélectionnez 30 SEC ou 1 - Sony DSR 11 | Operating Instructions - Page 105
audio, ce qui offre un enregistrement sonore de haute qualité.) Remarques • Cette option est désactivée lors de l'entrée de signaux depuis le connecteur DV IN/OUT. • Vous ne pouvez pas afficher l'écran de sélection en mode d'enregistrement. • Du bruit peut se produire lorsque vous commutez le mode - Sony DSR 11 | Operating Instructions - Page 106
lit la bande ou lorsque le sélecteur INPUT SELECT est réglé sur DV. • Les barres de couleurs sont affichées uniquement sur la sortie vidéo format d'affichage de la date dans l'écran de recherche d'index, dans l'affichage du code de données, etc. Y/M/D: Affiche la date au format AA/MM/JJ (année/mois - Sony DSR 11 | Operating Instructions - Page 107
est affiché. : Bande avec mémoire de cassette : Bande sans mémoire de cassette Pour créer une étiquette de bande, procédez comme suit: 1 Sur l'écran TAPE LABEL, sélectionnez la ligne contenant le caractère alphabétique souhaité en appuyant sur les touches M/m puis sur la touche SET. (Le curseur se - Sony DSR 11 | Operating Instructions - Page 108
bande entrés, sélectionnez [SET]. Remarque L'appareil ne peut pas afficher l'écran TAPE LABEL dans les cas suivants: • Aucune bande n'est chargée dans l'appareil OK, l'unité vous invite à confirmer l'effacement de l'élément.) CM SET VTR I TEM ERASE A I NDEX ALL RETURN DISP T I T LE ALL OK CM DATE - Sony DSR 11 | Operating Instructions - Page 109
invite à confirmer l'effacement de tous les éléments.) CM SET VTR CM SEARCH A T I TLE D I SP DISP LABEL D I SP CM TAPE LABEL ETC I TEM ERASE ERASE ALL RETURN RETURN OK [MENU] : END , CM SET VTR CM SEARCH A T I TLE D I SP DISP LABEL D I SP CM TAPE LABEL ETC I TEM ERASE ERASE ALL RETURN RETURN OK - Sony DSR 11 | Operating Instructions - Page 110
code temporel interne lorsque vous réglez l'option REC MODE du menu VTR SET sur DV Lors de l'enregistrement au format DVCAM, le code temporel généré par l'appareil passe environ un mois sans support de l'alimentation secteur Durée de rotation du tambour TAPE RUN: Durée de défilement de bande THREADING: - Sony DSR 11 | Operating Instructions - Page 111
d'entrée. La position du commutateur de sélection REMOTE CONTROL n'est pas correcte. t Placez-le sur la position correcte en fonction du périphérique que vous utilisez. L'option REC MODE du menu VTR SET est réglée sur DV SP. t Réglez cette option sur DVCAM. Lorsque le commutateur NTSC/PAL est régl - Sony DSR 11 | Operating Instructions - Page 112
de données, reportez-vous à la section "Affichage de différentes données", page 26 (FR). Moniteur % %Z Q NO TAPE Q QZ TAPE END QZ CLOCK SET COPY INHIBIT x Y Affichage alterné CLEANING CASSETTE Z Indicateur d'indicateur (clignotant) a) ATTENTION Clignotement rapide Clignotement rapide Clignotement - Sony DSR 11 | Operating Instructions - Page 113
utilisation d'un chiffon imprégné de produits chimiques, employez-le suivant les instructions. Nettoyez le coffret en utilisant un chiffon doux et sec. Si le éo et les autres pièces mécaniques peuvent s'encrasser ou s'user. Pour conserver une image nette, nous recommandons d'effectuer un entretien - Sony DSR 11 | Operating Instructions - Page 114
Reportez-vous aux instructions d'utilisation de la cassette de nettoyage. Après une utilisation prolongée, les têtes vidéo peuvent s'user. Si vous n' d'humidité Vous ne pouvez pas manipuler l'unité à l'exception de la touche EJECT et vous ne pouvez pas insérer de cassette. Si ceci se produit, mettez - Sony DSR 11 | Operating Instructions - Page 115
filement de la bande est affiché par incrément de 10 heures. • Mode TAPE RUN Le nombre total d'heures de défilement de la bande est affiché par incr le problème ou qu'un code différent de ceux du tableau ci-dessous apparaît, contactez votre revendeur Sony ou un service aprèsvente agréé et communiquez - Sony DSR 11 | Operating Instructions - Page 116
formats DVCAM et DV Paramètre DVCAM DV Entre-axe des pistes 15 µm 10 µm Fréquence d'échantillonnage audio 12 bits: 32 kHz 16 bits: 48 kHz 12 bits: 32 kHz 16 bits: 32 kHz, 44,1 kHz, 48 kHz 2) Enregistrement audio mode 1) Mode de verrouillage Mode de déverrouillage Système de code temporel - Sony DSR 11 | Operating Instructions - Page 117
REC MODE du menu VTR SET est réglée sur DVCAM sur cet appareil.) DV (Si l'option REC MODE du menu VTR SET est réglée sur DV SP sur cet appareil.) Format de la cassette Format d'enregistrement DVCAM DV DVCAM DVCAM DV DV • Cet appareil peut enregistrer au format DV. (mode SP uniquement) • Cet - Sony DSR 11 | Operating Instructions - Page 118
REC MODE du menu VTR SET. 3) Lorsque vous copiez une bande de format DV à l'aide d'un appareil vidéo DVCAM, le format enregistré de la bande copiée est le format DVCAM suivant. • Le mode d'enregistrement audio de la bande copiée est le mode de déverrouillage. • Le code temporel de la bande copi - Sony DSR 11 | Operating Instructions - Page 119
DVCAM standard et minicassettes DVCAM Durée d'enregistrement Cassette standard DVCAM: 184 minutes (PDV184) 180 minutes (DV270) DV: 270 minutes (PDV184/ DV270) Minicassette DVCAM: 40 minutes (PDVM40/ DVM60) DV Entrée Control-S Miniprise Entrée/sortie LANC Miniprise stéréo Entrée/sortie DV Prise à - Sony DSR 11 | Operating Instructions - Page 120
(6) 185 (7 3/8) 110 (4 3/8) unité:mm (pouces) Poids Environ 2,7 kg (5 lb 15 oz) Accessoires fournis Télécommande (1) Piles (R6) de taille AA (2) Adaptateur d'alimentation secteur (1) Cordon d'alimentation (1) Support (1) Cassette de nettoyage (1) Mode d'emploi Annexe 60 (FR) Annexe - Sony DSR 11 | Operating Instructions - Page 121
non compensation du temps réel (NDF - Non Drop Frame). Sur cet appareil, le code temporel est enregistré séquentiellement en partant de "00:00:00:00" à partir du sur la touche EJECT. Egalement appelé non défilement. Défilement Voir "Chargement". Mode 12 bits (Fs32k) Dans le format DVCAM, le mode 12 - Sony DSR 11 | Operating Instructions - Page 122
15 (FR) Cassettes utilisables 15 (FR) Code temporel 50 (FR) Compensation du temps réel ......... 61 (FR) D, E Données de caméra 25 (FR) Durée de bande restante 27 (FR), 46 (FR) DV cassette 57 (FR) connecteur IN/OUT 11 (FR), 20 (FR), 34 (FR) format 56 (FR) DVCAM cassette 15 (FR), 57 (FR - Sony DSR 11 | Operating Instructions - Page 123
- Sony DSR 11 | Operating Instructions - Page 124
Sony Corporation Printed in Japan
-
 1
1 -
 2
2 -
 3
3 -
 4
4 -
 5
5 -
 6
6 -
 7
7 -
8
-
9
-
10
-
11
-
12
-
13
-
14
-
15
-
16
-
17
-
18
-
19
-
20
-
21
-
22
-
23
-
24
-
25
-
26
-
27
-
28
-
29
-
30
-
31
-
32
-
33
-
34
-
35
-
36
-
37
-
38
-
39
-
40
-
41
-
42
-
43
-
44
-
45
-
46
-
47
-
48
-
49
-
50
-
51
-
52
-
53
-
54
-
55
-
56
-
57
-
58
-
59
-
60
-
61
-
62
-
63
-
64
-
65
-
66
-
67
-
68
-
69
-
70
-
71
-
72
-
73
-
74
-
75
-
76
-
77
-
78
-
79
-
80
-
81
-
82
-
83
-
84
-
85
-
86
-
87
-
88
-
89
-
90
-
91
-
92
-
93
-
94
-
95
-
96
-
97
-
98
-
99
-
100
-
101
-
102
-
103
-
104
-
105
-
106
-
107
-
108
-
109
-
110
-
111
-
112
-
113
-
114
-
115
-
116
-
117
-
118
-
119
-
120
-
121
-
122
-
123
-
124
 |
 |
DSR-11
2000 Sony Corporation
3-065-956-
13
(1)
Digital
Videocassette
Recorder
DSR-11
Operating Instructions
Mode d’emploi
GB
FR