Sony DVP-CX995V Operating Instructions - Page 29
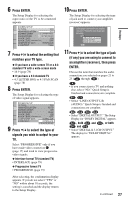
Press ENTER., Press, to select whether or not, you have connected a subwoofer.
 |
UPC - 027242668591
View all Sony DVP-CX995V manuals
Add to My Manuals
Save this manual to your list of manuals |
Page 29 highlights
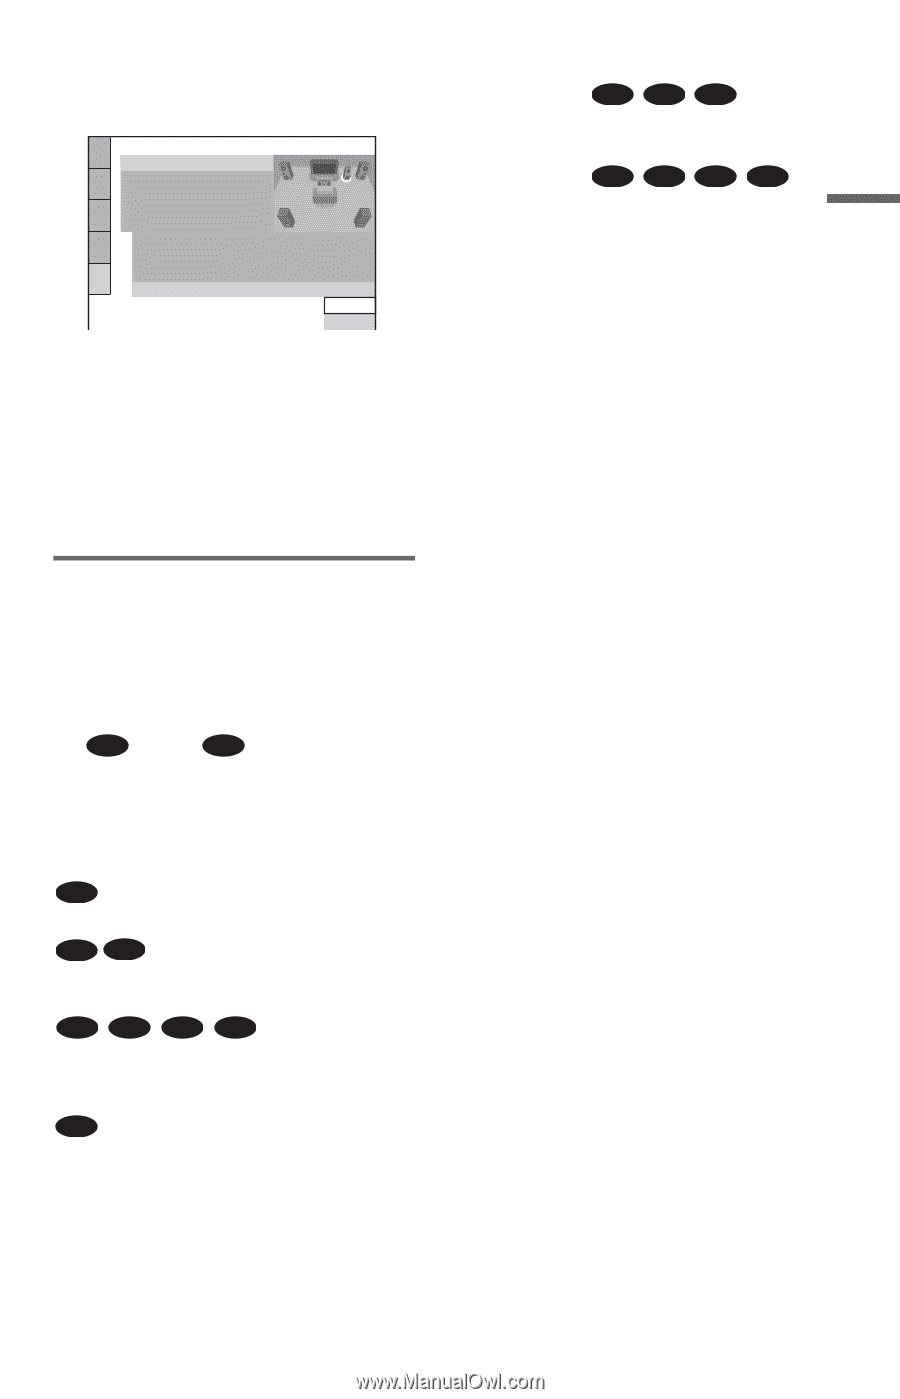
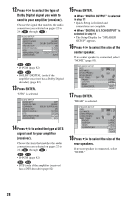
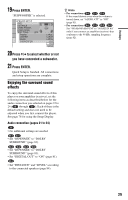
Hookups 19 Press ENTER. "SUBWOOFER" is selected. SPEAKER SETUP SIZE: DISTANCE: LEVEL(FRONT): LEVEL(REAR): TEST TONE: OFF FRONT: CENTER: REAR: SUBWOOFER: To set, press , then ENTER . LARGE LARGE LARGE YES YES NONE 20 To quit press SDEISTPULPAY Press X/x to select whether or not you have connected a subwoofer. 21 Press ENTER. Quick Setup is finished. All connections and setup operations are complete. Enjoying the surround sound effects To enjoy the surround sound effects of this player or your amplifier (receiver), set the following items as described below for the audio connection you selected on pages 22 to 24 ( B through D ). Each of these is the default setting and does not need to be adjusted when you first connect the player. See page 76 for using the Setup Display. Audio connection (pages 21 to 24) A • No additional settings are needed. B-1 C-1 • Set "DOWNMIX" to "DOLBY SURROUND" (page 81). B-2 C-2 D-2 D-3 • Set "DOWNMIX" to "DOLBY SURROUND" (page 81). • Set "DIGITAL OUT" to "ON" (page 81). D-1 • Set "DISTANCE" and "LEVEL" according to the connected speakers (page 84). z Hints • For connections B-1 C-1 D-1 If the sound distorts even when the volume is turned down, set "AUDIO ATT" to "ON" (page 81). • For connections B-2 C-2 D-2 D-3 Set "48 kHz/96 kHz PCM" to "96 kHZ/24 bit" only if you connect an amplifier (receiver) that conforms to the 96 kHz sampling frequency (page 82). 29
-
 1
1 -
2
-
3
-
4
-
5
-
6
-
7
-
8
-
9
-
10
-
11
-
12
-
13
-
14
-
15
-
16
-
17
-
18
-
19
-
20
-
21
-
22
-
23
-
 24
24 -
 25
25 -
 26
26 -
 27
27 -
 28
28 -
 29
29 -
 30
30 -
 31
31 -
 32
32 -
 33
33 -
 34
34 -
35
-
36
-
37
-
38
-
39
-
40
-
41
-
42
-
43
-
44
-
45
-
46
-
47
-
48
-
49
-
50
-
51
-
52
-
53
-
54
-
55
-
56
-
57
-
58
-
59
-
60
-
61
-
62
-
63
-
64
-
65
-
66
-
67
-
68
-
69
-
70
-
71
-
72
-
73
-
74
-
75
-
76
-
77
-
78
-
79
-
80
-
81
-
82
-
83
-
84
-
85
-
86
-
87
-
88
-
89
-
90
-
91
-
92
-
93
-
94
-
95
-
96
 |
 |