Sony DVP-CX995V Operating Instructions - Page 32
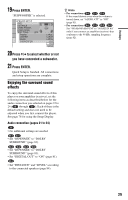
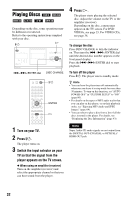
Playing Discs, Turn on your TV., Press, Switch the input selector on your
 |
UPC - 027242668591
View all Sony DVP-CX995V manuals
Add to My Manuals
Save this manual to your list of manuals |
Page 32 highlights
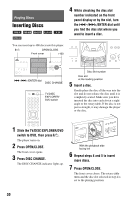
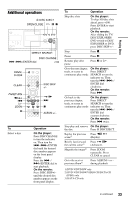
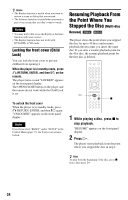
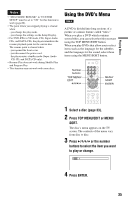
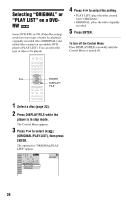
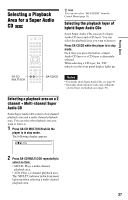
Playing Discs Depending on the disc, some operations may be different or restricted. Refer to the operating instructions supplied with your disc. H [/1 .-/>+/ENTER dial DISC CHANGE [/1 ENTER H 1 Turn on your TV. 2 Press [/1. The player turns on. 3 Switch the input selector on your TV so that the signal from the player appears on the TV screen. ◆ When using an amplifier (receiver) Turn on the amplifier (receiver) and select the appropriate channel so that you can hear sound from the player. 4 Press H. The player starts playing the selected disc. Adjust the volume on the TV or the amplifier (receiver). Depending on the disc, a menu may appear on the TV screen. For DVD VIDEOs, see page 35. For VIDEO CDs, see page 38. To change the disc Press DISC CHANGE to turn the indicator on. Then turn the .-/>+/ENTER dial until the desired disc number appears on the front panel display. Press the .-/>+/ENTER dial to start playback. To turn off the player Press [/1. The player enters standby mode. z Hints • You can have the player turn off automatically whenever you leave it in stop mode for more than 30 minutes. To turn on this function, set "AUTO POWER OFF" in "CUSTOM SETUP" to "ON" (page 80). • For details on the types of MP3 audio tracks that you can play on this player, or on their playback order, see "Enjoying MP3 Audio and JPEG Images" (page 64). • You can select to play a disc from a list of all the discs inserted in the player. For details, see "Displaying the Disc Information" (page 43). Note Super Audio CD audio signals are not output from the DIGITAL OUT (COAXIAL or OPTICAL)/ HDMI OUT jack. 32
-
 1
1 -
2
-
3
-
4
-
5
-
6
-
7
-
8
-
9
-
10
-
11
-
12
-
13
-
14
-
15
-
16
-
17
-
18
-
19
-
20
-
21
-
22
-
23
-
24
-
25
-
26
-
 27
27 -
 28
28 -
 29
29 -
 30
30 -
 31
31 -
 32
32 -
 33
33 -
 34
34 -
 35
35 -
 36
36 -
 37
37 -
38
-
39
-
40
-
41
-
42
-
43
-
44
-
45
-
46
-
47
-
48
-
49
-
50
-
51
-
52
-
53
-
54
-
55
-
56
-
57
-
58
-
59
-
60
-
61
-
62
-
63
-
64
-
65
-
66
-
67
-
68
-
69
-
70
-
71
-
72
-
73
-
74
-
75
-
76
-
77
-
78
-
79
-
80
-
81
-
82
-
83
-
84
-
85
-
86
-
87
-
88
-
89
-
90
-
91
-
92
-
93
-
94
-
95
-
96
 |
 |