TP-Link TD-W8970 TD-W8970 V1 User Guide - Page 74
IPv6 Static Route
 |
View all TP-Link TD-W8970 manuals
Add to My Manuals
Save this manual to your list of manuals |
Page 74 highlights
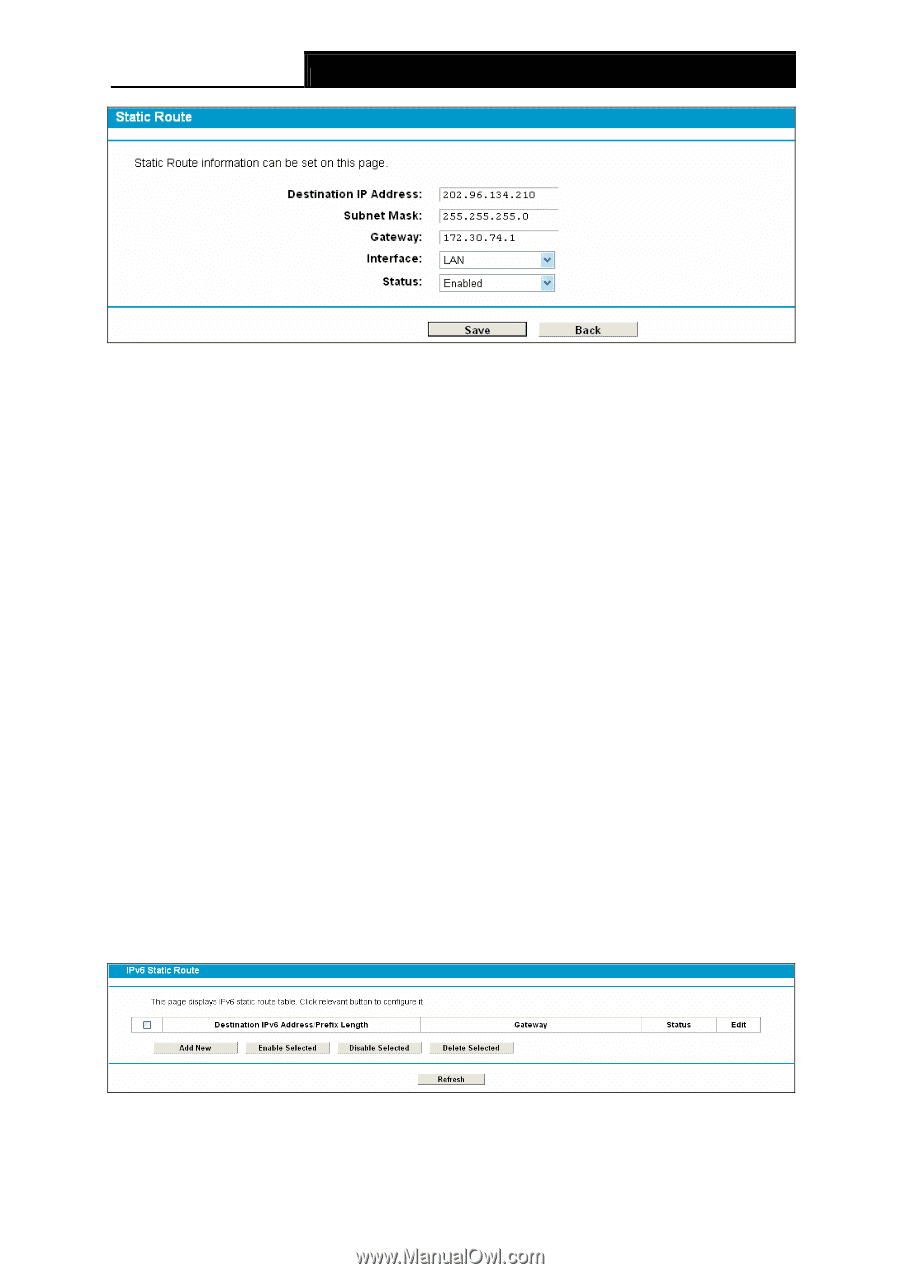
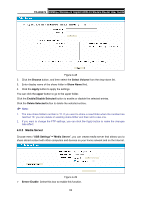
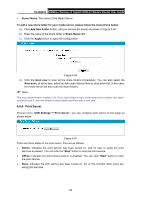
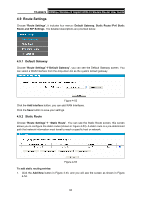
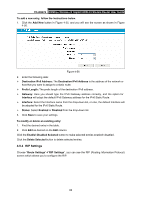
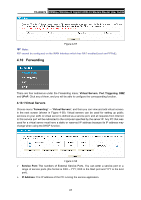
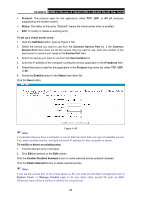
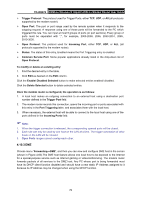
TD-W8970 300Mbps Wireless N Gigabit ADSL2+ Modem Router User Guide Figure 4-54 2. Enter the following data: ¾ Destination IP Address: The Destination IP Address is the address of the network or host that you want to assign to a static route. ¾ Subnet Mask: The Subnet Mask determines which portion of an IP Address is the network portion, and which portion is the host portion. ¾ Gateway: Here you should type the Gateway address correctly, and the option for Interface will adopt the default Gateway address for the Static Route. ¾ Interface: Select the Interface name in the text box, or else, the default Use Interface will be adopted for the Static Route. ¾ Status: Select Enabled or disabled from the drop-down list. 3. Click Save to save your settings as shown in Figure 4-54. To modify or delete an existing entry: 1 Find the desired entry in the table. 2 Click Edit as desired on the Edit column. Click the Enable/ Disabled Selected button to make selected entries enabled/ disabled. Click the Delete Selected button to delete selected entries. 4.9.3 IPv6 Static Route Choose "Route Settings"Æ "IPv6 Static Route". You can see the IPv6 Static Route screen. This screen allows you to configure the IPv6 static routes (shown in Figure 4-53). An IPv6 static route is a pre-determined path that network information must travel to reach a specific host or network. Figure 4-55 65
-
 1
1 -
2
-
3
-
4
-
5
-
6
-
7
-
8
-
9
-
10
-
11
-
12
-
13
-
14
-
15
-
16
-
17
-
18
-
19
-
20
-
21
-
22
-
23
-
24
-
25
-
26
-
27
-
28
-
29
-
30
-
31
-
32
-
33
-
34
-
35
-
36
-
37
-
38
-
39
-
40
-
41
-
42
-
43
-
44
-
45
-
46
-
47
-
48
-
49
-
50
-
51
-
52
-
53
-
54
-
55
-
56
-
57
-
58
-
59
-
60
-
61
-
62
-
63
-
64
-
65
-
66
-
67
-
68
-
 69
69 -
 70
70 -
 71
71 -
 72
72 -
 73
73 -
 74
74 -
 75
75 -
 76
76 -
 77
77 -
 78
78 -
 79
79 -
80
-
81
-
82
-
83
-
84
-
85
-
86
-
87
-
88
-
89
-
90
-
91
-
92
-
93
-
94
-
95
-
96
-
97
-
98
-
99
-
100
-
101
-
102
-
103
-
104
-
105
-
106
-
107
-
108
-
109
-
110
-
111
-
112
-
113
-
114
-
115
-
116
 |
 |