Xerox 6128MFP User Guide - Page 32
Print and Scan Drivers - USB Only - phaser n driver
 |
UPC - 095205751772
View all Xerox 6128MFP manuals
Add to My Manuals
Save this manual to your list of manuals |
Page 32 highlights
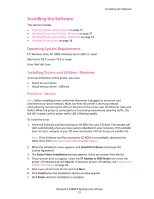
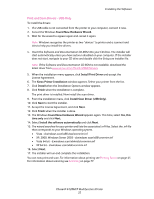
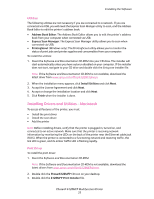
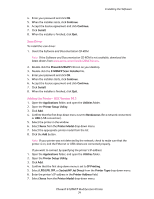
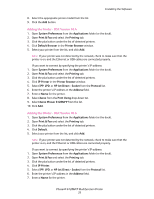
Installing the Software Print and Scan Drivers - USB Only To install the drivers: 1. If a USB cable is not connected from the printer to your computer, connect it now. 2. Cancel the Windows Found New Hardware Wizard. 3. Wait for the wizard to appear again and cancel it again. Note: Windows recognizes the printer as two "devices" (a printer and a scanner) and tries to help you install the drivers. 4. Insert the Software and Documentation CD-ROM into your CD drive. The installer will start automatically unless you have autorun disabled on your computer. If the installer does not start, navigate to your CD drive and double click the Setup.exe installer file. Note: If the Software and Documentation CD-ROM is not available, download the latest driver from www.xerox.com/office/6128MFPdrivers. 5. When the installation menu appears, click Install Print Driver and accept the License Agreement. 6. The Xerox Printer Installation window appears. Select your printer from the list. 7. Click Install when the Installation Options window appears. 8. Click Finish when the installation is complete. The print driver is installed. Now install the scan driver. 9. From the installation menu, click Install Scan Driver (USB Only). 10. Click Next to start the installer. 11. Accept the License Agreement, and click Next. 12. Click Finish when the installer is done. 13. The Windows Found New Hardware Wizard appears again. This time, select Yes, this time only and click Next. 14. Select Install the software automatically and click Next. 15. The wizard searches for your printer and lists the associated .inf files. Select the .inf file that corresponds to your Windows operating system. • Vista - d:windows scan\x86vista\xrsmnim.inf • XP, 2000, Windows Server 2003 - d:windows scan\x86\xrsmnim.inf • Vista 64 bit - d:windows scan\x64vista\xrsmnim.inf • XP 64 bit - d:windows scan\x64\xrsmnim.inf 16. Select Next. 17. The installer will run and complete the installation. You can now print and scan. For information about printing see Printing Basics on page 41. For information about scanning see Scanning on page 77. Phaser® 6128MFP Multifunction Printer 32
-
 1
1 -
2
-
3
-
4
-
5
-
6
-
7
-
8
-
9
-
10
-
11
-
12
-
13
-
14
-
15
-
16
-
17
-
18
-
19
-
20
-
21
-
22
-
23
-
24
-
25
-
26
-
 27
27 -
 28
28 -
 29
29 -
 30
30 -
 31
31 -
 32
32 -
 33
33 -
 34
34 -
 35
35 -
 36
36 -
 37
37 -
38
-
39
-
40
-
41
-
42
-
43
-
44
-
45
-
46
-
47
-
48
-
49
-
50
-
51
-
52
-
53
-
54
-
55
-
56
-
57
-
58
-
59
-
60
-
61
-
62
-
63
-
64
-
65
-
66
-
67
-
68
-
69
-
70
-
71
-
72
-
73
-
74
-
75
-
76
-
77
-
78
-
79
-
80
-
81
-
82
-
83
-
84
-
85
-
86
-
87
-
88
-
89
-
90
-
91
-
92
-
93
-
94
-
95
-
96
-
97
-
98
-
99
-
100
-
101
-
102
-
103
-
104
-
105
-
106
-
107
-
108
-
109
-
110
-
111
-
112
-
113
-
114
-
115
-
116
-
117
-
118
-
119
-
120
-
121
-
122
-
123
-
124
-
125
-
126
-
127
-
128
-
129
-
130
-
131
-
132
-
133
-
134
-
135
-
136
-
137
-
138
-
139
-
140
-
141
-
142
-
143
-
144
-
145
-
146
-
147
-
148
-
149
-
150
-
151
-
152
-
153
-
154
-
155
-
156
-
157
-
158
-
159
-
160
-
161
-
162
-
163
-
164
-
165
-
166
-
167
-
168
-
169
-
170
-
171
-
172
-
173
-
174
-
175
-
176
-
177
-
178
-
179
-
180
-
181
-
182
 |
 |
