Xerox 6128MFP User Guide - Page 82
Scanning to a FTP Server, Server FTP, Scan to, Up Arrow, Down Arrow, Start
 |
UPC - 095205751772
View all Xerox 6128MFP manuals
Add to My Manuals
Save this manual to your list of manuals |
Page 82 highlights
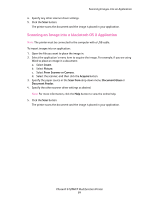
Scanning to a FTP Server Scanning to a FTP Server If you have not created an address for the printer to use, see the Installation and Setup Overview on page 26. To scan to a FTP server: 1. On the printer control panel, click the Scan button. 2. Select Server (FTP), and then press the OK button. 3. Select Scan to, and then press the OK button. 4. Press the Up Arrow or Down Arrow button to select the address that points to your computer, and then press the OK button. 5. Press the Start button. The printer scans the document and the image is placed on the FTP server. See also: Adjusting Scanning Options on page 85 Phaser® 6128MFP Multifunction Printer 82
-
 1
1 -
2
-
3
-
4
-
5
-
6
-
7
-
8
-
9
-
10
-
11
-
12
-
13
-
14
-
15
-
16
-
17
-
18
-
19
-
20
-
21
-
22
-
23
-
24
-
25
-
26
-
27
-
28
-
29
-
30
-
31
-
32
-
33
-
34
-
35
-
36
-
37
-
38
-
39
-
40
-
41
-
42
-
43
-
44
-
45
-
46
-
47
-
48
-
49
-
50
-
51
-
52
-
53
-
54
-
55
-
56
-
57
-
58
-
59
-
60
-
61
-
62
-
63
-
64
-
65
-
66
-
67
-
68
-
69
-
70
-
71
-
72
-
73
-
74
-
75
-
76
-
 77
77 -
 78
78 -
 79
79 -
 80
80 -
 81
81 -
 82
82 -
 83
83 -
 84
84 -
 85
85 -
 86
86 -
 87
87 -
88
-
89
-
90
-
91
-
92
-
93
-
94
-
95
-
96
-
97
-
98
-
99
-
100
-
101
-
102
-
103
-
104
-
105
-
106
-
107
-
108
-
109
-
110
-
111
-
112
-
113
-
114
-
115
-
116
-
117
-
118
-
119
-
120
-
121
-
122
-
123
-
124
-
125
-
126
-
127
-
128
-
129
-
130
-
131
-
132
-
133
-
134
-
135
-
136
-
137
-
138
-
139
-
140
-
141
-
142
-
143
-
144
-
145
-
146
-
147
-
148
-
149
-
150
-
151
-
152
-
153
-
154
-
155
-
156
-
157
-
158
-
159
-
160
-
161
-
162
-
163
-
164
-
165
-
166
-
167
-
168
-
169
-
170
-
171
-
172
-
173
-
174
-
175
-
176
-
177
-
178
-
179
-
180
-
181
-
182
 |
 |

Scanning to a FTP Server
Phaser® 6128MFP Multifunction Printer
82
Scanning to a FTP Server
If you have not created an address for the printer to use, see the
Installation and Setup
Overview
on page 26.
To scan to a FTP server:
1.
On the printer control panel, click the
Scan
button.
2.
Select
Server (FTP)
, and then press the
OK
button.
3.
Select
Scan to
, and then press the
OK
button.
4.
Press the
Up Arrow
or
Down Arrow
button to select the address that points to your
computer, and then press the
OK
button.
5.
Press the
Start
button.
The printer scans the document and the image is placed on the FTP server.
See also:
Adjusting Scanning Options
on page 85