Xerox 6128MFP User Guide - Page 34
Scan Driver, Adding the Printer - OSX Version 10.3, Socket/HP Jet Direct - driver download
 |
UPC - 095205751772
View all Xerox 6128MFP manuals
Add to My Manuals
Save this manual to your list of manuals |
Page 34 highlights
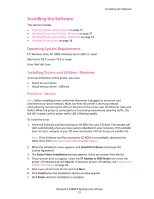
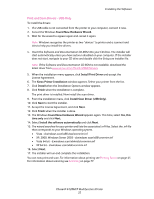
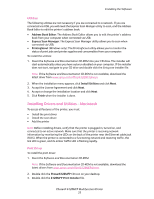
Installing the Software 4. Enter your password and click OK. 5. When the installer starts, click Continue. 6. Accept the license agreement and click Continue. 7. Click Install. 8. When the installer is finished, click Quit. Scan Driver To install the scan driver: 1. Insert the Software and Documentation CD-ROM. Note: If the Software and Documentation CD-ROM is not available, download the latest drivers from www.xerox.com/office/6128MFPdrivers. 2. Double click the Phaser6128MFP CD icon on your desktop. 3. Double click the 6128MFP Scan Installer file. 4. Enter your password and click OK. 5. When the installer starts, click Continue. 6. Accept the license agreement and click Continue. 7. Click Install. 8. When the installer is finished, click Quit. Adding the Printer - OSX Version 10.3 1. Open the Applications folder, and open the Utilities folder. 2. Open the Printer Setup Utility. 3. Click Add. 4. Confirm that the first drop-down menu is set to Rendezvous (for a network connection) or USB (USB connection). 5. Select the printer in the window. 6. Select Xerox from the Printer Model drop-down menu. 7. Select the appropriate printer model from the list. 8. Click the Add button. Note: If your printer was not detected by the network, check to make sure that the printer is on, and the Ethernet or USB cables are connected properly. If you want to connect by specifying the printer's IP address: 1. Open the Applications folder, and open the Utilities folder. 2. Open the Printer Setup Utility. 3. Click Add. 4. Confirm that the first drop-down menu is set to IP Printing. 5. Select LPD/LPR, IPP, or Socket/HP Jet Direct from the Printer Type drop-down menu. 6. Enter the printer's IP address in the Printer Address field. 7. Select Xerox from the Printer Model drop-down menu. Phaser® 6128MFP Multifunction Printer 34
-
 1
1 -
2
-
3
-
4
-
5
-
6
-
7
-
8
-
9
-
10
-
11
-
12
-
13
-
14
-
15
-
16
-
17
-
18
-
19
-
20
-
21
-
22
-
23
-
24
-
25
-
26
-
27
-
28
-
 29
29 -
 30
30 -
 31
31 -
 32
32 -
 33
33 -
 34
34 -
 35
35 -
 36
36 -
 37
37 -
 38
38 -
 39
39 -
40
-
41
-
42
-
43
-
44
-
45
-
46
-
47
-
48
-
49
-
50
-
51
-
52
-
53
-
54
-
55
-
56
-
57
-
58
-
59
-
60
-
61
-
62
-
63
-
64
-
65
-
66
-
67
-
68
-
69
-
70
-
71
-
72
-
73
-
74
-
75
-
76
-
77
-
78
-
79
-
80
-
81
-
82
-
83
-
84
-
85
-
86
-
87
-
88
-
89
-
90
-
91
-
92
-
93
-
94
-
95
-
96
-
97
-
98
-
99
-
100
-
101
-
102
-
103
-
104
-
105
-
106
-
107
-
108
-
109
-
110
-
111
-
112
-
113
-
114
-
115
-
116
-
117
-
118
-
119
-
120
-
121
-
122
-
123
-
124
-
125
-
126
-
127
-
128
-
129
-
130
-
131
-
132
-
133
-
134
-
135
-
136
-
137
-
138
-
139
-
140
-
141
-
142
-
143
-
144
-
145
-
146
-
147
-
148
-
149
-
150
-
151
-
152
-
153
-
154
-
155
-
156
-
157
-
158
-
159
-
160
-
161
-
162
-
163
-
164
-
165
-
166
-
167
-
168
-
169
-
170
-
171
-
172
-
173
-
174
-
175
-
176
-
177
-
178
-
179
-
180
-
181
-
182
 |
 |
