Yamaha AW4416 Version2.0 Manual Supplement - Page 15
Assigning a MIDI message to a, fader
 |
View all Yamaha AW4416 manuals
Add to My Manuals
Save this manual to your list of manuals |
Page 15 highlights
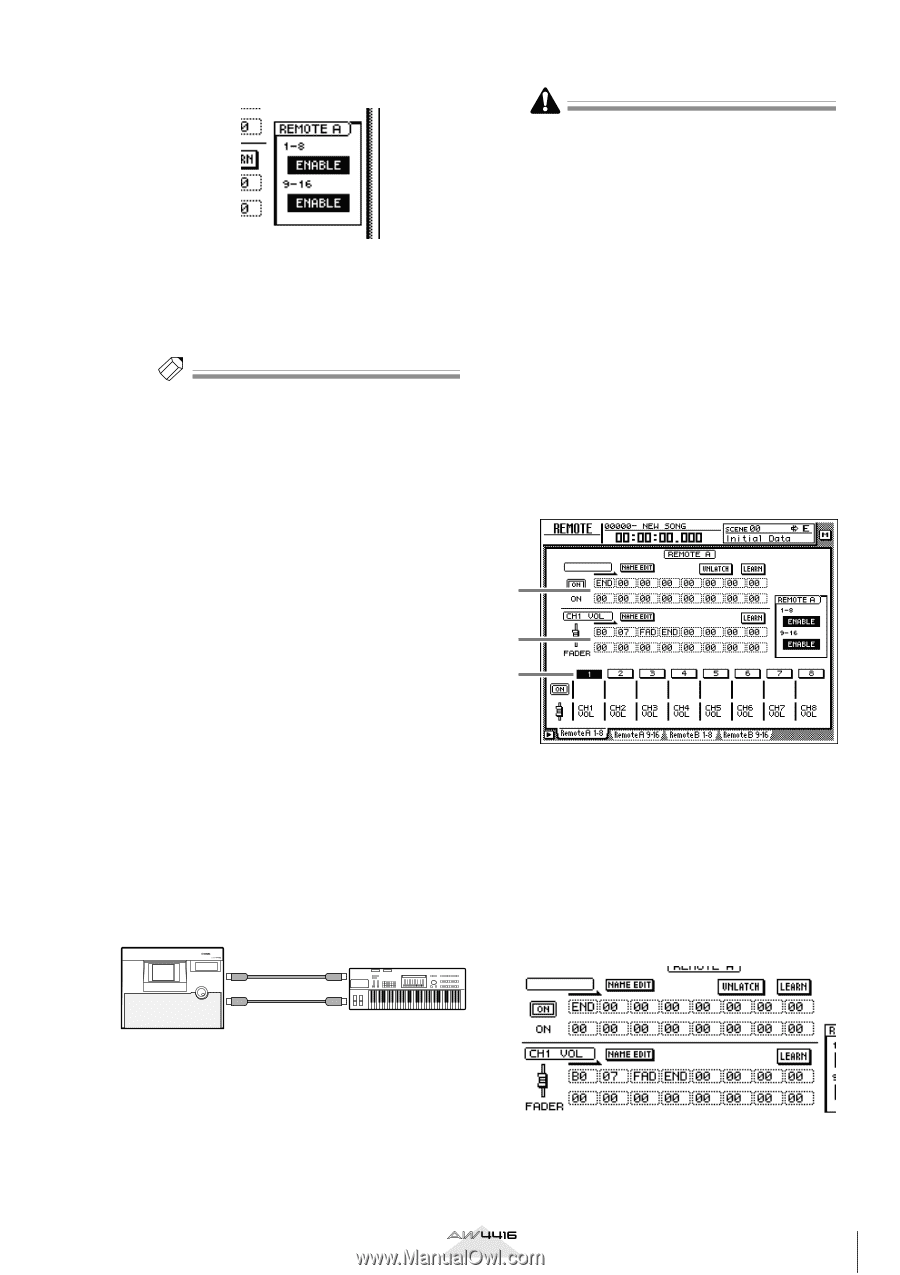
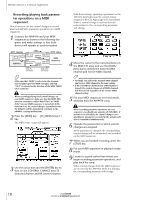
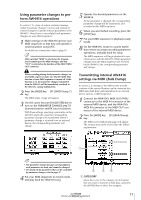
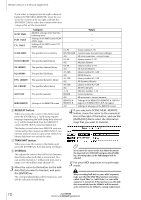
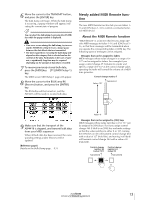
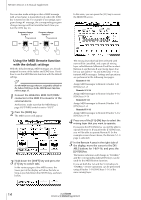
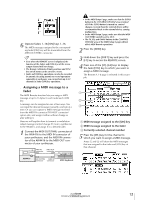
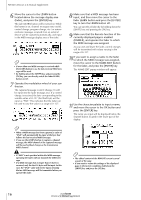
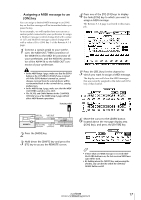
6 Operate faders 1-16/[ON] keys 1-16. The MIDI messages assigned to the corresponding fader/[ON] key will be transmitted from the MIDI OUT/THRU connector. Tip! • Even when the REMOTE screen is displayed, the function of the faders and [ON] keys of the stereo output channel will not change. • The Remote A/Remote B fader positions and [ON] key on/off status can be saved in a scene. • Fader and [ON] key operations can also be recorded in automix. By using automix to record operations separately in each page, you can perform up to 32 channels of fader/[ON] key operations. s Assigning a MIDI message to a fader The MIDI Remote function lets you assign a MIDI message of up to 16 bytes to each fader/each [ON] key. A message can be assigned in one of two ways. You can input the desired message manually, one byte at a time. Or you can capture a MIDI message received from the MIDI IN connector/TO HOST connector/ option slot, and assign it either without change or after editing it. Here we will explain how to transmit a modulation wheel message (control change #1) from a synthesizer to the AW4416, and assign it to a desired fader. 1 Connect the MIDI OUT/THRU connector of the AW4416 to the MIDI IN connector of your synthesizer, and the MIDI IN connector of the AW4416 to the MIDI OUT connector of your synthesizer. PROFESSIONAL AUDIO WORKSTATION MIDI IN connector MIDI OUT connector • In the MIDI Setup 1 page, make sure that the ECHO button in the CONTROL CHANGE area is turned off. If the ECHO button is turned on, control changes received from the external device will be re-transmitted back to the external device, causing malfunctions. • In the MIDI Setup 2 page, make sure that the MIDI OUT/THRU switch is set to OUT. • The TX, RX, and OMNI buttons in the CONTROL CHANGE area of the MIDI Setup 1 page will not affect MIDI Remote operations. 2 Press the [MIDI] key. 3 Hold down the [SHIFT] key and press the [F1] key to access the REMOTE screen. 4 Press one of the [F1]-[F4] keys to display the fader/[ON] key to which you want to assign a MIDI message. The Remote A 1-8 page is selected in this example. 1 2 3 A MIDI message assigned to the [ON] key B MIDI message assigned to the fader C Currently selected channel number 5 Press the [SEL] key for the channel to which you want to assign a MIDI message. Areas 1 and 2 will show the MIDI messages that are assigned to the fader and [ON] key of that channel. AW4416 MIDI OUT/THRU MIDI IN connector connector MIDI keyboard Version 2.0 Manual Supplement 15
-
 1
1 -
2
-
3
-
4
-
5
-
6
-
7
-
8
-
9
-
 10
10 -
 11
11 -
 12
12 -
 13
13 -
 14
14 -
 15
15 -
 16
16 -
 17
17 -
 18
18 -
 19
19 -
 20
20 -
21
-
22
-
23
-
24
-
25
-
26
-
27
-
28
-
29
-
30
-
31
-
32
-
33
-
34
-
35
-
36
-
37
-
38
-
39
-
40
-
41
-
42
-
43
-
44
-
45
-
46
-
47
-
48
 |
 |