Yamaha AW4416 Version2.0 Manual Supplement - Page 16
fader LEARN button and press the [ENTER], key to turn the LEARN button off.
 |
View all Yamaha AW4416 manuals
Add to My Manuals
Save this manual to your list of manuals |
Page 16 highlights
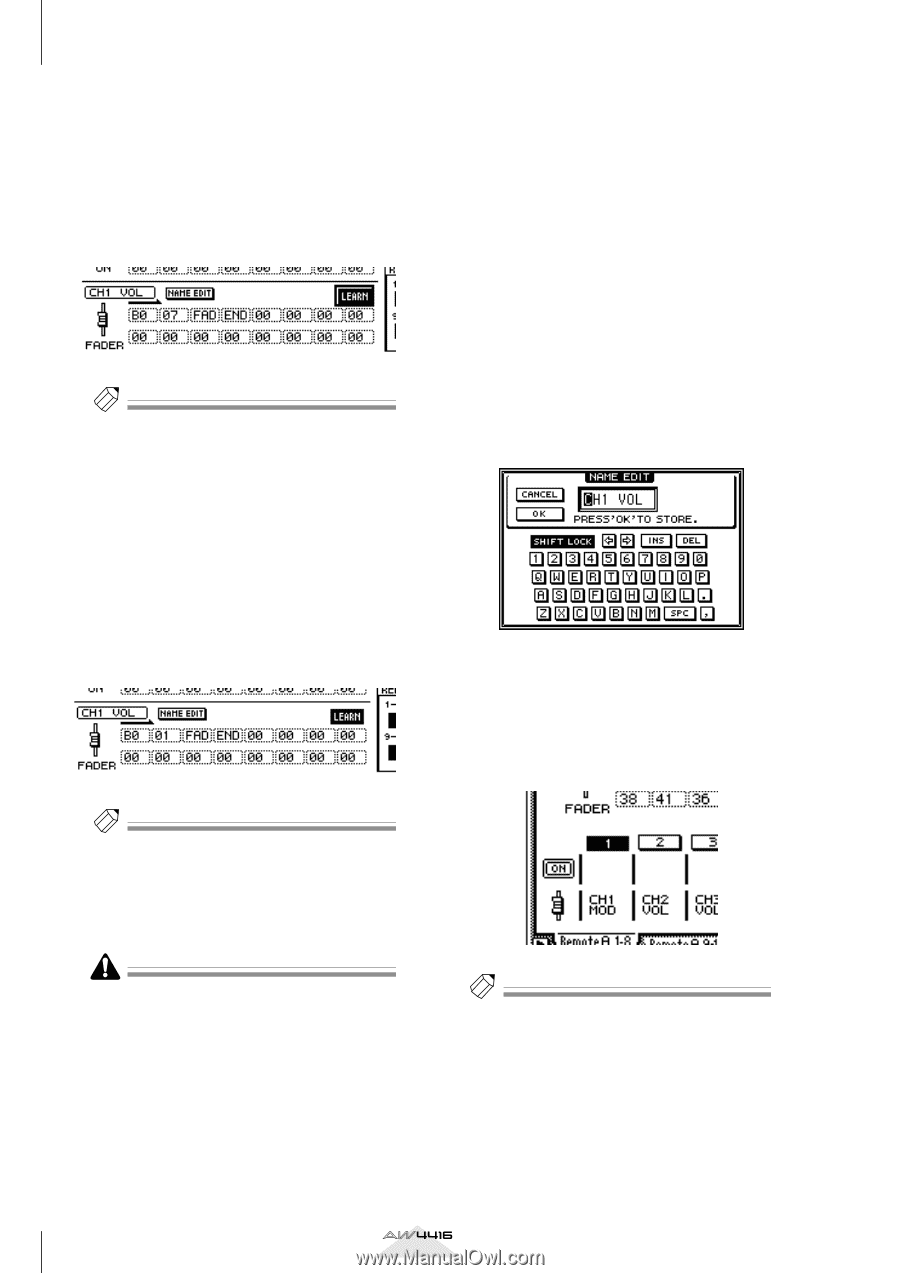
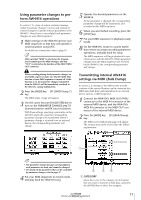
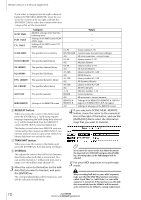
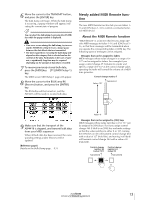
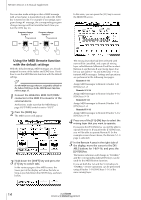
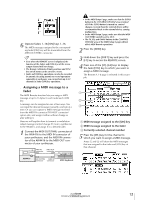
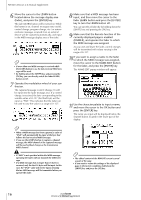
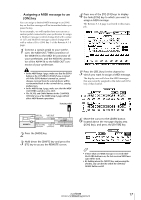
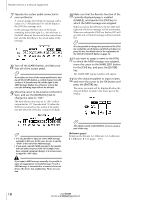
AW4416 Version 2.0 Manual Supplement 6 Move the cursor to the LEARN button located above the message display area (fader), and press the [ENTER] key. The fader LEARN button will be turned on. While this button is on, channel messages (note-on/off, control change, program change, etc.) or system exclusive messages received from an external device will be captured automatically, and input in the MIDI message display area of the fader. Tip! • If more than one MIDI message is received while the LEARN button is on, the last-received MIDI message will be used. • By holding down the [SHIFT] key and pressing the [F4] key, you can directly switch the fader LEARN button on/off. 7 Operate the modulation wheel of your synthesizer. The captured message (control change #1) will be input into the fader message area. If a control change is received, the byte corresponding to the variable value of 0-127 (the third byte) will be input as "FAD." This indicates that the fader can be used to vary the value in a range of 0-127. 8 Make sure that a MIDI message has been input, and then move the cursor to the fader LEARN button and press the [ENTER] key to turn the LEARN button off. You can turn this off directly by holding down the [SHIFT] key and pressing the [F4] key. 9 Make sure that the Remote function of the currently-displayed page is enabled (ENABLE), and operate the fader to which the MIDI message was assigned. As you raise and lower the fader, control changes will be transmitted with values varying in the range of 0-127. 10 If you want to assign a name to the fader to which the MIDI message was assigned, move the cursor to the NAME EDIT button for the fader, and press the [ENTER] key. The NAME EDIT popup window will appear. 11 Use the character palette to input a name, and move the cursor to the OK button and press the [ENTER] key. The name you input will be displayed below the channel button located in the lower part of the display. Tip! • When a MIDI message has been captured, a value of "END" will automatically be input at the byte that follows the last-received MIDI message. • If you use the LEARN button to capture a channel message, the MIDI channel of the captured message will be used without change as the transmission MIDI channel. • If "FAD" is not specified within the MIDI message, operating the fader will not transmit the MIDI message. • If a MIDI message that is longer than 16 bytes is received, only the first 16 bytes will be input. In this case, the "END" value will not be input, meaning that no MIDI message will be transmitted when you operate the fader. Tip! • The edited content of the REMOTE screen is saved as part of the song. • If you want to return the settings of the displayed page to the factory condition, hold down the [SHIFT] key and press the [F5] key. 16 Version 2.0 Manual Supplement
-
 1
1 -
2
-
3
-
4
-
5
-
6
-
7
-
8
-
9
-
10
-
 11
11 -
 12
12 -
 13
13 -
 14
14 -
 15
15 -
 16
16 -
 17
17 -
 18
18 -
 19
19 -
 20
20 -
 21
21 -
22
-
23
-
24
-
25
-
26
-
27
-
28
-
29
-
30
-
31
-
32
-
33
-
34
-
35
-
36
-
37
-
38
-
39
-
40
-
41
-
42
-
43
-
44
-
45
-
46
-
47
-
48
 |
 |