Yamaha AW4416 Version2.0 Manual Supplement - Page 21
Mini YGDAI plug-in system compatible I/O card operations, Backing up an I/O card - waves card
 |
View all Yamaha AW4416 manuals
Add to My Manuals
Save this manual to your list of manuals |
Page 21 highlights
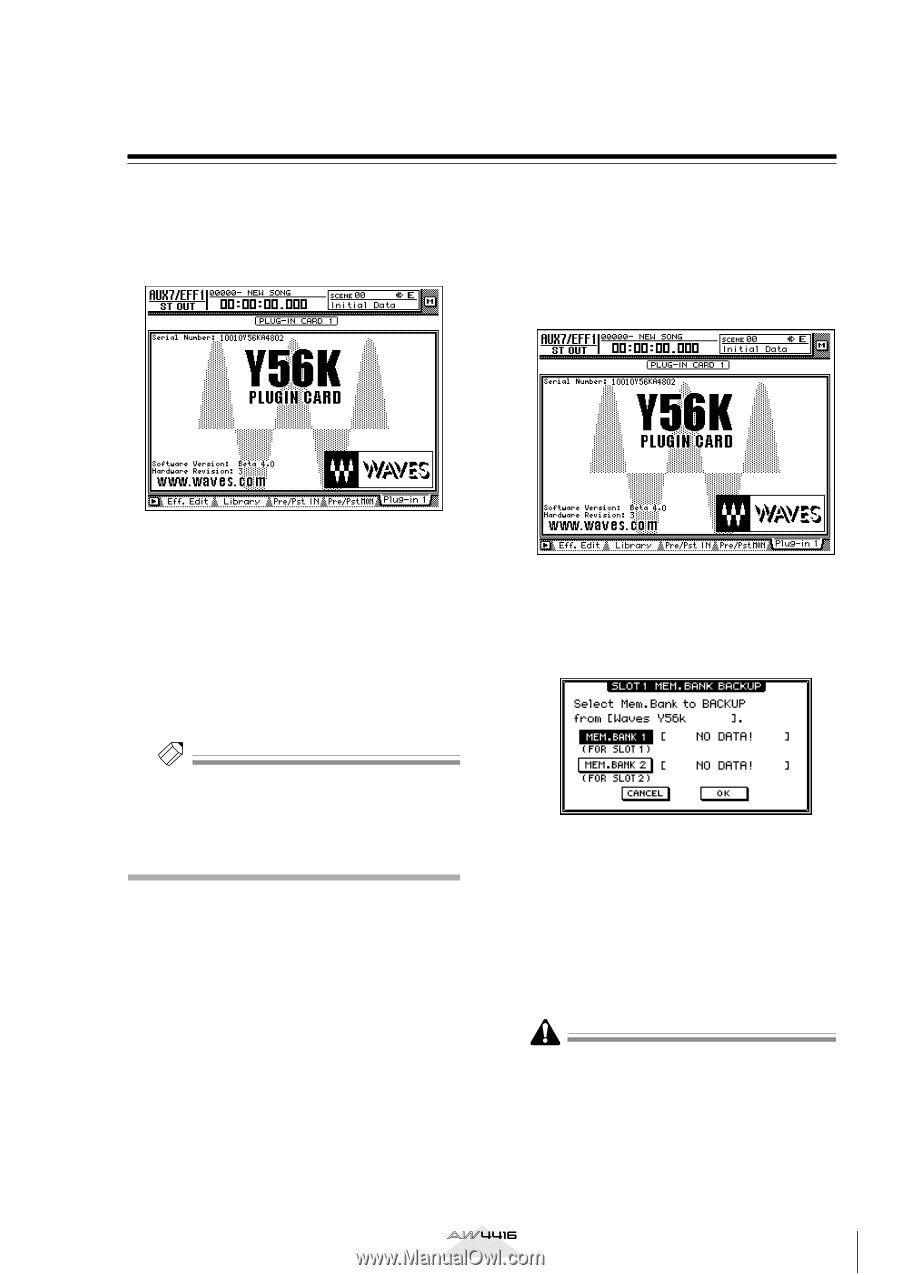
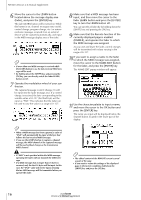
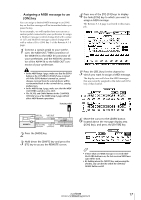
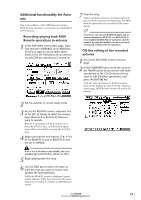
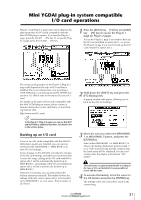
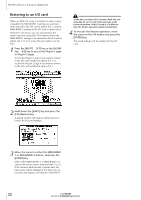
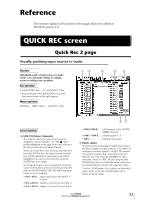
Mini YGDAI plug-in system compatible I/O card operations Plug-In 1 and Plug-In 2 pages have been added to dis- play parameters for I/O cards compatible with the Mini YGDAI plug-in system. To access the Plug-In 1 page, press the [AUX7] ¡ [F5] key. To access the PlugIn 2 page, press the [AUX8] ¡ [F5] key. 1 Press the [AUX7] key ¡ [F5] key (or [AUX8] key ¡ [F5] key) to access the Plug-In 1 page (or Plug-In 2 page). Access the Plug-In 1 page if you want to back up the I/O card installed in option slot 1, or access the Plug-In 2 page if you want to back up the I/O card installed in option slot 2. The content and operation of the Plug-In 1/Plug-In 2 pages will depend on the type of I/O card that is installed. The screen shown here is of a prototype Y56K DSP plug-in card manufactured by WAVES Corporation. For details refer to the manual for your I/O card. For details on the types of I/O cards compatible with the Mini YGDAI plug-in system, please contact a Yamaha information center, distributor, or the following Internet URL. http://www.aw4416.com/ Tip! In the Plug-In 1/Plug-In 2 pages you can use BACKUP and RESTORE as additional functions. For details refer to the sections below. Backing up an I/O card If one or two I/O cards compatible with the MiniYGDAI plug-in system are installed, you can use two memory banks (MEM.BANK 1 / MEM.BANK 2) to store I/O card settings. Scene changes on the AW4416 are linked to changes of the I/O card settings, and when you store the scene (or save the song), settings of the I/O card installed in option slot 1 will be automatically backed-up to MEM.BANK 1, and settings of the I/O card installed in option slot 2 will be automatically backed-up to MEM.BANK 2. However if necessary, you can also perform the backup operation manually. This method allows the settings of the I/O card in option slot 1 to be backed up to MEM.BANK 2 (or vice versa). The procedure is as follows. 2 Hold down the [SHIFT] key and press the [F1] (Backup) key. A popup window will appear, allowing you to back up the I/O card settings. 3 Move the cursor to either the MEM.BANK 1 or MEM.BANK 2 button, and press the [ENTER] key. Select either MEM.BANK 1 or MEM.BANK 2 to choose the backup-destination memory bank (1 or 2). If the memory bank already contains data, the bank name will be displayed. If it does not contain data, the display will indicate "NO DATA!" The bank name is assigned automatically according to the type of I/O card installed. It is not possible for you to edit this name. 4 To execute the backup, move the cursor to the OK button and press the [ENTER] key. The settings of the I/O card will be saved in the current song. Version 2.0 Manual Supplement 21
-
 1
1 -
2
-
3
-
4
-
5
-
6
-
7
-
8
-
9
-
10
-
11
-
12
-
13
-
14
-
15
-
 16
16 -
 17
17 -
 18
18 -
 19
19 -
 20
20 -
 21
21 -
 22
22 -
 23
23 -
 24
24 -
 25
25 -
 26
26 -
27
-
28
-
29
-
30
-
31
-
32
-
33
-
34
-
35
-
36
-
37
-
38
-
39
-
40
-
41
-
42
-
43
-
44
-
45
-
46
-
47
-
48
 |
 |