Yamaha AW4416 Version2.0 Manual Supplement - Page 17
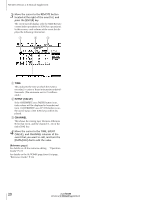
Assigning a MIDI message to an, ON] key, The TX, RX, and OMNI buttons in the CONTROL
 |
View all Yamaha AW4416 manuals
Add to My Manuals
Save this manual to your list of manuals |
Page 17 highlights
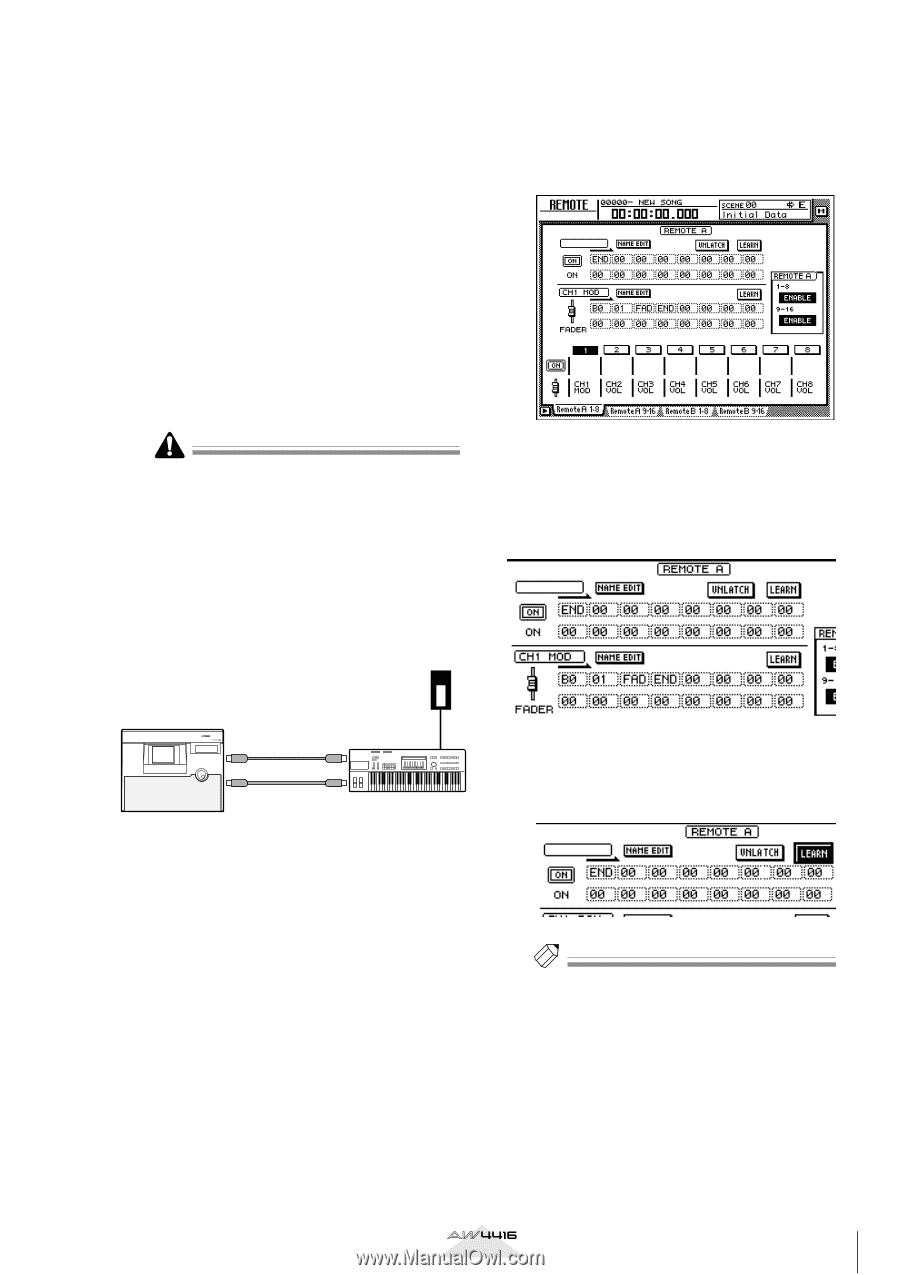
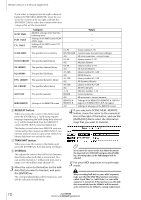
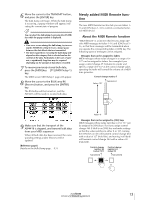
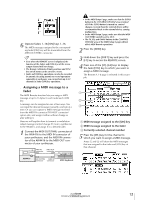
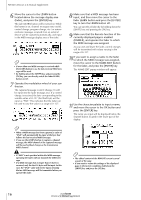
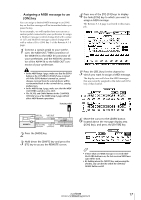
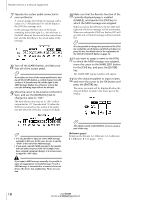
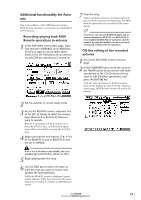
s Assigning a MIDI message to an [ON] key You can assign a desired MIDI message to an [ON] key so that the message will be transmitted when you press the key. As an example, we will explain how you can use a sustain pedal connected to your synthesizer to assign a Hold-on message (control change #64 with a value of 127) and Hold-off message (control change #64 with a value of 0) to [ON] key 1 of the Remote A 1-8 page. 1 Connect a sustain pedal to your synthesizer, the MIDI OUT/THRU connector of the AW4416 to the MIDI IN connector of your synthesizer, and the MIDI IN connector of the AW4416 to the MIDI OUT connector of your synthesizer. • In the MIDI Setup 1 page, make sure that the ECHO button in the CONTROL CHANGE area is turned off. If the ECHO button is turned on, control changes received from the external device will be re-transmitted back to the external device, causing malfunctions. • In the MIDI Setup 2 page, make sure that the MIDI OUT/THRU switch is set to OUT. • The TX, RX, and OMNI buttons in the CONTROL CHANGE area of the MIDI Setup 1 page will not affect MIDI Remote operations. Sustain pedal 4 Press one of the [F1]-[F4] keys to display the fader/[ON] key to which you want to assign a MIDI message. The Remote A 1-8 page is selected in this example. 5 Press the [SEL] key for the channel to which you want to assign a MIDI message. The display area will show the MIDI messages that are currently assigned to the fader and [ON] key of that channel. PROFESSIONAL AUDIO WORKSTATION MIDI IN connector MIDI OUT connector AW4416 MIDI OUT/THRU MIDI IN connector connector MIDI keyboard 2 Press the [MIDI] key. 3 Hold down the [SHIFT] key and press the [F1] key to access the REMOTE screen. 6 Move the cursor to the LEARN button located above the message display area ([ON] key), and press the [ENTER] key. Tip! • If more than one MIDI message is received while the LEARN button is on, the last-received MIDI message will be used. • By holding down the [SHIFT] key and pressing the [F3] key, you can directly switch the [ON] key LEARN button on/off. Version 2.0 Manual Supplement 17
-
 1
1 -
2
-
3
-
4
-
5
-
6
-
7
-
8
-
9
-
10
-
11
-
 12
12 -
 13
13 -
 14
14 -
 15
15 -
 16
16 -
 17
17 -
 18
18 -
 19
19 -
 20
20 -
 21
21 -
 22
22 -
23
-
24
-
25
-
26
-
27
-
28
-
29
-
30
-
31
-
32
-
33
-
34
-
35
-
36
-
37
-
38
-
39
-
40
-
41
-
42
-
43
-
44
-
45
-
46
-
47
-
48
 |
 |