Adaptec 2805 User Manual and Install Guide - Page 107
Managing Existing Arrays, Creating Bootable Arrays, Modifying Power Management Settings, Manage Arrays
 |
View all Adaptec 2805 manuals
Add to My Manuals
Save this manual to your list of manuals |
Page 107 highlights
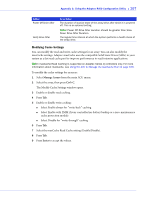
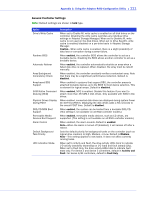
Appendix C: Using the Adaptec RAID Configuration Utility ● 106 Managing Existing Arrays To view or modify existing arrays, select Manage Arrays from the main ACU menu. From the Manage Arrays menu, you can: ● View the properties of an array. Note: Failed drives are displayed in a different text color. ● Make an array bootable (see Creating Bootable Arrays on page 106). ● Assign or remove hot spares. ● Modify power management settings. ● Change the cache settings for an array. ● Delete an array. ! Caution: Before deleting an array, back up the data to avoid permanently losing it. Creating Bootable Arrays Note: You may need to change the system BIOS to modify the boot order. For more information, refer to your computer documentation. The controller always uses the lowest numbered array as its bootable array. To make an array bootable: 1 Select Manage Arrays from the main ACU menu. 2 Select the array that you want to make bootable, then press Ctrl+B. Note: You cannot make an array bootable while it's building, verifying, or rebuilding. The array's number changes to Array 00, which makes this array the controller's boot array. 3 Restart your computer. Modifying Power Management Settings Power management settings switch the array to low power state when it is inactive for a specific time. To modify power management settings: 1 Select Manage Arrays from the main ACU menu. 2 Select the array, then press Ctrl+W. In the power management console, enter these details: Option Power Management Slow Down Drive After Description When enabled, switches the array to low power state, when the array/ drive is inactive. The duration of inactive state of the array/drive after which it is slowed down to low power mode. This is an optional setting. Note: The disk drive should support low power mode.
-
 1
1 -
2
-
3
-
4
-
5
-
6
-
7
-
8
-
9
-
10
-
11
-
12
-
13
-
14
-
15
-
16
-
17
-
18
-
19
-
20
-
21
-
22
-
23
-
24
-
25
-
26
-
27
-
28
-
29
-
30
-
31
-
32
-
33
-
34
-
35
-
36
-
37
-
38
-
39
-
40
-
41
-
42
-
43
-
44
-
45
-
46
-
47
-
48
-
49
-
50
-
51
-
52
-
53
-
54
-
55
-
56
-
57
-
58
-
59
-
60
-
61
-
62
-
63
-
64
-
65
-
66
-
67
-
68
-
69
-
70
-
71
-
72
-
73
-
74
-
75
-
76
-
77
-
78
-
79
-
80
-
81
-
82
-
83
-
84
-
85
-
86
-
87
-
88
-
89
-
90
-
91
-
92
-
93
-
94
-
95
-
96
-
97
-
98
-
99
-
100
-
101
-
 102
102 -
 103
103 -
 104
104 -
 105
105 -
 106
106 -
 107
107 -
 108
108 -
 109
109 -
 110
110 -
 111
111 -
 112
112 -
113
-
114
-
115
-
116
-
117
-
118
-
119
-
120
-
121
-
122
-
123
-
124
-
125
-
126
-
127
-
128
-
129
-
130
-
131
-
132
-
133
-
134
-
135
-
136
-
137
-
138
-
139
-
140
-
141
-
142
-
143
-
144
-
145
-
146
-
147
-
148
-
149
-
150
-
151
-
152
-
153
-
154
-
155
 |
 |
