Adaptec 2805 User Manual and Install Guide - Page 77
Installing on Solaris, Installing on VMware
 |
View all Adaptec 2805 manuals
Add to My Manuals
Save this manual to your list of manuals |
Page 77 highlights
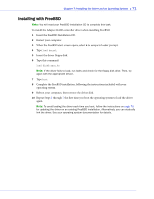
Chapter 8: Installing the Driver on an Existing Operating System ● 76 Installing on Solaris To install the driver on Solaris: 1 Start your computer. 2 (Solaris 10 only) Check for any pre-existing Adaptec driver by performing a pkginfo SUNWaac in a terminal window . If there is no pre-existing Adaptec driver on your computer, continue with Step 3. If an Adaptec driver is already installed on your computer, perform a pkgrm SUNWaac to remove it. ! Caution: If your operating system currently boots from the Adaptec controller, do not reset your computer after you remove the pre-existing Adaptec driver. Instead, follow the steps in this section to install a new driver before rebooting your computer. 3 Insert and mount the driver disk: volcheck 4 Change to the driver installer directory: On Solaris 10: cd /rmdisk/aacraid/DU/sol_210/i86pc/Tools On Solaris 11: cd /rmdisk/aacraid/DU/sol_211/i86pc/Tools 5 Start the driver installer: ./install.sh -i 6 Remove the driver disk, then reboot your computer. 7 Continue with Managing Your Storage Space on page 79. Installing on VMware Note: You must remove the old driver before you can install the new one. You must have root privilege to install the new driver. Note: To copy the driver VIB file to the VMware ESX/ESXi server (in Step 2 below), you must have access to a remote copy utility, such as WinSCP, putty, or Linux scp. To install the driver on VMware: 1 At the VMware console screen, type these commands to remove the old driver: VMware ESX/ESXi 4.1: esxupdate query --vib-view | grep -i aacraid esxupdate -b --maintenancemode remove where vibID is the full name of the driver package. (list driver packages) (remove package) Note: For VMware 4.0 or earlier, use the rpm -e command to remove the driver. VMware ESXi 5: esxcli software vib list (list driver packages) esxcli software vib remove --vibname=scsi-aacraid --maintenance-mode (remove package)
-
 1
1 -
2
-
3
-
4
-
5
-
6
-
7
-
8
-
9
-
10
-
11
-
12
-
13
-
14
-
15
-
16
-
17
-
18
-
19
-
20
-
21
-
22
-
23
-
24
-
25
-
26
-
27
-
28
-
29
-
30
-
31
-
32
-
33
-
34
-
35
-
36
-
37
-
38
-
39
-
40
-
41
-
42
-
43
-
44
-
45
-
46
-
47
-
48
-
49
-
50
-
51
-
52
-
53
-
54
-
55
-
56
-
57
-
58
-
59
-
60
-
61
-
62
-
63
-
64
-
65
-
66
-
67
-
68
-
69
-
70
-
71
-
 72
72 -
 73
73 -
 74
74 -
 75
75 -
 76
76 -
 77
77 -
 78
78 -
 79
79 -
 80
80 -
 81
81 -
 82
82 -
83
-
84
-
85
-
86
-
87
-
88
-
89
-
90
-
91
-
92
-
93
-
94
-
95
-
96
-
97
-
98
-
99
-
100
-
101
-
102
-
103
-
104
-
105
-
106
-
107
-
108
-
109
-
110
-
111
-
112
-
113
-
114
-
115
-
116
-
117
-
118
-
119
-
120
-
121
-
122
-
123
-
124
-
125
-
126
-
127
-
128
-
129
-
130
-
131
-
132
-
133
-
134
-
135
-
136
-
137
-
138
-
139
-
140
-
141
-
142
-
143
-
144
-
145
-
146
-
147
-
148
-
149
-
150
-
151
-
152
-
153
-
154
-
155
 |
 |