Adaptec 2805 User Manual and Install Guide - Page 114
PHY Settings, Formatting and Verifying Disk Drives, Locating Disk Drives, Enter, Disk Utilities
 |
View all Adaptec 2805 manuals
Add to My Manuals
Save this manual to your list of manuals |
Page 114 highlights
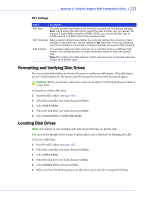
Appendix C: Using the Adaptec RAID Configuration Utility ● 113 PHY Settings Option Description PHY Rate The data transfer rate between the controller and devices. The default setting is Auto, which allows the SAS card to adjust the data transfer rate, as needed. For low-port 5-series RAID controllers (5085, 5405), you can set the PHY rate to 1.5Gb/second or 3.0Gb/second (the maximum rate). CRC Checking When enabled, determines whether the controller verifies the accuracy of data transfer on the serial bus. Default setting is Yes (enabled). Set to No (disabled) only if the controller is connected to a device that does not support CRC Checking. SAS Address In a situation where you want each phy on a controller to be in a different SAS domain, this setting specifies a unique world-wide name for each phy. Default is 0. Note: This setting is for SAS address conflict resolution only and should otherwise remain at its default value. Formatting and Verifying Disk Drives You can use the disk utilities to low-level format or verify your disk drives. (New disk drives are low-level formatted at the factory and do not need to be low-level formatted again.) ! Caution: Before you format a disk drive, back up all data. Formatting destroys all data on a disk drive. To format or verify a disk drive: 1 Start the ARC utility (see page 105). 2 Select the controller you want, then press Enter. 3 Select Disk Utilities. 4 Select the disk drive you want, then press Enter. 5 Select Format Disk or Verify Disk Media. Locating Disk Drives Note: This feature is only available with disk drives that have an activity LED. You can use the Identify Drive feature to physically locate a disk drive by blinking the LED. To locate a disk drive: 1 Start the ARC utility (see page 105). 2 Select the controller you want, then press Enter. 3 Select Disk Utilities. 4 Select the disk drive you want, then press Enter. 5 Select Identify Drive, then press Enter. 6 When you have finished locating your disk drive, press any key to stop the blinking.
-
 1
1 -
2
-
3
-
4
-
5
-
6
-
7
-
8
-
9
-
10
-
11
-
12
-
13
-
14
-
15
-
16
-
17
-
18
-
19
-
20
-
21
-
22
-
23
-
24
-
25
-
26
-
27
-
28
-
29
-
30
-
31
-
32
-
33
-
34
-
35
-
36
-
37
-
38
-
39
-
40
-
41
-
42
-
43
-
44
-
45
-
46
-
47
-
48
-
49
-
50
-
51
-
52
-
53
-
54
-
55
-
56
-
57
-
58
-
59
-
60
-
61
-
62
-
63
-
64
-
65
-
66
-
67
-
68
-
69
-
70
-
71
-
72
-
73
-
74
-
75
-
76
-
77
-
78
-
79
-
80
-
81
-
82
-
83
-
84
-
85
-
86
-
87
-
88
-
89
-
90
-
91
-
92
-
93
-
94
-
95
-
96
-
97
-
98
-
99
-
100
-
101
-
102
-
103
-
104
-
105
-
106
-
107
-
108
-
 109
109 -
 110
110 -
 111
111 -
 112
112 -
 113
113 -
 114
114 -
 115
115 -
 116
116 -
 117
117 -
 118
118 -
 119
119 -
120
-
121
-
122
-
123
-
124
-
125
-
126
-
127
-
128
-
129
-
130
-
131
-
132
-
133
-
134
-
135
-
136
-
137
-
138
-
139
-
140
-
141
-
142
-
143
-
144
-
145
-
146
-
147
-
148
-
149
-
150
-
151
-
152
-
153
-
154
-
155
 |
 |
