Adobe 65023809 Printing Guide - Page 91
Printing from Illustrator, Tiling Artboards
 |
UPC - 883919165974
View all Adobe 65023809 manuals
Add to My Manuals
Save this manual to your list of manuals |
Page 91 highlights
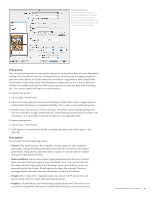
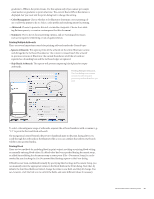
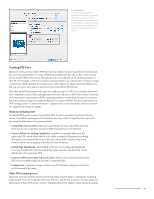
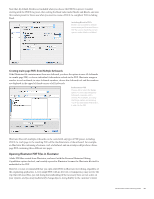
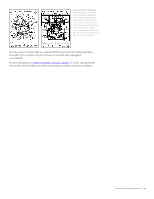
is to show areas affected by transparency flattening so you can modify the file or choose another flattener preset if necessary to control flattening results before output. To use the Flattener Preview features: 1. Choose Window > Flattener Preview. If you don't see all options, choose Show Options from the panel menu. 2. Select a flattener preset. The default High Resolution preset is appropriate for most printing conditions, but if you have created a custom preset, choose it from the Preset pop-up menu. 3. To preview the results of using a flattener preset, click the Refresh button and select objects to highlight: • Rasterized Complex Regions • Transparent Objects • All Affected Objects • Affected Linked EPS Files • Expanded Patterns • Outlined Strokes The options available to you depend on the preset selected. For example, if you select the High Resolution flattener preset, Rasterized Complex Regions won't be available because the High Resolution preset does not result in rasterized regions. 4. If you choose a new preset, click Refresh to renew the display. In a very complex document, this may take a few seconds. 5. To view small details, click in the preview area at the bottom of the panel; the cursor automatically becomes a zoom tool. Hold down the spacebar to pan the image in the preview window. Flattener Preview To see all the available controls in the Flattener Preview dialog box, choose Show Options from the panel menu. Choose an existing transparency flattener preset, or create a custom preset based on your choices in the Flattener Preview dialog box (left). Printing from Illustrator The Print dialog box contains controls for selecting a printer and PostScript Printer Description (PPD), as well as access to page setup, presets, and options. Certain controls are displayed regardless of the option chosen in the left column of the dialog box. The remainder of the dialog box changes according to the selected option. Tiling Artboards To tile artboards, you must print them one at a time. Enter the number of the artboard in the Range field, and choose the Tile option. You can numerically specify position in the Placement X/Y fields, or drag the thumbnail in the preview window to position the artwork relative to tiles. Adobe Creative Suite 4 Printing Guide 89
-
 1
1 -
2
-
3
-
4
-
5
-
6
-
7
-
8
-
9
-
10
-
11
-
12
-
13
-
14
-
15
-
16
-
17
-
18
-
19
-
20
-
21
-
22
-
23
-
24
-
25
-
26
-
27
-
28
-
29
-
30
-
31
-
32
-
33
-
34
-
35
-
36
-
37
-
38
-
39
-
40
-
41
-
42
-
43
-
44
-
45
-
46
-
47
-
48
-
49
-
50
-
51
-
52
-
53
-
54
-
55
-
56
-
57
-
58
-
59
-
60
-
61
-
62
-
63
-
64
-
65
-
66
-
67
-
68
-
69
-
70
-
71
-
72
-
73
-
74
-
75
-
76
-
77
-
78
-
79
-
80
-
81
-
82
-
83
-
84
-
85
-
 86
86 -
 87
87 -
 88
88 -
 89
89 -
 90
90 -
 91
91 -
 92
92 -
 93
93 -
 94
94 -
 95
95 -
 96
96 -
97
-
98
-
99
-
100
-
101
-
102
-
103
-
104
-
105
-
106
-
107
-
108
-
109
-
110
-
111
-
112
-
113
-
114
-
115
-
116
-
117
-
118
-
119
-
120
-
121
-
122
-
123
-
124
-
125
-
126
-
127
-
128
-
129
-
130
-
131
-
132
-
133
-
134
-
135
-
136
-
137
-
138
-
139
 |
 |
