Brother International DCP1000 Users Manual - English - Page 23
Assembly, Installing the Drum Unit Assembly (with Toner Cartridge)
 |
UPC - 012502565796
View all Brother International DCP1000 manuals
Add to My Manuals
Save this manual to your list of manuals |
Page 23 highlights
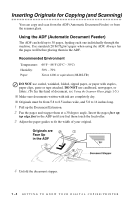
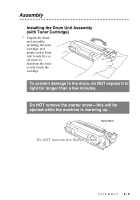
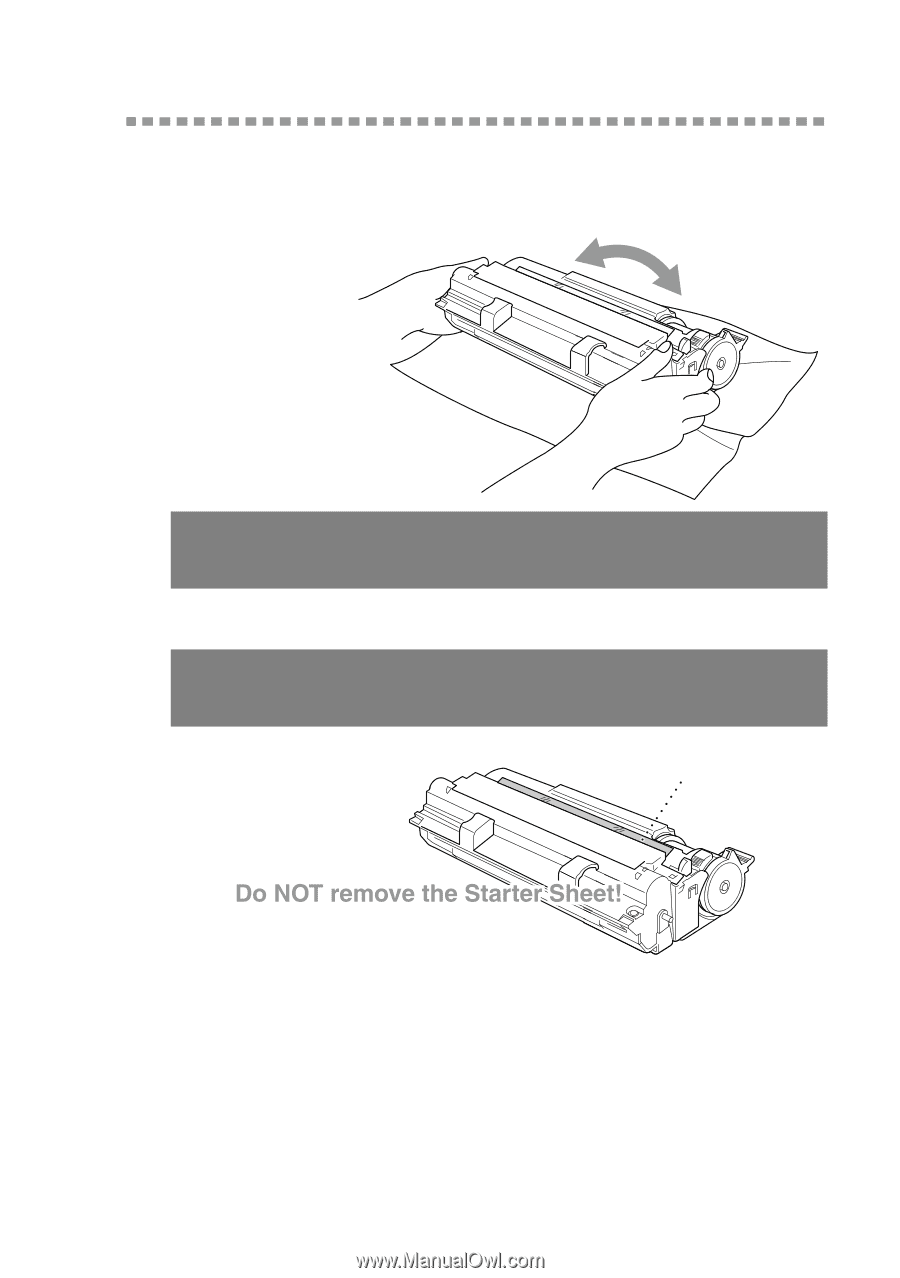
Assembly Installing the Drum Unit Assembly (with Toner Cartridge) 1 Unpack the drum unit assembly, including the toner cartridge, and gently rock it from side to side five or six times to distribute the toner evenly inside the cartridge. To prevent damage to the drum, do NOT expose it to light for longer than a few minutes. Do NOT remove the starter sheet-this will be ejected while the machine is warming up. Starter Sheet ASSEMBLY 2-3
-
 1
1 -
2
-
3
-
4
-
5
-
6
-
7
-
8
-
9
-
10
-
11
-
12
-
13
-
14
-
15
-
16
-
17
-
 18
18 -
 19
19 -
 20
20 -
 21
21 -
 22
22 -
 23
23 -
 24
24 -
 25
25 -
 26
26 -
 27
27 -
 28
28 -
29
-
30
-
31
-
32
-
33
-
34
-
35
-
36
-
37
-
38
-
39
-
40
-
41
-
42
-
43
-
44
-
45
-
46
-
47
-
48
-
49
-
50
-
51
-
52
-
53
-
54
-
55
-
56
-
57
-
58
-
59
-
60
-
61
-
62
-
63
-
64
-
65
-
66
-
67
-
68
-
69
-
70
-
71
-
72
-
73
-
74
-
75
-
76
-
77
-
78
-
79
-
80
-
81
-
82
-
83
-
84
-
85
-
86
-
87
-
88
-
89
-
90
-
91
-
92
-
93
-
94
-
95
-
96
-
97
-
98
-
99
-
100
-
101
-
102
-
103
-
104
-
105
-
106
-
107
-
108
-
109
-
110
-
111
-
112
-
113
-
114
-
115
-
116
-
117
-
118
-
119
-
120
-
121
-
122
-
123
-
124
-
125
-
126
-
127
-
128
-
129
 |
 |
ASSEMBLY
2 - 3
Assembly
Installing the Drum Unit Assembly
(with Toner Cartridge)
1
Unpack the drum
unit assembly,
including the toner
cartridge, and
gently rock it from
side to side five or
six times to
distribute the toner
evenly inside the
cartridge.
To prevent damage to the drum, do NOT expose it to
light for longer than a few minutes.
Do NOT remove the starter sheet
—
this will be
ejected while the machine is warming up.
Starter Sheet