Brother International DCP1000 Users Manual - English - Page 68
Setting Up the Scanner Configurations, To Access the Scanner Configurations Screen, Restore Defaults
 |
UPC - 012502565796
View all Brother International DCP1000 manuals
Add to My Manuals
Save this manual to your list of manuals |
Page 68 highlights
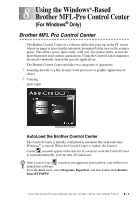
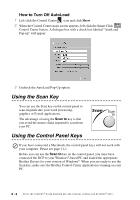
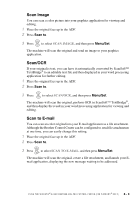
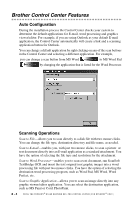
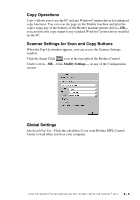
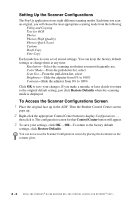
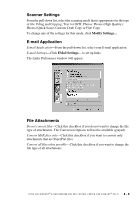
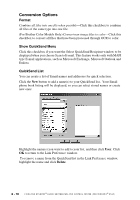
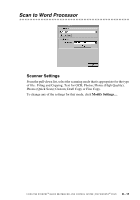
Setting Up the Scanner Configurations The Pop-Up application stores eight different scanning modes. Each time you scan an original, you will choose the most appropriate scanning mode from the following: Filing and Copying Text for OCR Photos Photos (High Quality) Photos (Quick Scan) Custom Draft Copy Fine Copy Each mode has its own set of stored settings. You can keep the factory default settings or change them at any time: Resolution-Select the scanning resolution you most frequently use. Color Mode-From the pull-down list, select Scan Size-From the pull-down list, select Brightness-Slide the adjuster from 0% to 100% Contrast-Slide the adjuster from 0% to 100% Click OK to save your changes. If you make a mistake or later decide to return to the original default setting, just click Restore Defaults when the scanning mode is displayed. To Access the Scanner Configurations Screen 1 Place the original face up in the ADF. Then the Brother Control Center screen pops up. 2 Right-click the appropriate Control Center button to display Configurations..., then click it. The configuration screen for that Control Center button will appear. 3 To save your settings, click OK -OR-To return to the factory default settings, click Restore Defaults. You can not access the Scanner Configuration screen by placing the document on the scanner glass. 8 - 6 U S I N G T H E W I N D O W S ®- B A S E D B R O T H E R M F L - P R O C O N T R O L C E N T E R ( F O R W I N D O W S ® O N L Y )
-
 1
1 -
2
-
3
-
4
-
5
-
6
-
7
-
8
-
9
-
10
-
11
-
12
-
13
-
14
-
15
-
16
-
17
-
18
-
19
-
20
-
21
-
22
-
23
-
24
-
25
-
26
-
27
-
28
-
29
-
30
-
31
-
32
-
33
-
34
-
35
-
36
-
37
-
38
-
39
-
40
-
41
-
42
-
43
-
44
-
45
-
46
-
47
-
48
-
49
-
50
-
51
-
52
-
53
-
54
-
55
-
56
-
57
-
58
-
59
-
60
-
61
-
62
-
 63
63 -
 64
64 -
 65
65 -
 66
66 -
 67
67 -
 68
68 -
 69
69 -
 70
70 -
 71
71 -
 72
72 -
 73
73 -
74
-
75
-
76
-
77
-
78
-
79
-
80
-
81
-
82
-
83
-
84
-
85
-
86
-
87
-
88
-
89
-
90
-
91
-
92
-
93
-
94
-
95
-
96
-
97
-
98
-
99
-
100
-
101
-
102
-
103
-
104
-
105
-
106
-
107
-
108
-
109
-
110
-
111
-
112
-
113
-
114
-
115
-
116
-
117
-
118
-
119
-
120
-
121
-
122
-
123
-
124
-
125
-
126
-
127
-
128
-
129
 |
 |