Brother International Innov-ís 950D Users Manual - English - Page 122
less, otherwise the needle may bend or
 |
View all Brother International Innov-ís 950D manuals
Add to My Manuals
Save this manual to your list of manuals |
Page 122 highlights
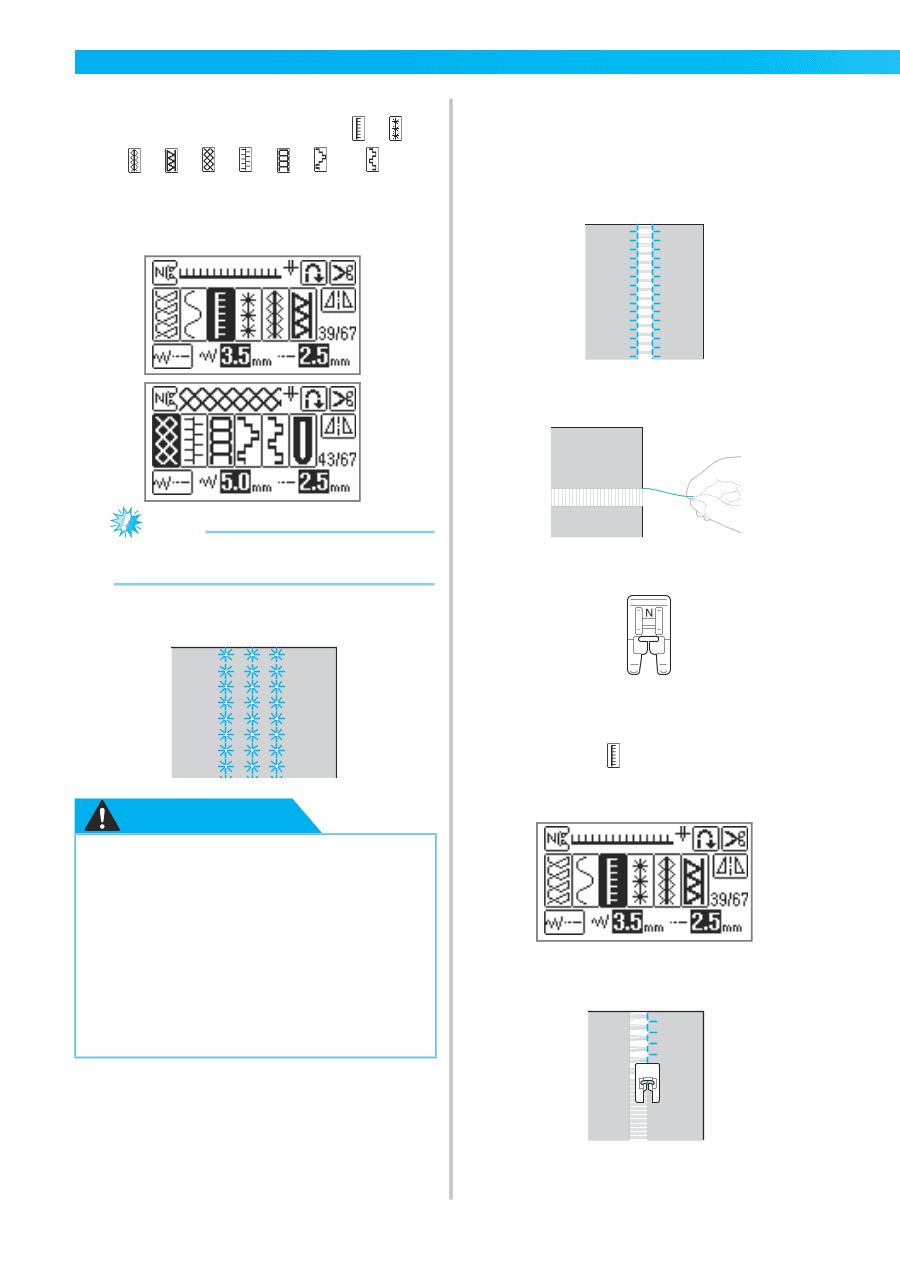
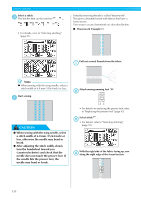
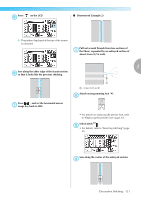
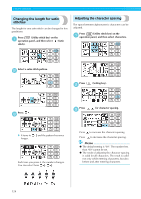
UTILITY STITCHES Select a stitch. c The stitches that can be used are 39 , 40 , 41 , 42 , 43 , 44 , 45 , 46 or 47 . • For details, refer to "Selecting stitching" (page 51). Partially removing threads is called "drawnwork". This gives a beautiful result with fabrics that have a loose weave. Two ways to create drawnwork are described below. ■ Drawnwork (Example 1) Pull out several threads from the fabric. a Note z When sewing with the wing needle, select a stitch width of 6.0 mm (15/64 inch) or less. Start sewing. d Attach monogramming foot "N". b CAUTION ● When sewing with the wing needle, select a stitch width of 6.0 mm (15/64 inch) or less, otherwise the needle may bend or break. ● After adjusting the stitch width, slowly turn the handwheel toward you (counterclockwise) and check that the needle does not touch the presser foot. If the needle hits the presser foot, the needle may bend or break. • For details on replacing the presser foot, refer to "Replacing the presser foot" (page 43). Select stitch 39 . c • For details, refer to "Selecting stitching" (page 51). With the right side of the fabric facing up, sew d along the right edge of the frayed section. N 120
-
 1
1 -
2
-
3
-
4
-
5
-
6
-
7
-
8
-
9
-
10
-
11
-
12
-
13
-
14
-
15
-
16
-
17
-
18
-
19
-
20
-
21
-
22
-
23
-
24
-
25
-
26
-
27
-
28
-
29
-
30
-
31
-
32
-
33
-
34
-
35
-
36
-
37
-
38
-
39
-
40
-
41
-
42
-
43
-
44
-
45
-
46
-
47
-
48
-
49
-
50
-
51
-
52
-
53
-
54
-
55
-
56
-
57
-
58
-
59
-
60
-
61
-
62
-
63
-
64
-
65
-
66
-
67
-
68
-
69
-
70
-
71
-
72
-
73
-
74
-
75
-
76
-
77
-
78
-
79
-
80
-
81
-
82
-
83
-
84
-
85
-
86
-
87
-
88
-
89
-
90
-
91
-
92
-
93
-
94
-
95
-
96
-
97
-
98
-
99
-
100
-
101
-
102
-
103
-
104
-
105
-
106
-
107
-
108
-
109
-
110
-
111
-
112
-
113
-
114
-
115
-
116
-
 117
117 -
 118
118 -
 119
119 -
 120
120 -
 121
121 -
 122
122 -
 123
123 -
 124
124 -
 125
125 -
 126
126 -
 127
127 -
128
-
129
-
130
-
131
-
132
-
133
-
134
-
135
-
136
-
137
-
138
-
139
-
140
-
141
-
142
-
143
-
144
-
145
-
146
-
147
-
148
-
149
-
150
-
151
-
152
-
153
-
154
-
155
-
156
-
157
-
158
-
159
-
160
-
161
-
162
-
163
-
164
-
165
-
166
-
167
-
168
-
169
-
170
-
171
-
172
-
173
-
174
-
175
-
176
-
177
-
178
-
179
-
180
-
181
-
182
-
183
-
184
-
185
-
186
-
187
-
188
-
189
-
190
-
191
-
192
-
193
-
194
-
195
-
196
 |
 |