Brother International Innov-ís 950D Users Manual - English - Page 38
Using the twin needle
 |
View all Brother International Innov-ís 950D manuals
Add to My Manuals
Save this manual to your list of manuals |
Page 38 highlights
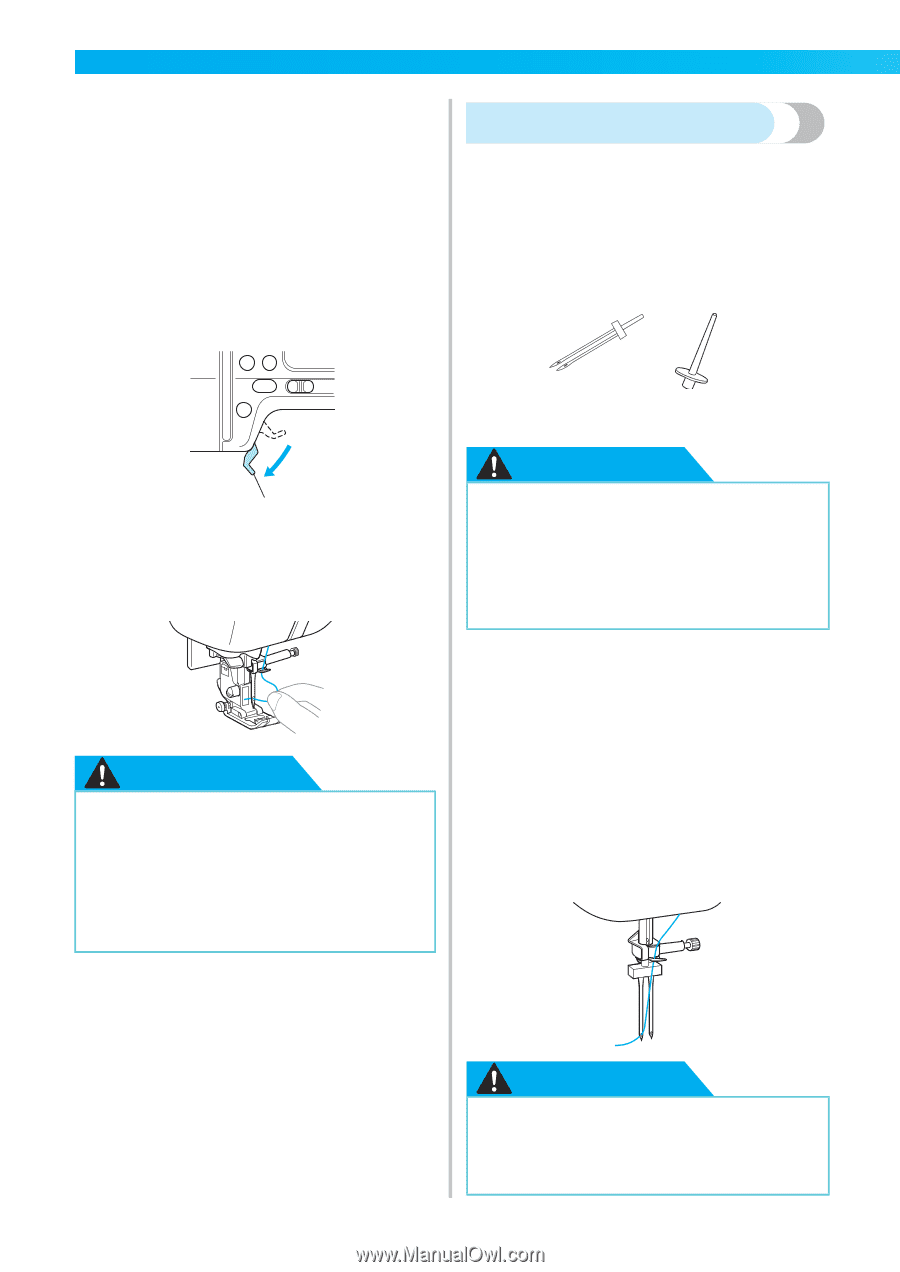
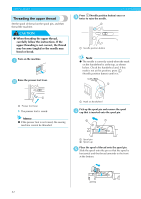
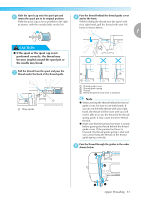
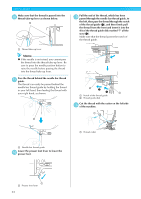
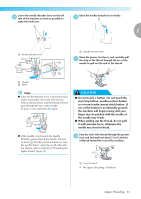
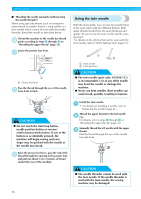
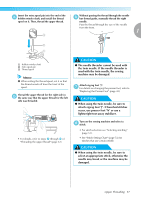
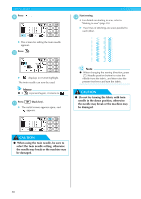
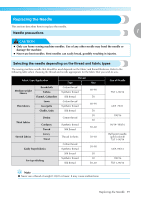
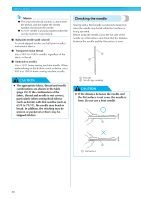
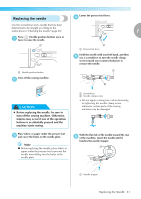
GETTING READY ■ Threading the needle manually (without using the needle threader) When using specialty thread, such as transparent nylon thread or metallic thread, a wing needle or a twin needle which cannot be used with the needle threader, thread the needle as described below. Thread the machine to the needle bar thread a guide according to steps a through k on "Threading the upper thread" (page 32). Lower the presser foot lever. b a a Presser foot lever Pass the thread through the eye of the needle c from front to back. Using the twin needle With the twin needle, you can sew two parallel lines of the same stitch with two different threads. Both upper threads should have the same thickness and quality. Be sure to use the twin needle and the extra spool pin. For details on the stitches that can be sewn with the twin needle, refer to "Stitch Setting Chart" (page 72). a b a Twin needle b Extra spool pin CAUTION ● The twin needle (part code: X59296-121) is recommended. Use of any other needle may bend the needle or damage the machine. ● Never use bent needles. Bent needles can easily break, possibly resulting in injuries. CAUTION ● Do not touch the start/stop button, needle position button or reverse/ reinforcement stitch button. If one of the buttons is accidentally pressed, the machine will begin sewing and your finger may be pricked with the needle or the needle may break. Raise the presser foot lever, pass the end of the d thread through the opening in the presser foot, and pull out about 5 cm (2 inches) of thread toward the rear of the machine. Install the twin needle. a • For details on installing a needle, refer to "Replacing the needle" (page 41). Thread the upper thread for the left needle b eye. For details, refer to steps a through k of "Threading the upper thread" (page 32). Manually thread the left needle with the upper c thread. Pass the thread through the eye of the needle from the front. CAUTION ● The needle threader cannot be used with the twin needle. If the needle threader is used with the twin needle, the sewing machine may be damaged. 36
-
 1
1 -
2
-
3
-
4
-
5
-
6
-
7
-
8
-
9
-
10
-
11
-
12
-
13
-
14
-
15
-
16
-
17
-
18
-
19
-
20
-
21
-
22
-
23
-
24
-
25
-
26
-
27
-
28
-
29
-
30
-
31
-
32
-
 33
33 -
 34
34 -
 35
35 -
 36
36 -
 37
37 -
 38
38 -
 39
39 -
 40
40 -
 41
41 -
 42
42 -
 43
43 -
44
-
45
-
46
-
47
-
48
-
49
-
50
-
51
-
52
-
53
-
54
-
55
-
56
-
57
-
58
-
59
-
60
-
61
-
62
-
63
-
64
-
65
-
66
-
67
-
68
-
69
-
70
-
71
-
72
-
73
-
74
-
75
-
76
-
77
-
78
-
79
-
80
-
81
-
82
-
83
-
84
-
85
-
86
-
87
-
88
-
89
-
90
-
91
-
92
-
93
-
94
-
95
-
96
-
97
-
98
-
99
-
100
-
101
-
102
-
103
-
104
-
105
-
106
-
107
-
108
-
109
-
110
-
111
-
112
-
113
-
114
-
115
-
116
-
117
-
118
-
119
-
120
-
121
-
122
-
123
-
124
-
125
-
126
-
127
-
128
-
129
-
130
-
131
-
132
-
133
-
134
-
135
-
136
-
137
-
138
-
139
-
140
-
141
-
142
-
143
-
144
-
145
-
146
-
147
-
148
-
149
-
150
-
151
-
152
-
153
-
154
-
155
-
156
-
157
-
158
-
159
-
160
-
161
-
162
-
163
-
164
-
165
-
166
-
167
-
168
-
169
-
170
-
171
-
172
-
173
-
174
-
175
-
176
-
177
-
178
-
179
-
180
-
181
-
182
-
183
-
184
-
185
-
186
-
187
-
188
-
189
-
190
-
191
-
192
-
193
-
194
-
195
-
196
 |
 |