Brother International Innov-ís 950D Users Manual - English - Page 170
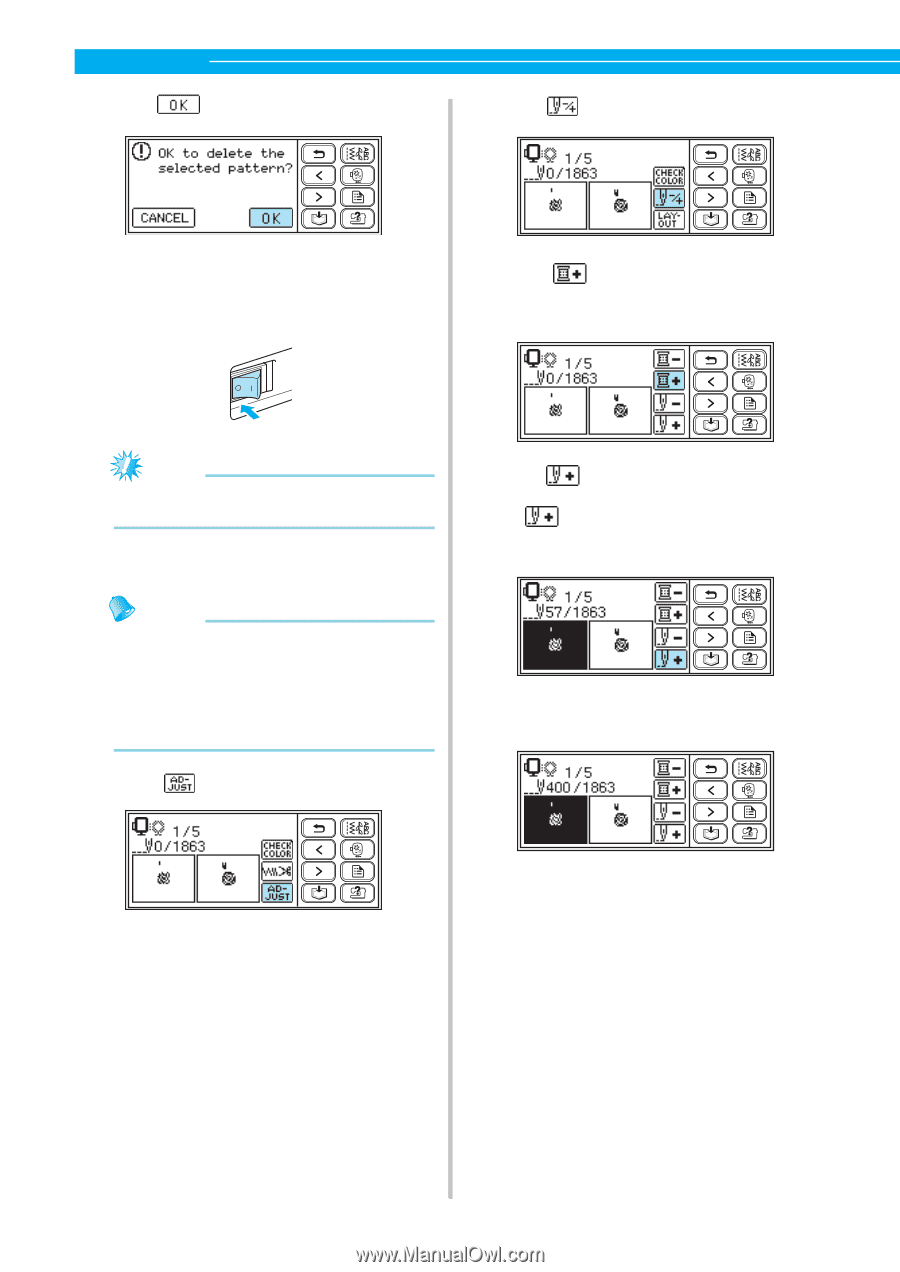
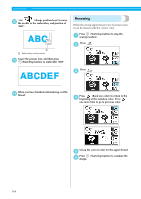
the pattern.
 |
View all Brother International Innov-ís 950D manuals
Add to My Manuals
Save this manual to your list of manuals |
Page 170 highlights
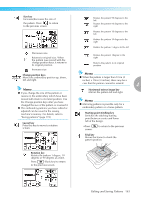
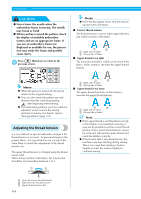
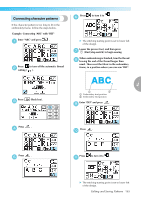
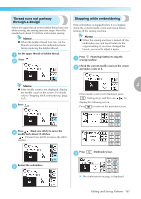
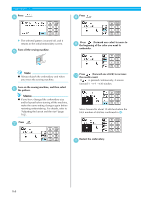
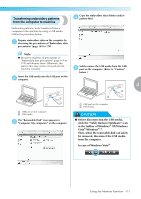
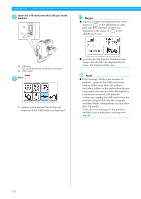
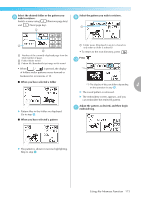
EMBROIDERY Press . d Press . h X The selected pattern is turned off, and it returns to the initial embroidery screen. Turn off the sewing machine. e Press (Forward one color) to move to i the beginning of the color you want to embroider. Note z Always detach the embroidery unit when you move the sewing machine. Turn on the sewing machine, and then select f the pattern. Memo z If you have changed the embroidery size and/or layout before turning off the machine, make the same setting changes again before restarting embroidering. For details, refer to "Adjusting the layout and the size" (page 162). Press (Forward one stitch) to increase j the needle count. If is pressed continuously, it moves forward 1 -> 9 ->30 stitches. Move forward to about 10 stitches before the total number of stitches confirmed in b. Press . g Restart the embroidery. k 168
-
 1
1 -
2
-
3
-
4
-
5
-
6
-
7
-
8
-
9
-
10
-
11
-
12
-
13
-
14
-
15
-
16
-
17
-
18
-
19
-
20
-
21
-
22
-
23
-
24
-
25
-
26
-
27
-
28
-
29
-
30
-
31
-
32
-
33
-
34
-
35
-
36
-
37
-
38
-
39
-
40
-
41
-
42
-
43
-
44
-
45
-
46
-
47
-
48
-
49
-
50
-
51
-
52
-
53
-
54
-
55
-
56
-
57
-
58
-
59
-
60
-
61
-
62
-
63
-
64
-
65
-
66
-
67
-
68
-
69
-
70
-
71
-
72
-
73
-
74
-
75
-
76
-
77
-
78
-
79
-
80
-
81
-
82
-
83
-
84
-
85
-
86
-
87
-
88
-
89
-
90
-
91
-
92
-
93
-
94
-
95
-
96
-
97
-
98
-
99
-
100
-
101
-
102
-
103
-
104
-
105
-
106
-
107
-
108
-
109
-
110
-
111
-
112
-
113
-
114
-
115
-
116
-
117
-
118
-
119
-
120
-
121
-
122
-
123
-
124
-
125
-
126
-
127
-
128
-
129
-
130
-
131
-
132
-
133
-
134
-
135
-
136
-
137
-
138
-
139
-
140
-
141
-
142
-
143
-
144
-
145
-
146
-
147
-
148
-
149
-
150
-
151
-
152
-
153
-
154
-
155
-
156
-
157
-
158
-
159
-
160
-
161
-
162
-
163
-
164
-
 165
165 -
 166
166 -
 167
167 -
 168
168 -
 169
169 -
 170
170 -
 171
171 -
 172
172 -
 173
173 -
 174
174 -
 175
175 -
176
-
177
-
178
-
179
-
180
-
181
-
182
-
183
-
184
-
185
-
186
-
187
-
188
-
189
-
190
-
191
-
192
-
193
-
194
-
195
-
196
 |
 |