Brother International Innov-ís 950D Users Manual - English - Page 37
start/stop button, needle position button
 |
View all Brother International Innov-ís 950D manuals
Add to My Manuals
Save this manual to your list of manuals |
Page 37 highlights
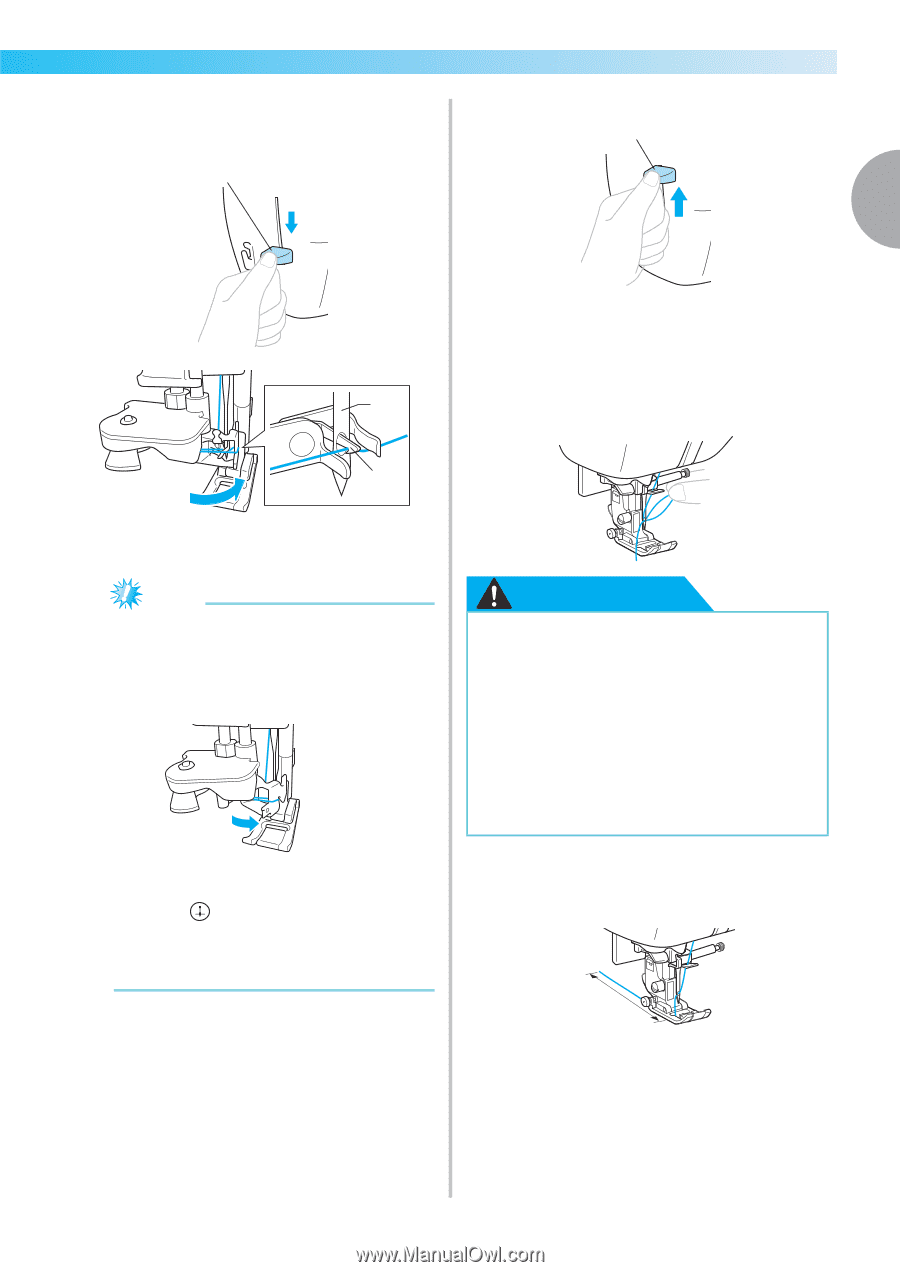
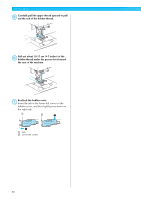
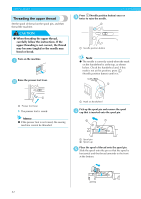
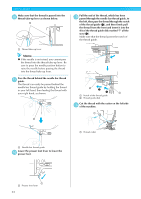
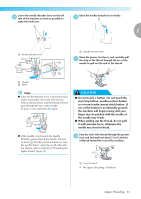
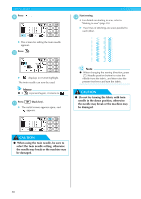
Lower the needle threader lever on the left o side of the machine as much as possible to make the hook turn. Raise the needle threader lever slowly. p Ta a 1 a Needle threader lever a Needle threader lever Raise the presser foot lever, and carefully pull q the loop of the thread through the eye of the Ta needle to pull out the end of the thread. Tb a Needle b Hook Note z If the needle threader lever is not lowered as much as possible, the hook will not turn fully as shown below and the thread will not pass through the eye of the needle. In such a case, start from m again. z If the needle is not raised, the needle threader cannot thread the needle. Be sure to press (Needle position button) to raise the needle before using the needle threader. For details, refer to step c of "Threading the upper thread" (page 32). z CAUTION ● Do not touch a button. Do not touch the start/stop button, needle position button or reverse/reinforcement stitch button. If one of the buttons is accidentally pressed, the machine will begin sewing and your finger may be pricked with the needle or the needle may break. ● When pulling out the thread, do not pull it with extreme force, otherwise the needle may bend or break. Pass the end of the thread through the presser r foot, and then pull out about 5 cm (2 inches) of thread toward the rear of the machine. a a 5cm (2 inches) X The upper threading is finished. Upper Threading 35
-
 1
1 -
2
-
3
-
4
-
5
-
6
-
7
-
8
-
9
-
10
-
11
-
12
-
13
-
14
-
15
-
16
-
17
-
18
-
19
-
20
-
21
-
22
-
23
-
24
-
25
-
26
-
27
-
28
-
29
-
30
-
31
-
 32
32 -
 33
33 -
 34
34 -
 35
35 -
 36
36 -
 37
37 -
 38
38 -
 39
39 -
 40
40 -
 41
41 -
 42
42 -
43
-
44
-
45
-
46
-
47
-
48
-
49
-
50
-
51
-
52
-
53
-
54
-
55
-
56
-
57
-
58
-
59
-
60
-
61
-
62
-
63
-
64
-
65
-
66
-
67
-
68
-
69
-
70
-
71
-
72
-
73
-
74
-
75
-
76
-
77
-
78
-
79
-
80
-
81
-
82
-
83
-
84
-
85
-
86
-
87
-
88
-
89
-
90
-
91
-
92
-
93
-
94
-
95
-
96
-
97
-
98
-
99
-
100
-
101
-
102
-
103
-
104
-
105
-
106
-
107
-
108
-
109
-
110
-
111
-
112
-
113
-
114
-
115
-
116
-
117
-
118
-
119
-
120
-
121
-
122
-
123
-
124
-
125
-
126
-
127
-
128
-
129
-
130
-
131
-
132
-
133
-
134
-
135
-
136
-
137
-
138
-
139
-
140
-
141
-
142
-
143
-
144
-
145
-
146
-
147
-
148
-
149
-
150
-
151
-
152
-
153
-
154
-
155
-
156
-
157
-
158
-
159
-
160
-
161
-
162
-
163
-
164
-
165
-
166
-
167
-
168
-
169
-
170
-
171
-
172
-
173
-
174
-
175
-
176
-
177
-
178
-
179
-
180
-
181
-
182
-
183
-
184
-
185
-
186
-
187
-
188
-
189
-
190
-
191
-
192
-
193
-
194
-
195
-
196
 |
 |