Brother International MFC-9340CDW Advanced Users Manual - English - Page 39
Fax Storage, Changing Memory Receive Options, If received faxes have already been printed
 |
View all Brother International MFC-9340CDW manuals
Add to My Manuals
Save this manual to your list of manuals |
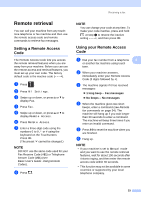
Page 39 highlights
Receiving a fax Fax Storage 4 The Fax Storage feature lets you store your received faxes in the machine's memory. You can retrieve stored fax messages from a fax machine at another location using the remote retrieval commands (see Retrieving fax messages on page 35). Your machine will print a backup copy of each stored fax. a Press . b Press All Settings. c Swipe up or down, or press a or b to display Fax. d Press Fax. e Swipe up or down, or press a or b to display Setup Receive. f Press Setup Receive. g Swipe up or down, or press a or b to display Memory Receive. h Press Memory Receive. i Swipe up or down, or press a or b to display Fax Storage. j Press Fax Storage. k Press . Changing Memory Receive Options 4 If received faxes are in your machine's memory when you change the Memory Receive operations, the Touchscreen will ask you one of the following questions: If received faxes have already been printed 4 Erase all faxes? 4 • If you press Yes, faxes in the memory will be erased before the setting changes. • If you press No, faxes in the memory will not be erased and the setting will be unchanged. If unprinted faxes are in the memory 4 Print all faxes? • If you press Yes, faxes in the memory will be printed before the setting changes. If a backup copy has already been printed, it will not be printed again. • If you press No, faxes in the memory will not be printed and the setting will be unchanged. If received faxes are left in the machine's memory when you change to PC Fax Receive from another option (Fax Forward, Paging or Fax Storage), press USB or the name of the computer if you are on a network. Press OK. 31
-
 1
1 -
2
-
3
-
4
-
5
-
6
-
7
-
8
-
9
-
10
-
11
-
12
-
13
-
14
-
15
-
16
-
17
-
18
-
19
-
20
-
21
-
22
-
23
-
24
-
25
-
26
-
27
-
28
-
29
-
30
-
31
-
32
-
33
-
 34
34 -
 35
35 -
 36
36 -
 37
37 -
 38
38 -
 39
39 -
 40
40 -
 41
41 -
 42
42 -
 43
43 -
 44
44 -
45
-
46
-
47
-
48
-
49
-
50
-
51
-
52
-
53
-
54
-
55
-
56
-
57
-
58
-
59
-
60
-
61
-
62
-
63
-
64
-
65
-
66
-
67
-
68
-
69
-
70
-
71
-
72
-
73
-
74
-
75
-
76
-
77
-
78
-
79
-
80
-
81
-
82
-
83
-
84
-
85
-
86
-
87
-
88
-
89
-
90
-
91
-
92
-
93
-
94
-
95
-
96
-
97
-
98
-
99
-
100
 |
 |
