Brother International MFC-9340CDW Network Users Manual - English - Page 30
Network, Setup Wizard, Enable WLAN?, <New SSID>, Infrastructure, EAP-FAST, EAP-TTLS
 |
View all Brother International MFC-9340CDW manuals
Add to My Manuals
Save this manual to your list of manuals |
Page 30 highlights
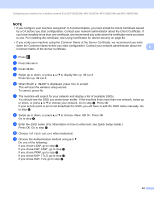
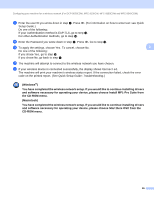
Configuring your machine for a wireless network (For DCP-9020CDW, MFC-9130CW, MFC-9330CDW and MFC-9340CDW) NOTE • If you configure your machine using EAP-TLS Authentication, you must install the Client Certificate issued by a CA before you start configuration. Contact your network administrator about the Client Certificate. If you have installed more than one certificate, we recommend you write down the certificate name you want to use. For installing the certificate, see Using Certificates for device security on page 84. • If you verify your machine using the Common Name of the Server Certificate, we recommend you write down the Common Name before you start configuration. Contact your network administrator about the 3 Common Name of the Server Certificate. b Press . c Press Network. d Press WLAN. e Swipe up or down, or press a or b to display Setup Wizard. Press Setup Wizard. f When Enable WLAN? is displayed, press Yes to accept. This will start the wireless setup wizard. To cancel, press No. g The machine will search for your network and display a list of available SSIDs. You should see the SSID you wrote down earlier. If the machine finds more than one network, swipe up or down, or press a or b to choose your network. Go to step k. Press OK. If your access point is set to not broadcast the SSID, you will have to add the SSID name manually. Go to step h. h Swipe up or down, or press a or b to choose . Press OK. Go to step i. i Enter the SSID name. (For information on how to enter text: see Quick Setup Guide.) Press OK. Go to step j. j Choose Infrastructure when instructed. k Choose the Authentication method using a or b. Do one of the following: If you chose LEAP, go to step q. If you chose EAP-FAST, go to step l. If you chose PEAP, go to step l. If you chose EAP-TTLS, go to step l. If you chose EAP-TLS, go to step m. 24
-
 1
1 -
2
-
3
-
4
-
5
-
6
-
7
-
8
-
9
-
10
-
11
-
12
-
13
-
14
-
15
-
16
-
17
-
18
-
19
-
20
-
21
-
22
-
23
-
24
-
 25
25 -
 26
26 -
 27
27 -
 28
28 -
 29
29 -
 30
30 -
 31
31 -
 32
32 -
 33
33 -
 34
34 -
 35
35 -
36
-
37
-
38
-
39
-
40
-
41
-
42
-
43
-
44
-
45
-
46
-
47
-
48
-
49
-
50
-
51
-
52
-
53
-
54
-
55
-
56
-
57
-
58
-
59
-
60
-
61
-
62
-
63
-
64
-
65
-
66
-
67
-
68
-
69
-
70
-
71
-
72
-
73
-
74
-
75
-
76
-
77
-
78
-
79
-
80
-
81
-
82
-
83
-
84
-
85
-
86
-
87
-
88
-
89
-
90
-
91
-
92
-
93
-
94
-
95
-
96
-
97
-
98
-
99
-
100
-
101
-
102
-
103
-
104
-
105
-
106
-
107
-
108
-
109
-
110
-
111
-
112
-
113
-
114
-
115
-
116
-
117
-
118
-
119
-
120
-
121
-
122
-
123
-
124
-
125
-
126
-
127
-
128
-
129
-
130
-
131
-
132
-
133
-
134
-
135
-
136
-
137
-
138
-
139
-
140
-
141
-
142
-
143
-
144
-
145
-
146
-
147
-
148
-
149
-
150
 |
 |