Brother International NX-250 Users Manual - English - Page 30
Pulling up the bobbin thread
 |
View all Brother International NX-250 manuals
Add to My Manuals
Save this manual to your list of manuals |
Page 30 highlights
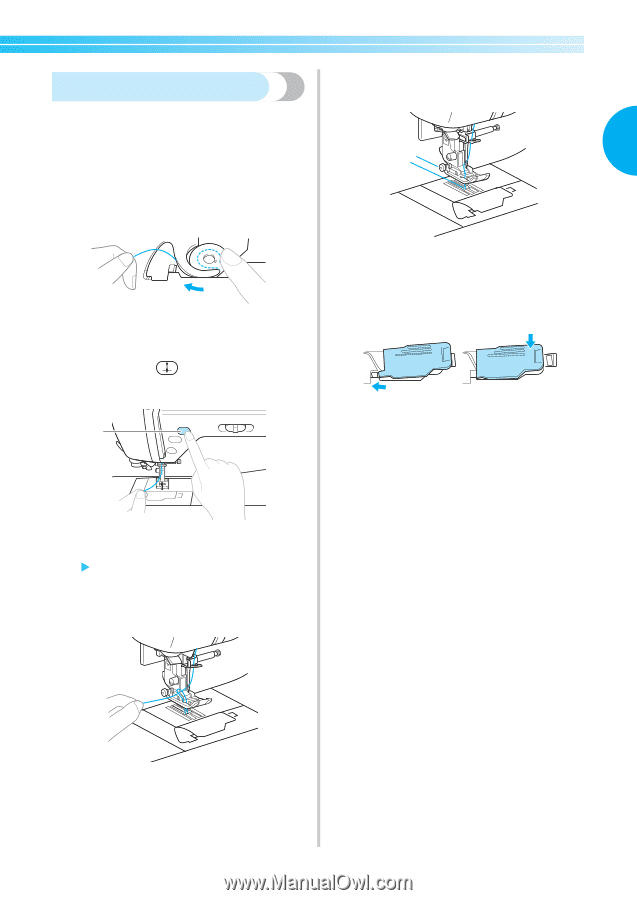
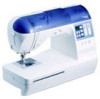
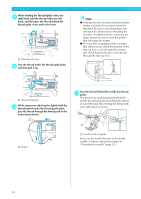
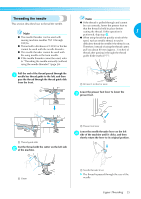
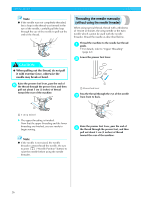
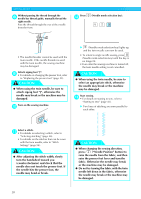
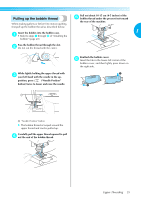
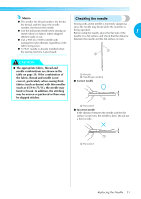
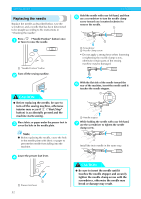
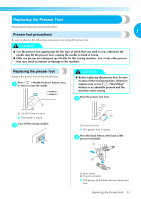
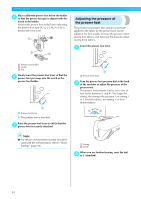
Pulling up the bobbin thread Pull out about 10-15 cm (4-5 inches) of the 5 bobbin thread under the presser foot toward When making gathers or before free-motion quilting, the rear of the machine. first pull up the bobbin thread as described below. Insert the bobbin into the bobbin case. 1 1 • Refer to steps 1 through 5 of "Installing the bobbin" (page 20). Pass the bobbin thread through the slot. 2 Do not cut the thread with the cutter. While lightly holding the upper thread with 3 your left hand with the needle in the up- position, press ("Needle Position" button) twice to lower and raise the needle. Reattach the bobbin cover. 6 Insert the tab in the lower-left corner of the bobbin cover, and then lightly press down on the right side. 2 1 1 1 "Needle Position" button X The bobbin thread is looped around the upper thread and can be pulled up. Carefully pull the upper thread upward to pull 4 out the end of the bobbin thread. Upper Threading 29
-
 1
1 -
2
-
3
-
4
-
5
-
6
-
7
-
8
-
9
-
10
-
11
-
12
-
13
-
14
-
15
-
16
-
17
-
18
-
19
-
20
-
21
-
22
-
23
-
24
-
 25
25 -
 26
26 -
 27
27 -
 28
28 -
 29
29 -
 30
30 -
 31
31 -
 32
32 -
 33
33 -
 34
34 -
 35
35 -
36
-
37
-
38
-
39
-
40
-
41
-
42
-
43
-
44
-
45
-
46
-
47
-
48
-
49
-
50
-
51
-
52
-
53
-
54
-
55
-
56
-
57
-
58
-
59
-
60
-
61
-
62
-
63
-
64
-
65
-
66
-
67
-
68
-
69
-
70
-
71
-
72
-
73
-
74
-
75
-
76
-
77
-
78
-
79
-
80
-
81
-
82
-
83
-
84
-
85
-
86
-
87
-
88
-
89
-
90
-
91
-
92
-
93
-
94
-
95
-
96
-
97
-
98
-
99
-
100
-
101
-
102
-
103
-
104
-
105
-
106
-
107
-
108
-
109
-
110
 |
 |