Canon S330 S330 Quick Start Guide - Page 17
To automatically optimize the image in Windows
 |
View all Canon S330 manuals
Add to My Manuals
Save this manual to your list of manuals |
Page 17 highlights
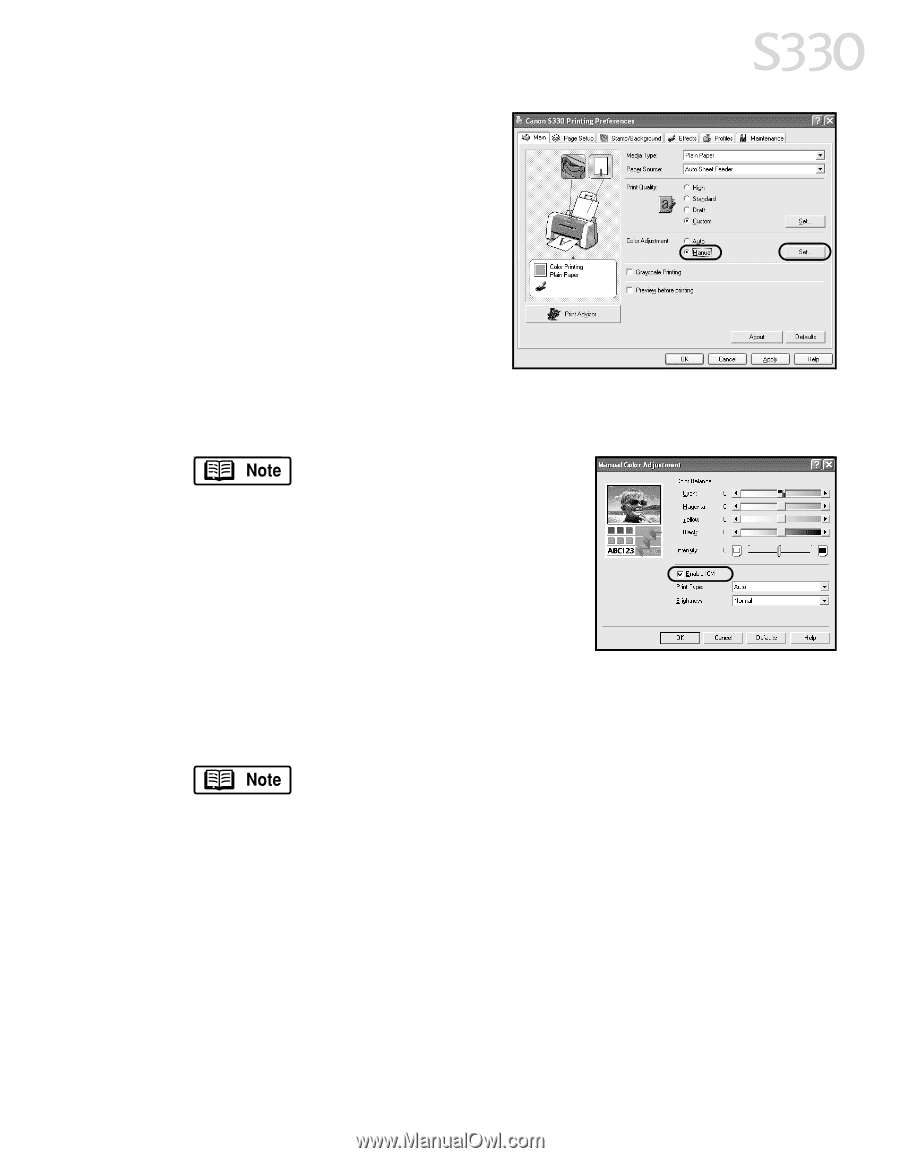
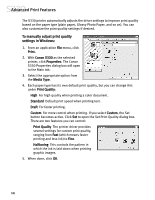
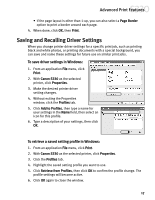
Advanced Print Features 3. On the Main tab, under Color Adjustment, click Manual. The Set button will become active. 4. Click Set and the Manual Color Adjustment dialog box will appear. 5. Click and drag the Color Balance slider for each color to adjust the color settings. The results will preview. 6. Click and drag the Intensity slider to change the intensity (saturation) for the image. The results will preview. 7. Image Color Management (ICM) is a feature that automatically adjusts the image colors. To use ICM for automatic color adjustment, select the Enable ICM check box. All features on this tab (except Intensity) will become inactive. 8. Under Print Type, select Photo when printing photographs to get a wider range of tones. Select Graphic when printing graphic images for crisper, cleaner graphic images. 9. Select a Brightness setting to control how light or dark the image will appear when printed. 10. When done, click OK. To print in black only, select the Grayscale Printing box. This will convert color images to grayscale when printing without changing the original colors in the document. To automatically optimize the image in Windows: Photo Optimizer PRO automatically adjusts a photographic image created with a digital camera. Use this feature to compensate for unsatisfactory color balance and over- or under-exposure before printing. 13
-
 1
1 -
2
-
3
-
4
-
5
-
6
-
7
-
8
-
9
-
10
-
11
-
 12
12 -
 13
13 -
 14
14 -
 15
15 -
 16
16 -
 17
17 -
 18
18 -
 19
19 -
 20
20 -
 21
21 -
 22
22 -
23
-
24
-
25
-
26
-
27
-
28
-
29
-
30
-
31
-
32
-
33
-
34
-
35
-
36
-
37
-
38
-
39
-
40
-
41
-
42
-
43
-
44
-
45
-
46
-
47
-
48
-
49
-
50
-
51
-
52
-
53
-
54
-
55
-
56
-
57
-
58
-
59
 |
 |