Canon S330 S330 Quick Start Guide - Page 24
Replacing Ink Tanks
 |
View all Canon S330 manuals
Add to My Manuals
Save this manual to your list of manuals |
Page 24 highlights
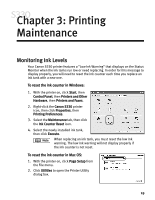
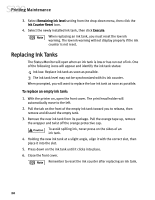
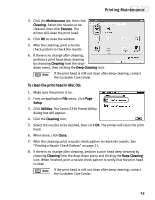
Printing Maintenance 3. Select Remaining ink level setting from the drop-down menu, then click the Ink Counter Reset icon. 4. Select the newly installed ink tank, then click Execute. When replacing an ink tank, you must reset the low ink warning. The low ink warning will not display properly if the ink counter is not reset. Replacing Ink Tanks The Status Monitor will open when an ink tank is low or has run out of ink. One of the following icons will appear and identify the ink tank status: Ink low. Replace ink tank as soon as possible. The ink tank level may not be synchronized with its ink counter. When prompted, you will want to replace the low ink tank as soon as possible. To replace an empty ink tank: 1. With the printer on, open the front cover. The print head holder will automatically move to the left. 2. Pull the tab on the front of the empty ink tank toward you to release, then remove and discard the empty tank. 3. Remove the new ink tank from its package. Pull the orange tape up, remove the wrapper and twist off the orange protective cap. To avoid spilling ink, never press on the sides of an ink tank. 4. Holding the new ink tank at a slight angle, align it with the correct slot, then place it into the slot. 5. Press down on the ink tank until it clicks into place. 6. Close the front cover. Remember to reset the ink counter after replacing an ink tank. 20
-
 1
1 -
2
-
3
-
4
-
5
-
6
-
7
-
8
-
9
-
10
-
11
-
12
-
13
-
14
-
15
-
16
-
17
-
18
-
 19
19 -
 20
20 -
 21
21 -
 22
22 -
 23
23 -
 24
24 -
 25
25 -
 26
26 -
 27
27 -
 28
28 -
 29
29 -
30
-
31
-
32
-
33
-
34
-
35
-
36
-
37
-
38
-
39
-
40
-
41
-
42
-
43
-
44
-
45
-
46
-
47
-
48
-
49
-
50
-
51
-
52
-
53
-
54
-
55
-
56
-
57
-
58
-
59
 |
 |