Canon S330 S330 Quick Start Guide - Page 43
Troubleshooting Printed Output - ink cartridge
 |
View all Canon S330 manuals
Add to My Manuals
Save this manual to your list of manuals |
Page 43 highlights
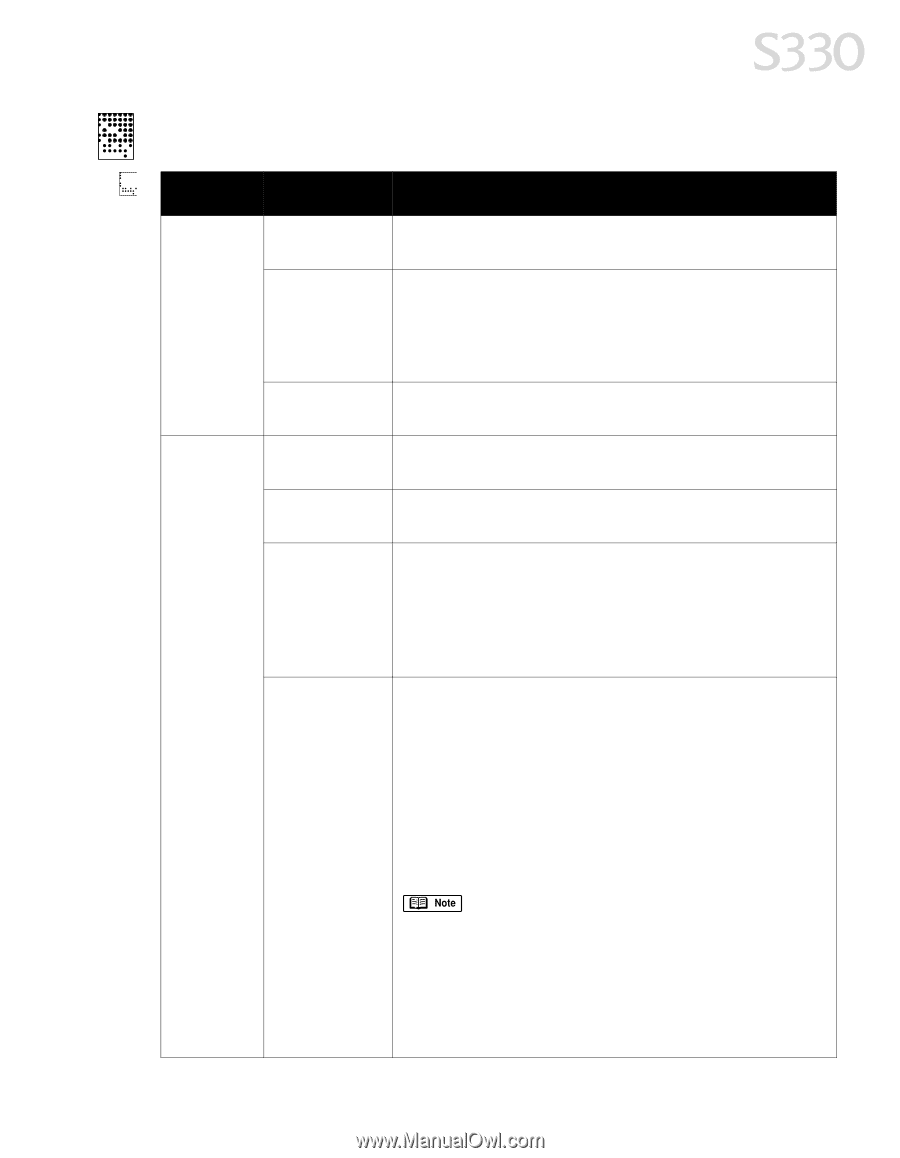
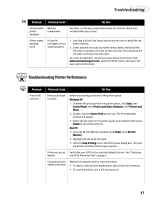
Troubleshooting Troubleshooting Printed Output Problem Possible Cause Try This Color missing on printed paper Printer out of ink Ink tanks/ cartridges not seated properly One or both of the ink tanks may be empty. Replace the empty ink tank with a new one. Verify that the ink tanks/cartridges are in the correct color slot. Check that they have been firmly seated. Press down on the ink tanks/ cartridges until they click into place. See Step 4 of the Easy Setup Instructions for how to install the ink tanks correctly. Print head needs Print a nozzle check pattern to see if the print head requires cleaning. cleaning See "Printing a Nozzle Check Pattern" on page 21. Printed output faded or unclear Print head needs to be aligned Paper not loaded print-side up Print a nozzle check pattern to see if the print head needs to be aligned. See "Printing a Nozzle Check Pattern" on page 21. Follow the instructions packaged with the paper for proper loading and handling. Incorrect paper type selected in printer driver Windows On the Main tab of the S330 Properties window, confirm that the Media Type selected matches the paper loaded. Mac OS In the Print dialog box, confirm that the Media Type selected matches the paper loaded. Print Quality is improperly set The print quality is automatically adjusted to the type of paper being used. Verify that the correct paper type has been selected. Windows On the Main tab of the S330 Properties window, select the appropriate paper type. The Print Quality setting will automatically change. Mac OS In the Print dialog box, select Manual from the Print Mode drop-down menu, then click the Details button. In the Detailed Setting window, move the Print Quality slider to select your preferred output quality. See "Adjusting Print Quality" on page 9 for more information. 39
-
 1
1 -
2
-
3
-
4
-
5
-
6
-
7
-
8
-
9
-
10
-
11
-
12
-
13
-
14
-
15
-
16
-
17
-
18
-
19
-
20
-
21
-
22
-
23
-
24
-
25
-
26
-
27
-
28
-
29
-
30
-
31
-
32
-
33
-
34
-
35
-
36
-
37
-
 38
38 -
 39
39 -
 40
40 -
 41
41 -
 42
42 -
 43
43 -
 44
44 -
 45
45 -
 46
46 -
 47
47 -
 48
48 -
49
-
50
-
51
-
52
-
53
-
54
-
55
-
56
-
57
-
58
-
59
 |
 |