Canon imageFORMULA DR-2010C Compact Color Scanner User Manual - Page 28
Using the Scan Panel, Scan Panel Functions
 |
View all Canon imageFORMULA DR-2010C Compact Color Scanner manuals
Add to My Manuals
Save this manual to your list of manuals |
Page 28 highlights
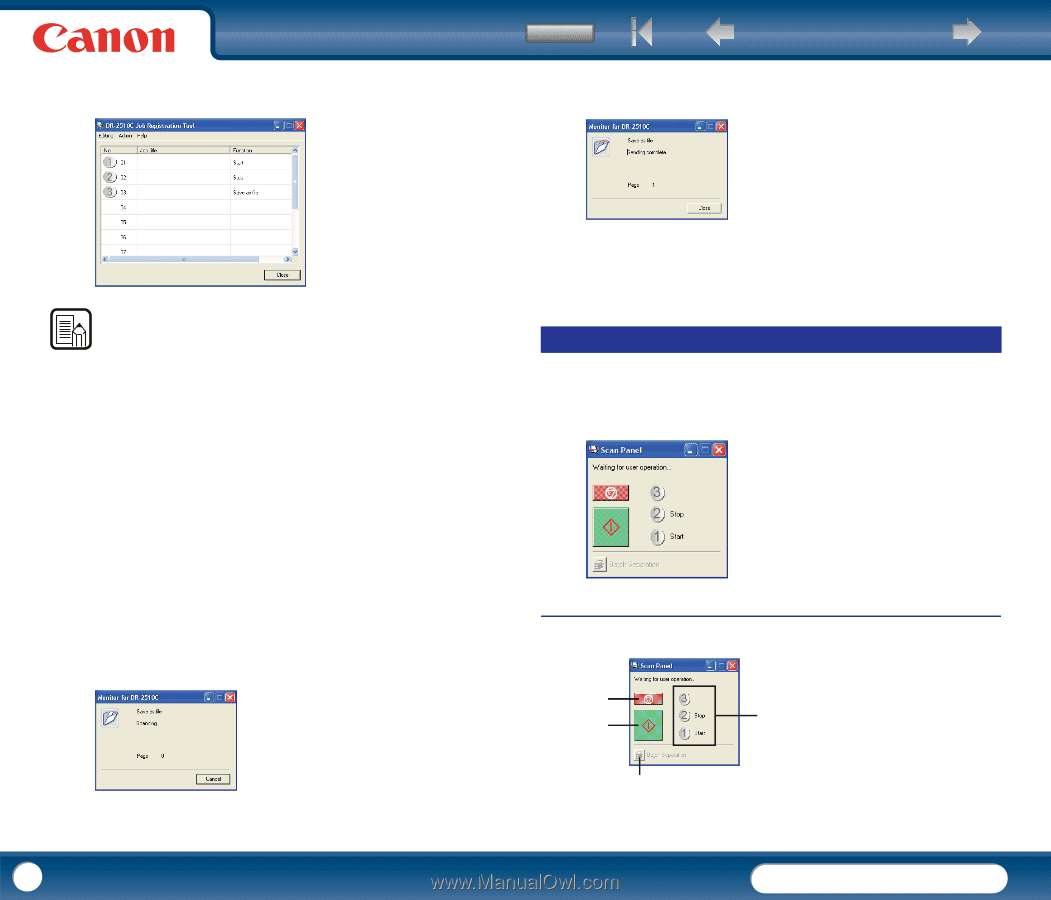
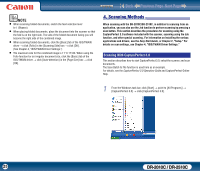
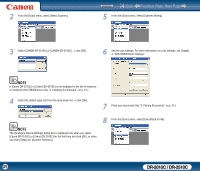
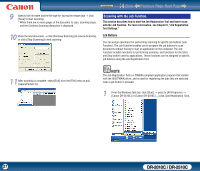
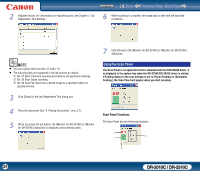
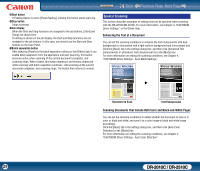
2 Register the job. For information on registering jobs, see Chapter 5, "Job Registration Tool Settings." Contents Back Previous Page Next Page 6 When scanning is complete, the image data is sent with the specified conditions. NOTE • You can register jobs from No. 01 to No. 10. • The following jobs are registered in the job buttons by default: c No. 01 Start: Performs scanning according to the application settings. d No. 02 Stop: Stops scanning. e No. 03 Save File: Saves the scanned image to a specified folder in a specified format. 3 Click [Close] in the Job Registration Tool dialog box. 7 Click [Close] in the [Monitor for DR-2510C] or [Monitor for DR-2010C] dialog box. Using the Scan Panel The Scan Panel is an application that is installed with the ISIS/TWAIN driver. It is displayed in the system tray when the DR-2010C/DR-2510C driver is started. If Feeding Option in the scan settings is set to [Panel-Feeding] or [Automatic Feeding], the Scan Panel will appear when you start scanning. 4 Place the document (See "3. Placing Documents," on p. 21.). 5 When you press the job button, the [Monitor for DR-2510C] or [Monitor for DR-2010C] dialog box is displayed, and scanning starts. Scan Panel Functions The Scan Panel has the following functions. ᶄ ᶅ ᶃ ᶆ 28 DR-2010C / DR-2510C
-
 1
1 -
2
-
3
-
4
-
5
-
6
-
7
-
8
-
9
-
10
-
11
-
12
-
13
-
14
-
15
-
16
-
17
-
18
-
19
-
20
-
21
-
22
-
 23
23 -
 24
24 -
 25
25 -
 26
26 -
 27
27 -
 28
28 -
 29
29 -
 30
30 -
 31
31 -
 32
32 -
 33
33 -
34
-
35
-
36
-
37
-
38
-
39
-
40
-
41
-
42
-
43
-
44
-
45
-
46
-
47
-
48
-
49
-
50
-
51
-
52
-
53
-
54
-
55
-
56
-
57
-
58
-
59
-
60
-
61
-
62
-
63
-
64
-
65
-
66
-
67
-
68
-
69
-
70
-
71
-
72
-
73
-
74
-
75
-
76
-
77
-
78
-
79
-
80
-
81
-
82
 |
 |